Beware, arachnophobes, the robots are coming for you!
What else would you be expected to think if you watched a hexapod robot display its best Transformers impression by turning into a wheel and pushing itself in your direction? The BionicWheelBot — developed by [Festo] — should rightly remind you of the cartwheeling Flic-Flac spider, the main inspiration for the robot. Of course, Star Wars fans might justifiably see a Droideka.
The BionicWheelBot can — almost — seamlessly transition between crawling around on six legs, to literally rolling away. To do so, its three pairs of legs sequentially fold up into a shape befitting its namesake and then pauses for a moment — almost for dramatic effect — before the real fun begins.
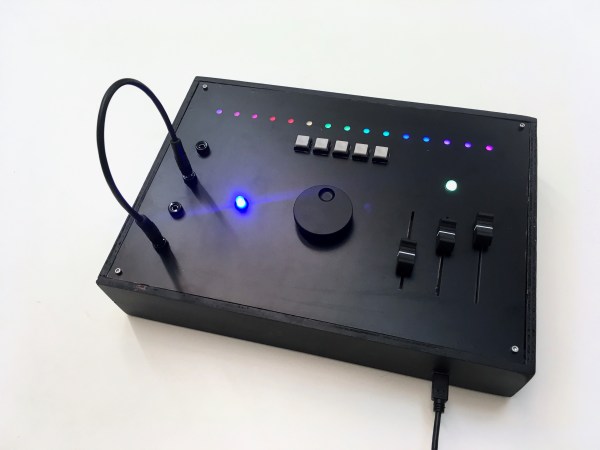
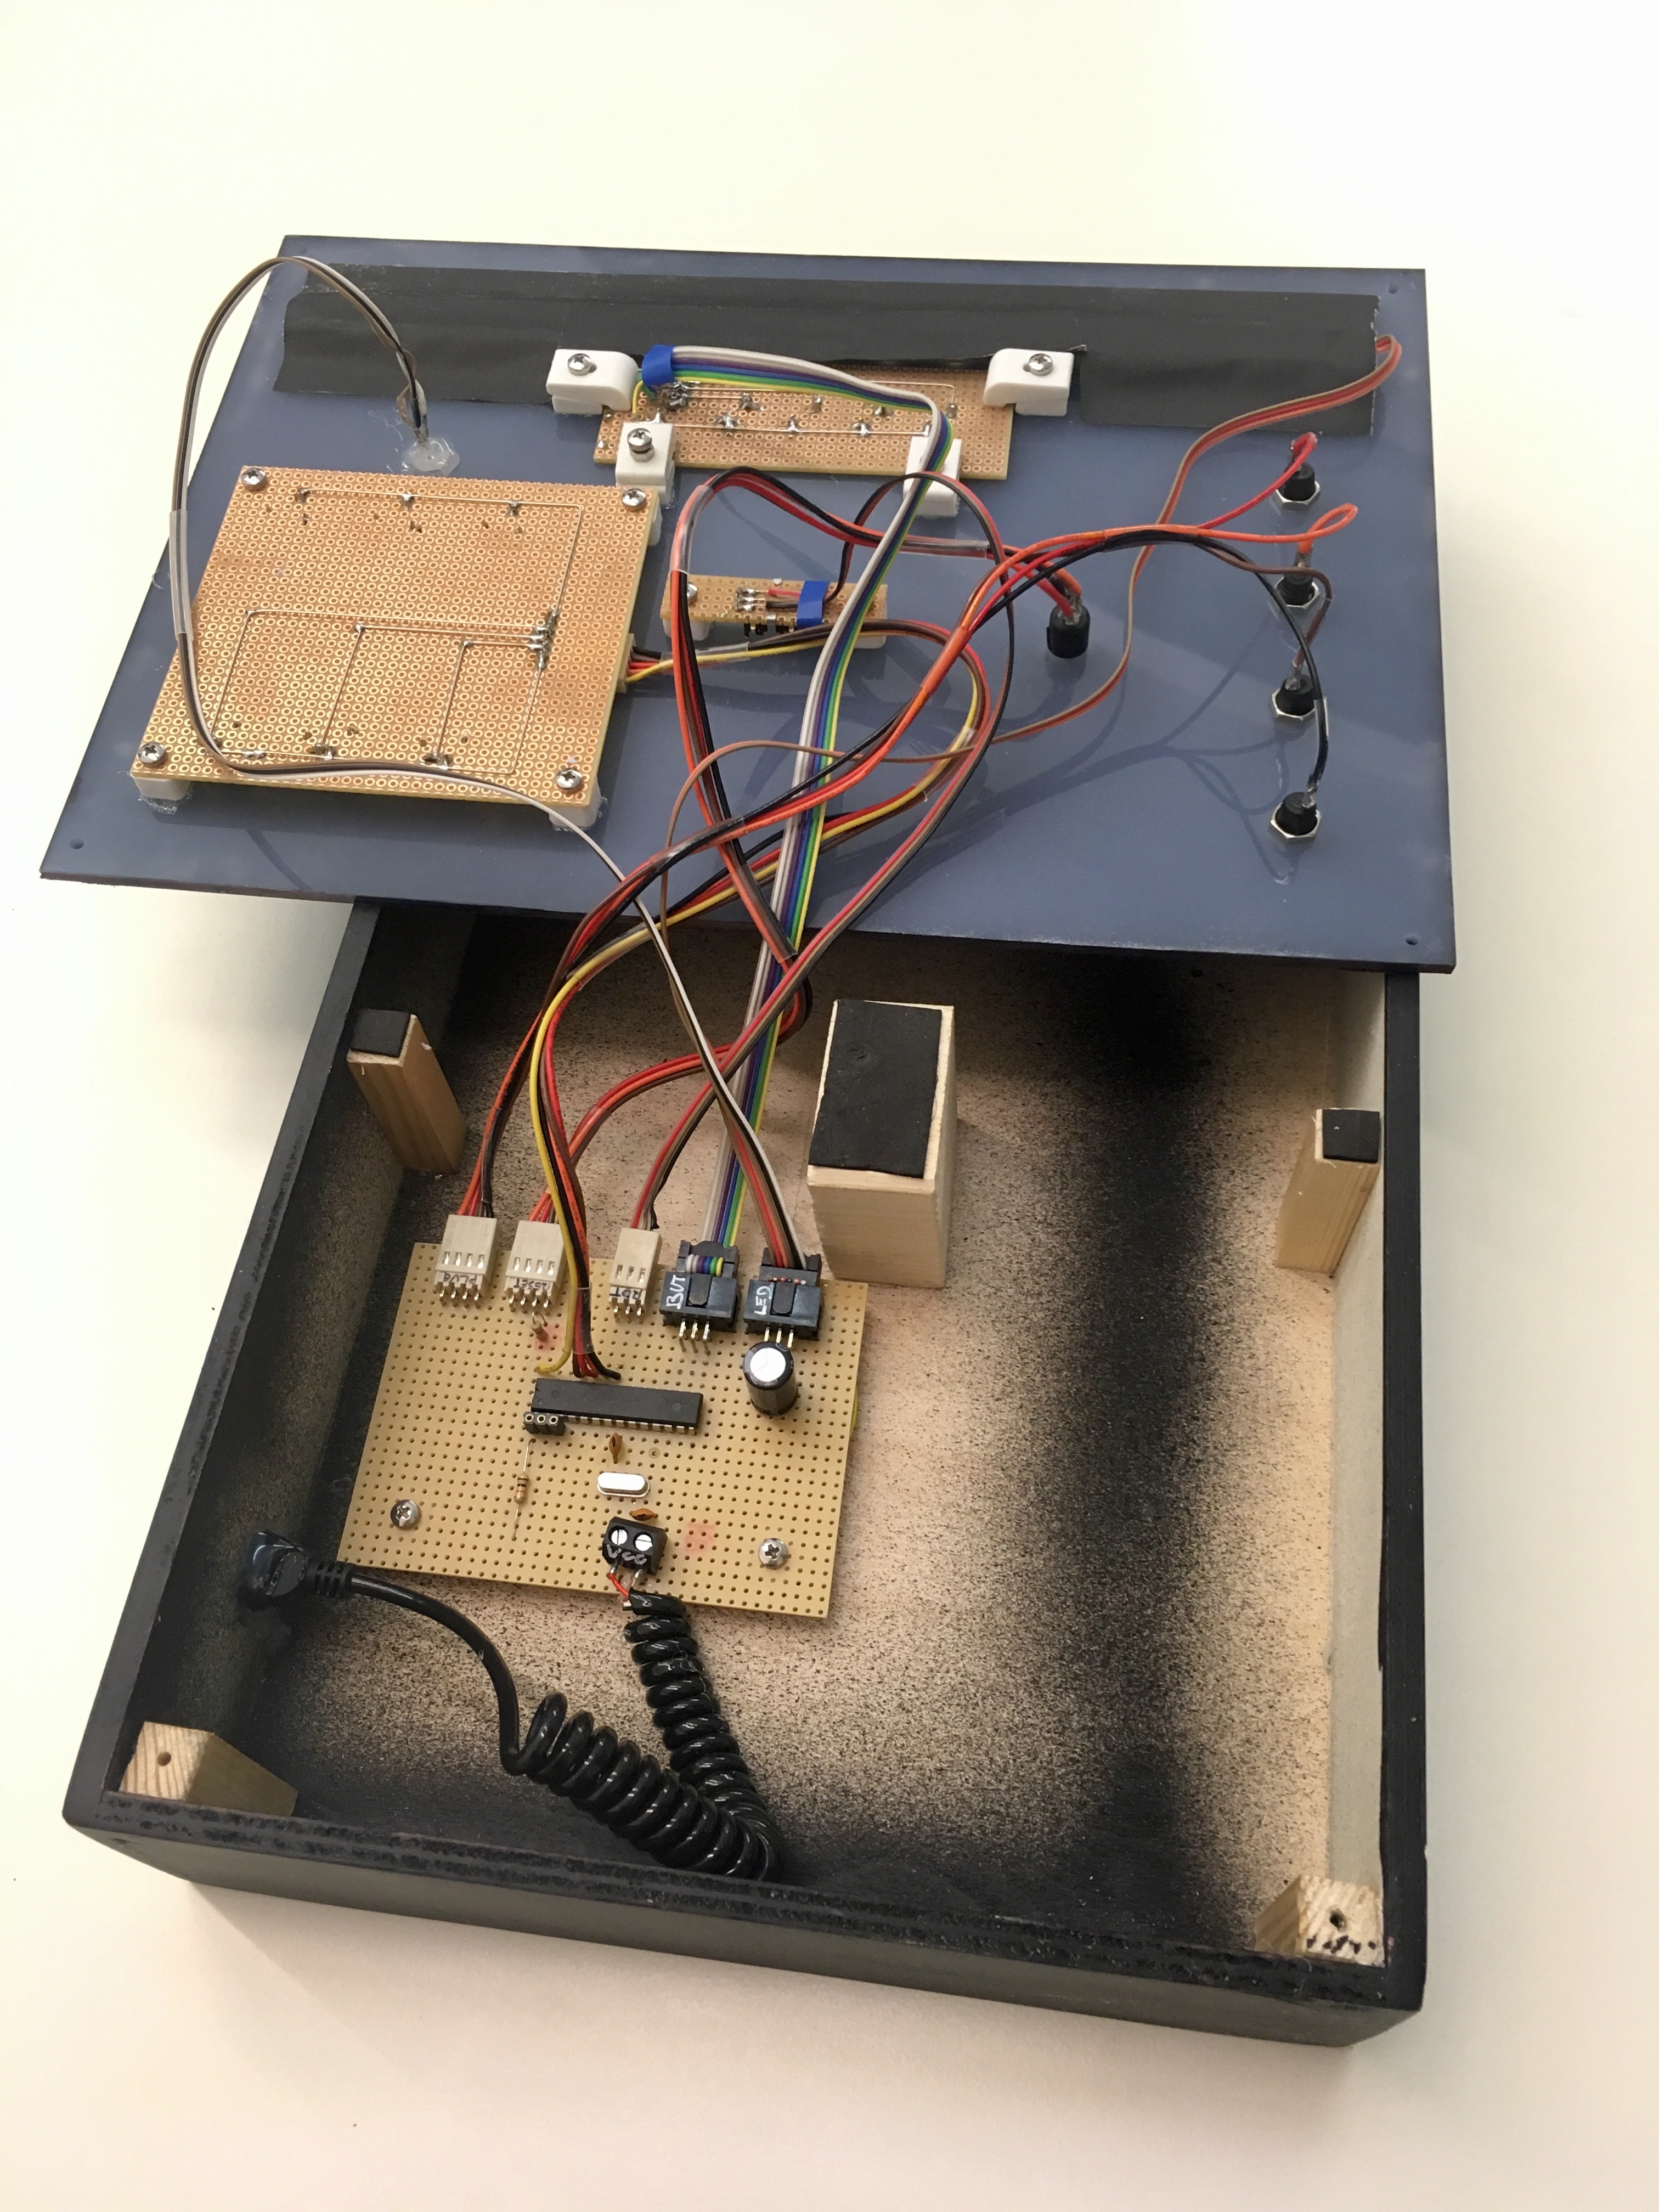
For little Alma’s enjoyment, three potentionmeters control a central LED, a row of buttons toggle a paired row ofmore lights, a rotary encoder to scroll the light pattern of said row left and right, and some sockets to plug a cable into for further lighting effects. Quite a lot to handle, so [Stefan] whipped up a prototype using an Arduino — although he went with an ATmega 328 for the final project — building each part of the project on separate boards and connected with ribbon cables to make any future modifications easier.
[Stefan] attempted to integrate a battery — keeping the Lichtspiel untethered for ease of use — and including a standby feature to preserve battery life. A power bank seemed like a good option to meet the LED’s needed 5V, but whenever the Lichtspiel switched to standby, the power bank would shut off entirely — necessitating the removal of the front plate to disconnect and reconnect the battery every time. The simpler solution was to scrap the idea entirely and use the charging port as a power port instead — much to the delight of his niece who apparently loves plugging it in.
Some of the creepy-crawlers under our feet, flitting through the air, and waiting on silk webs, incorporate metals into their rigid body parts and make themselves harder. Like Mega Man, they absorb the metals to improve themselves. In addition to making their bodies harder, silk-producing creatures like worms and spiders can spin webs with augmented properties. These silks can be conductive, insulating, or stronger depending on the doping elements.
At Italy’s University of Trento, they are pushing the limits and dosing spiders with single-wall carbon nanotubes and graphene. The carbon is suspended in water and sprayed into the spider’s habitat. After the treatment, the silk is measured, and in some cases, the silk is significantly tougher and surpasses all the naturally occurring fibers.
Commercial spider silk harvesting hasn’t been successful, so maybe the next billionaire is reading this right now. Let’s not make aircraft-grade aluminum mosquitoes though. In fact, here’s a simple hack to ground mosquitoes permanently. If you prefer your insects alive, maybe you also like their sound.
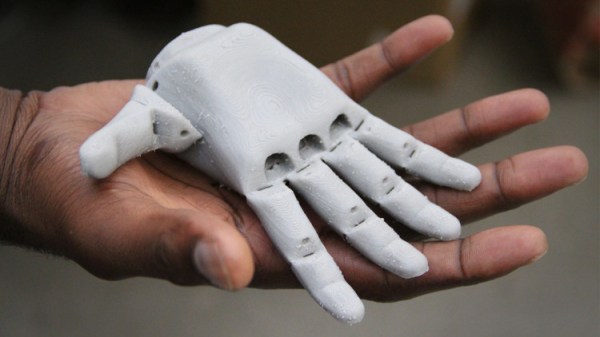
Open Bionics is a company creating prosthetics inspired by heroines, heroes and the fictional worlds they live in. The designs emblazoned on their first set of bionic hands include ones drawn from Queen Elsa from Disney’s Frozen, and Marvel’s Iron Man. The best thing about what they are doing is they offer you, dear reader, a chance to lend your own super powers of design and engineering. Open Bionics offers up 3D print files for several hand designs, hardware schematics and design files for their controller boards, firmware, and software to control the robotic hands with. Other than their website, you can also find all of the files and more on their GitHub account. If you’d like to devote a good amount of time and become a developer, they have a form to contact them through. To help with sourcing parts for your own build, they sell cables for tendons, muscle sensors, and fingertip grips in their online store.
We first came to learn about this company through a tipster [Dj Biohazard] who pointed to a post about their partnership with an 11-year-old Tilly, who is pictured on the left. Her bionic hand is an Open Bionics prototype whose design is based on the video game, Deus Ex. The best way products like these are improved are through the open source community and people like her.
Specific improvements Open Bionics state on their website are:
The customised bionic arms are manufactured in under 24 hours and the revolutionary socket adjusts as the child grows.
The bionic arms are light and small enough for those as young as eight.
The bionic arms use myoelectric skin sensors to detect the user’s muscle movements, which can be used to control the hand and open and close the fingers.
Read more about Tilly’s story and her partnership with Open Bionic’s on Womanthology. Tilly seems to have a dream of her own to “make prosthetics a high fashion piece – something that amputees can be proud to wear.”
We at Hackaday have written about several open source prosthetic developments such as a five-day event S.T.E.A.M. Fabrikarium program taking place at Maker’s Asylum in Mumbai and the work of [Nicholas Huchet]. What superhuman inspired designs would you create?
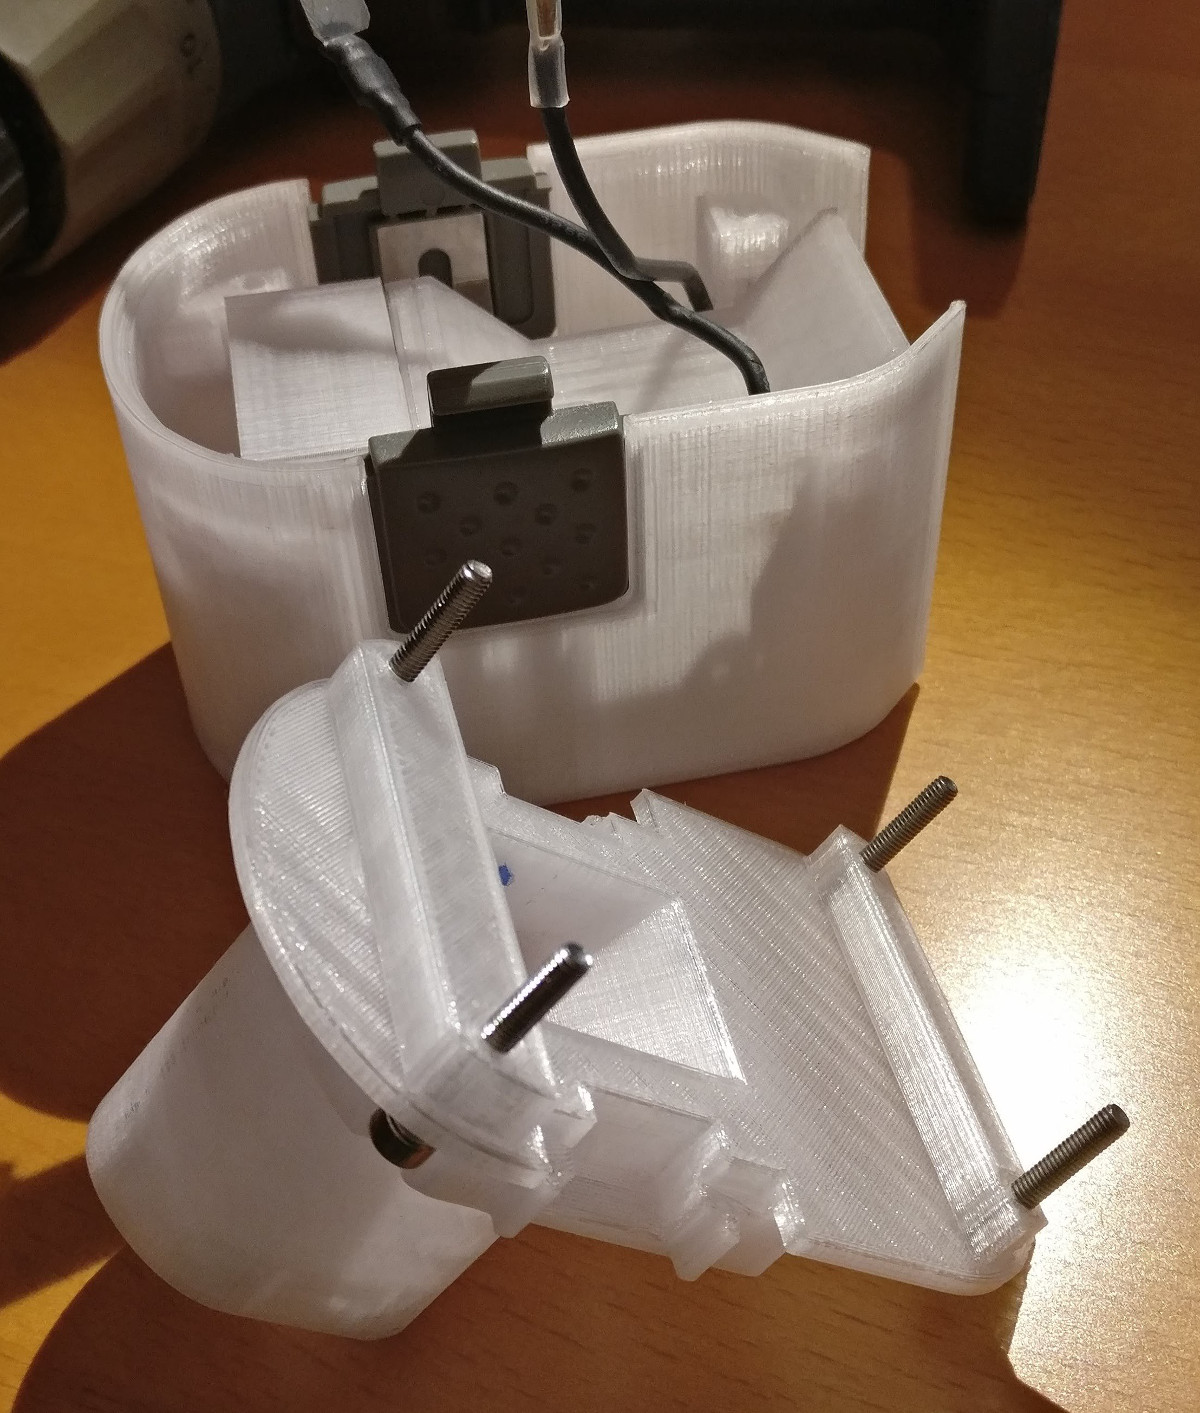
The greatest enemy of proprietary hardware and components is time. Eventually, that little adapter cable or oddball battery pack isn’t going to be available anymore, and you’re stuck with a device that you can’t use. That’s precisely what happened to [Larry G] when the now antiquated 7.2V NiCd batteries used by his cordless drill became too hard to track down. The drill was still in great shape and worked fine, but he couldn’t power the thing. Rather than toss a working tool, he decided to 3D print his own battery pack.
The 3D modeling on the battery pack is impeccable
He could have just swapped new cells into his old pack, but if you’re going to go through all that trouble, why not improve on things a little? Rather than the NiCd batteries used by the original pack, this new pack is designed around readily available AA NiMH batteries. For the light repairs and craft work he usually gets himself into, he figures these batteries should be fine. Plus he already had them on hand, and as we all know, that’s half the battle when putting a project together.
Interestingly, the original battery pack was wired in such a way that it provided two voltages. In older tools such as this one, this would be used for rudimentary speed control. Depending on which speed setting the drill is on, it would either connect to 4 or 6 cells in the original pack. [Larry] didn’t want to get involved with the extra wiring and never used the dual speeds anyway, so his pack only offers the maximum speed setting. Though he does mention that it may be possible to do PWM speed control in the battery itself via a 555 timer if he feels like revisiting the project.
[Larry] tells us the pack itself was rendered completely from scratch, using only the original battery pack and trial-and-error to get the fit perfect. He reused the side-mounted release buttons to save time, but otherwise everything is 3D printed in PETG for its strength and chemical resistance.
The twenty best projects will receive $100 in Tindie credit, and for the best projects by a Student or Organization, we’ve got two brand-new Prusa i3 MK3 printers. With a printer like that, you’ll be breaking stuff around the house just to have an excuse to make replacement parts.
We see a huge variety of human-computer interface devices here at Hackaday, and among them are some exceptionally elegant designs. Of those that use key switches though, the vast majority employ off the shelf components made for commercial keyboards or similar. It makes sense to do this, there are some extremely high quality ones to be had.
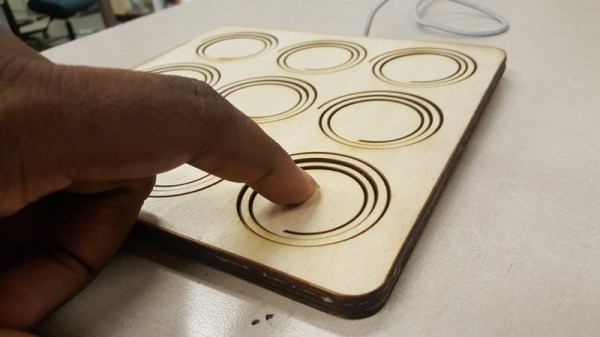
Sometimes though we are shown designs that go all the way in creating their key switches from the ground up. Such an example comes from [Brandon Rice], and it a particularly clever button design because of its use of laser cutting to achieve a super-slim result. He’s made a sandwich of plywood with the key mechanisms formed in a spiral cut on the top layer. He’s a little sketchy on the exact details of the next layer, but underneath appears to be a plywood spacer surrounding a silicone membrane with conductive rubber taken from a commercial keyboard. Beneath that is copper tape on the bottom layer cut to an interweaving finger design for the contacts. An Adafruit Trinket Pro provides the brains and a USB interface, and the whole device makes for an attractive and professional looking peripheral.
You can see the results in action as he’s posted a video, which we’ve included below the break.
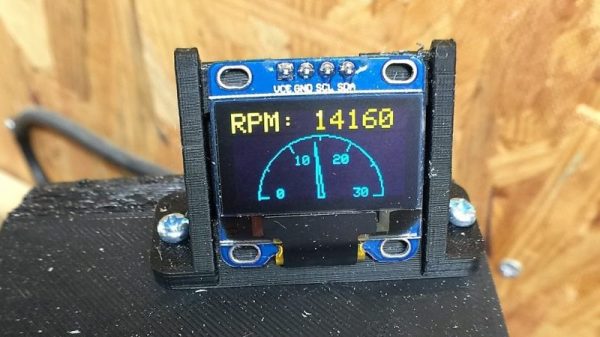
With CNC machines, getting the best results depends on knowing how fast your tool is moving relative to the workpiece. But entry-level CNC routers don’t often include a spindle tachometer, forcing the operator to basically guess at the speed. This DIY optical spindle tach aims to fix that, and has a few nice construction tips to boot.
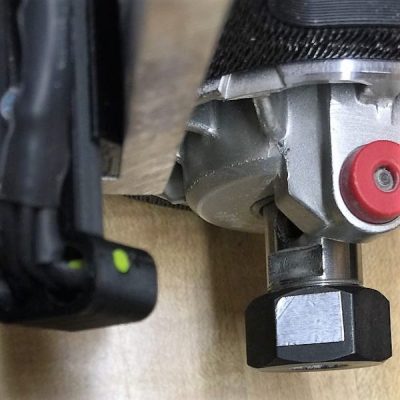
The CNC router in question is the popular Sienci, and the 3D-printed brackets for the photodiode and LED are somewhat specific for that machine. But [tmbarbour] has included STL files in his exhaustively detailed write-up, so modifying them to fit another machine should be easy. The sensor hangs down just far enough to watch a reflector on one of the flats of the collet nut; we’d worry about the reflector surviving tool changes, but it’s just a piece of shiny tape that’s easily replaced. The sensor feeds into a DIO pin on a Nano, and a small OLED display shows a digital readout along with an analog gauge. The display update speed is decent — not too laggy. Impressive build overall, and we like the idea of using a piece of PLA filament as a rivet to hold the diodes into the sensor arm.


 We first came to learn about this company through a tipster [Dj Biohazard] who pointed to a post about their partnership with an 11-year-old Tilly, who is pictured on the left. Her bionic hand is an Open Bionics prototype whose design is based on the video game, Deus Ex. The best way products like these are improved are through the open source community and people like her.
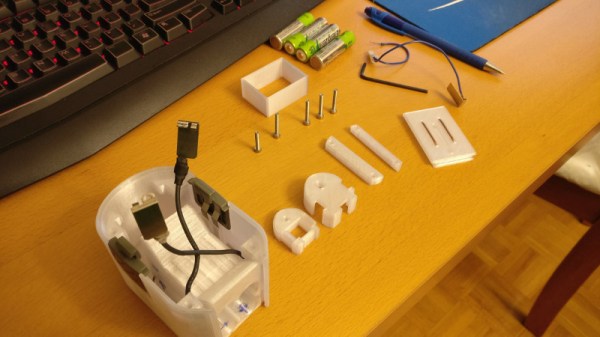

 The CNC router in question is the popular Sienci, and the 3D-printed brackets for the photodiode and LED are somewhat specific for that machine. But [tmbarbour] has included STL files in his exhaustively detailed write-up, so modifying them to fit another machine should be easy. The sensor hangs down just far enough to watch a reflector on one of the flats of the collet nut; we’d worry about the reflector surviving tool changes, but it’s just a piece of shiny tape that’s easily replaced. The sensor feeds into a DIO pin on a Nano, and a small OLED display shows a digital readout along with an analog gauge. The display update speed is decent — not too laggy. Impressive build overall, and we like the idea of using a piece of PLA filament as a rivet to hold the diodes into the sensor arm.


