Beat This Mario Block Like It Owes You Money

People trying to replicate their favorite items and gadgets from video games is nothing new, and with desktop 3D printing now at affordable prices, we’re seeing more of these types of projects than ever. At the risk of painting with too broad a stroke, most of these projects seem to revolve around weaponry; be it a mystic sword or a cobbled together plasma rifle, it seems most gamers want to hold the same piece of gear in the physical world that they do in the digital one.
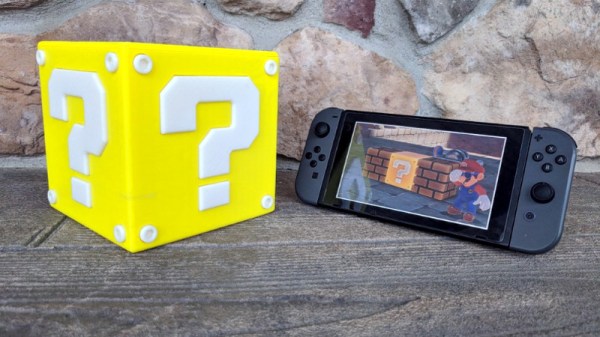
But [Jonathan Whalen] walks a different path. When provided with the power to manifest physical objects, he decided to recreate the iconic “Question Block” from the Mario franchise. But not content to just have a big yellow cube sitting idly on his desk, he decided to make it functional. While you probably shouldn’t smash your head into the thing, if you give it a good knock it will launch gold coins into the air. Unfortunately you have to provide the gold coins yourself, at least until we get that whole alchemy thing figured out.

Printing the block itself is straightforward enough. It’s simply a 145 mm yellow cube, with indents on the side to accept the question mark printed in white and glued in. A neat enough piece of decoration perhaps, but not exactly a hack.

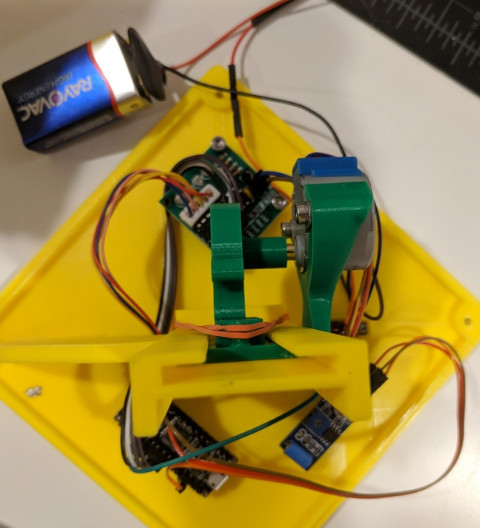
The real magic is on the inside. An Arduino Nano and a vibration sensor are used to detect when things start to get rough, which then sets the stepper motor into motion. Through an ingenious printed rack and pinion arrangement, a rubber band is pulled back and then released. When loaded with $1 US gold coins, all you need to do is jostle the cube around to cause a coin to shoot out of the top.

If this project has got you interested in the world of 3D printed props from the world of entertainment, don’t worry, we’ve got you covered.

Continue reading “Beat This Mario Block Like It Owes You Money”

Dublin Knows How To Bring-a-Hack

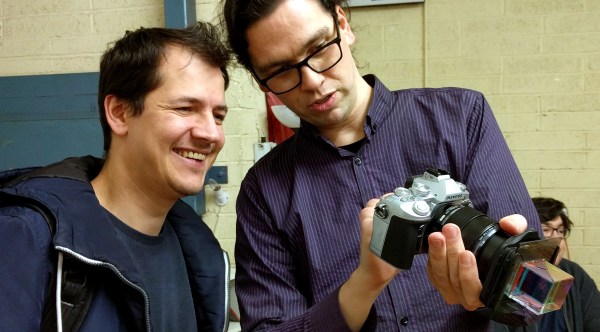
When on the road, we love to stop by a local hackerspace and connect with the hacker community. On Friday, TOG Hackerspace in Dublin, Ireland opened their doors to host a Bring-a-Hack with Hackaday and Tindie.

The city center of Dublin is anything but a grid. The cobblestone roads meander every which way and are a puzzle of one-way and surprise construction, none of which seemed to faze Google’s navigation algorithms. I was happy to be operating the smartphone instead of the rental vehicle. A big thanks goes to Jenny List for taking on the stress of driving on our refreshments run without coming in contact with people or cars.
You’re likely wondering why the street layout of the city deserves such attention. I’m used to centrally-located Hackerspaces being tight on space, and indeed the members of TOG cautioned us that 50 people would feel cramped. Much the opposite, the pubs, restaurants, hotels, and performing arts centers are not small, nor winding, nor made of cobblestones. Dublin is a fantastic place to party, with plenty of space for us hardware geeks to congregate. TOG itself, which about 20 minutes walk from the central Temple Bar area (where this image was taken), even has a small parking lot which made our beer drop off and pizza delivery a breeze.

A Tour of TOG Hackerspace

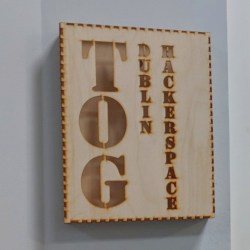
TOG is a Gaelic word which loosely translates as “to make”. Declan met us for the beer drop and gave us a tour when we returned for the evening event. The building is divided into several different spaces, starting with an entry area that serves as a meeting space, gaming room, and showcase of projects.

Where you might see prayer flags strung up on an apartment building, we see floppy disks (both the hard and soft variety) strung around the meeting area. Declan has a shamrock of K’nex parts wired up with a microphone controlled RGB LED strip — it’s like a test your strength game to see who can shout the coolest colors.

I also really enjoyed the fabric anatomy display that has snaps on each organ and only lights up the labels if you complete the circuits in the correct locations.

These are just the tip of the iceberg. There’s much more after the break so join me for the rest of the tour, and some of the notable hacks that showed up on Friday evening.

Continue reading “Dublin Knows How To Bring-a-Hack”

Space Garbage Truck Takes Out The Trash

On April 2nd, 2018 a Falcon 9 rocketed skywards towards the International Space Station. The launch itself went off without a hitch, and the Dragon spacecraft delivered its payload of supplies and spare parts. But alongside the usual deliveries, CRS-14 brought a particularly interesting experiment to the International Space Station.

Developed by the University of Surrey, RemoveDEBRIS is a demonstration mission that aims to test a number of techniques for tackling the increasingly serious problem of “space junk”. Earth orbit is filled with old spacecraft and bits of various man-made hardware that have turned some areas of space into a literal minefield. While there have been plenty of ideas floated as to how to handle this growing issue, RemoveDEBRIS will be testing some of these methods under real-world conditions.

The RemoveDEBRIS spacecraft will do this by launching two CubeSats as test targets, which it will then (hopefully) eliminate in a practical demonstration of what’s known as Active Debris Removal (ADR) technology. If successful, these techniques could eventually become standard operating procedure on future missions.

Continue reading “Space Garbage Truck Takes Out The Trash”

Color Spaces: The Model At The End Of The Rainbow

When I learned about colors in grade school everything started with red, yellow, and blue and getting fancier colors was easy. I mixed some blue into my yellow to get green, or into red to get purple, and so on. After painting enough terrifying “art” for my parents, this made intuitive sense. That is until my mind was blown by the revelation that this wasn’t always true! 

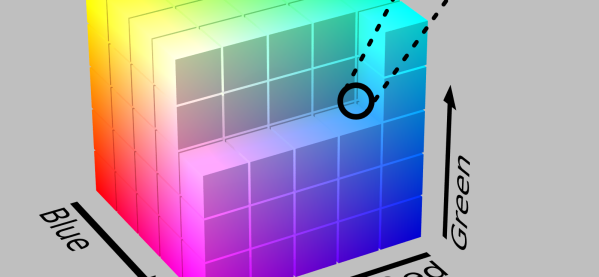
To make the same colors with light instead of paint I had to use red, green, and blue, not yellow. It was until much later when trying harness banks of RGB LEDs that this knowledge became useful. I was struggling to make my rogue diodes look quite the way I wanted when I stumbled into the realization that maybe there was another approach. What did the numbers representing R G and B actually mean? Why those parameters? Could there be others? [Elliot Williams] has written about the importance of gamma correction and adjustment for human perception of color, but we can ask a more fundamental question. Why do we represent color this way at all?

Continue reading “Color Spaces: The Model At The End Of The Rainbow”

The End Of The Candy Rainbow

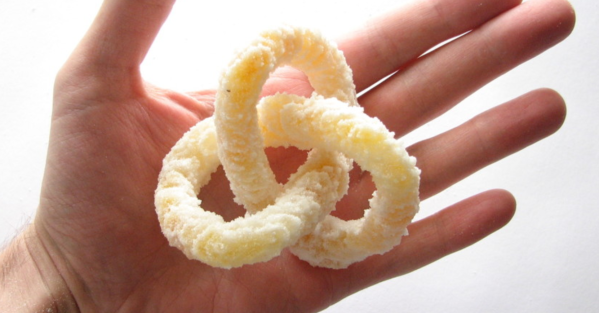
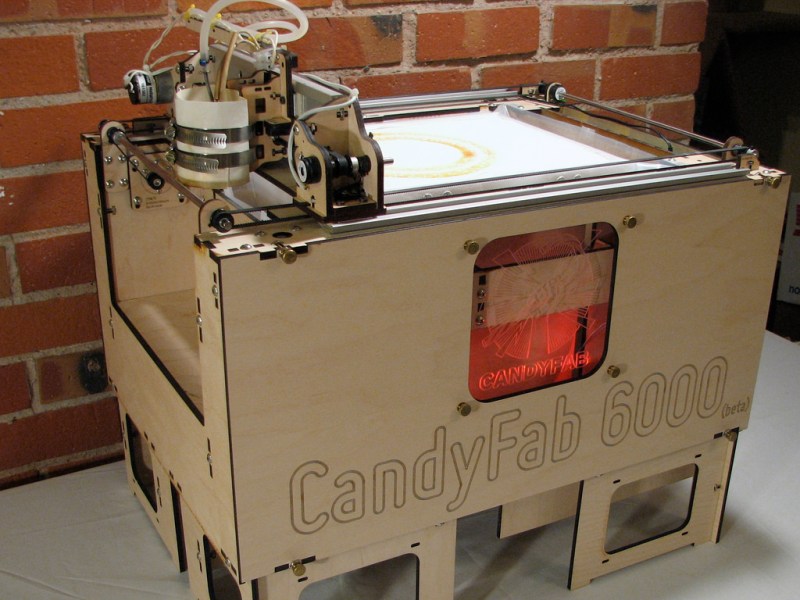
About a decade ago [Windell Oskay] and [Lenore Edman] spun out of Evil Mad Scientist Laboratories to work on CandyFab, an inexpensive 3D printer that used sugar as its medium. Wondering what happened to CandyFab? It’s been nearly that long since we last wrote about their work and Maker technology has moved on; nowadays 3D printers run the gamut from very inexpensive to production ready. The CandyFab project and nascent company are now shuttered, but there is a epilogue with some interesting lessons.

The CandyFab 6000

First of all, the saga of the CandyFab series of printers (above on the same page) is worth a read. Some of what these machines were capable of is still quite impressive by modern standards. Sure your Monoprice Mini Delta may be easy to use, fully assembled, functional when you take it out of the box, and quiet. But what if you need to print something up to 8.5″ x 11″ x 17″? The CandyFab 5000 can do that. Or even a humongous 24″ x 13.5″ x 9″? The CandyFab 4000 can do it, and for a measly $37 (if you printed a solid cube exactly the size of the build volume)! Sugar may have downsides but it’s still a pretty clever medium for some uses.

CandyFab credits the rise of MakerBot coupled with the complexity of iterating from a pile of “surplus junk” (their words) to something kitable. Reading their post-mortem brings to mind familiar problems from today’s hardware world. A spike of fantastic early publicity lead to the need to handle press while rapidly iterating from the aforementioned surplus parts to a reliable and manufacturable design. Then the complexity of balancing a day job and other side projects with the prospect of CandyFab as a business. Ultimately the need for the project in the first place (accessible inexpensive 3D printers) was alleviated by the market and the project came to a graceful close.

Give the post a read, we’re sure you’ll learn something!

Stecchino Game Is All About Balancing A Big Toothpick

Stecchino demo by the creator

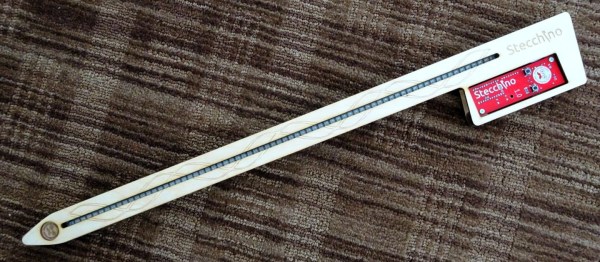
Self-described “Inventor Dad” [pepelepoisson]’s project is called Stecchino (English translation link here) and it’s an Arduino-based physical balancing game that aims to be intuitive to use and play for all ages. Using the Stecchino (‘toothpick’ in Italian) consists of balancing the device on your hand and trying to keep it upright for as long as possible. The LED strip fills up as time passes, and it keeps records of high scores. It was specifically designed to be instantly understood and simple to use by people of all ages, and we think it has succeeded in this brilliantly.

To sense orientation and movement, Stecchino uses an MPU-6050 gyro and accelerometer board. An RGB LED strip gives feedback, and it includes a small li-po cell and charger board for easy recharging via USB. The enclosure is made from a few layers of laser-cut and laser-engraved material that also holds the components in place. The WS2828B WS2812B LED strip used is technically a 5 V unit, but [pepelepoisson] found that feeding them direct from the 3.7 V cell works just fine; it’s not until the cell drops to about three volts that things start to glitch out. All source code and design files are on GitHub.

Games are great, and the wonderful options available to people today allow for all kinds of interesting experimentation like a blind version of tag, or putting new twists on old classics like testing speed instead of strength.

Lost In Space: How Materials Degrade In Space

Hackaday readers are well aware of the problems caused by materials left exposed to the environment over time, whether that be oxidized contact pads on circuit boards or plastics made brittle from long exposure to the sun’s UV rays.

Now consider the perils faced by materials on the International Space Station (ISS), launched beginning in 1998 and planned to be used until 2028. That’s a total of 30 years in an environment of unfiltered sunlight, extreme temperatures, micrometeoroids, and even problems caused by oxygen. What about the exposure faced by the newly launched Tesla Roadster, an entirely non-space hardened vehicle on a million-year orbit around the sun? How are the materials which make up the ISS and the Roadster affected by the harsh space environment?

Fortunately, we’ve been doing experiments since the 1970s in Earth orbit which can give us answers. The missions and experiments themselves are as interesting as the results so let’s look at how we put materials into orbit to be tested against the rigors of space.

Continue reading “Lost In Space: How Materials Degrade In Space”