Teensy Script Plays Nintendo Switch, Strikes Out

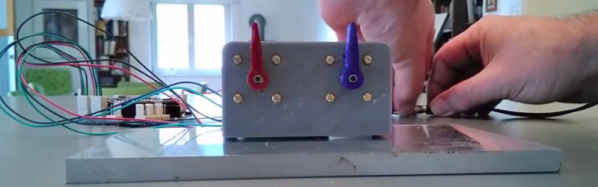
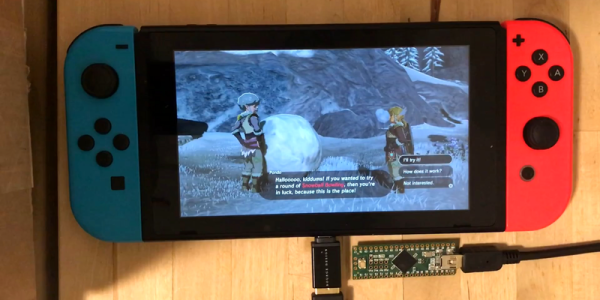
The most recent of the Zelda franchise, Breath of the Wild, is known for its many, many puzzles.  One of the more frustrating ones involved bowling with a giant snowball at the top of a hillside.  [Bertrand] did not like this, so he cheated the system hacked the Nintendo Switch so that he “genuinely earned” a strike every time he played.  He achieved this by writing a script for a Teensy module that got him those sweet rupees.

The Teensy houses an Atmel 90USB1286 microcontroller.  When paired with LUFA software, it can emulate numerous controllers including keyboards, joysticks, etc.  It also handily has a Mini-B USB connector located on its rear, allowing it to communicate to the Switch with ease.  After confirming the hardware was compatible, [Bertrand] looked towards the software side noticing the similarity between what already existed and what he was attempting to accomplish.  He happened upon this in a Splatoon 2 fork that allows players to draw posts. 

In essence, it takes image files as input and emulates the controls and buttons to draw a 1-bit version of the image automatically.  This takes care of syncing the hardware as well as how to simulate the button presses.  But instead of reading an image file, it needed to take a custom script as the input.  This required starting from scratch.  The first logical step — of course — was to create a language similar to Logo, a name that surely brings back memories of the time of big hair and shoulder pads.  He only needed a handful of simple commands to control Link:

typedef enum {
	UP,
	DOWN,
	LEFT,
	RIGHT,
	X,
	Y,
	A,
	B,
	L,
	R,
	THROW,
	NOTHING,
	TRIGGERS
} Buttons_t;

Continue reading “Teensy Script Plays Nintendo Switch, Strikes Out”

TeensyStep – Fast Stepper Library For Teensy

The Teensy platform is very popular with hackers — and rightly so. Teensys are available in 8-bit and 32-bit versions, the hardware has a bread-board friendly footprint, there are a ton of Teensy libraries available, and they can also run standard Arduino libraries. Want to blink a lot of LED’s? At very fast update rates? How about MIDI? Or USB-HID devices? The Teensy can handle just about anything you throw at it. Driving motors is easy using the standard Arduino libraries such as Stepper, AccelStepper or Arduino Stepper Library.

But if you want to move multiple motors at high micro-stepping speeds, either independently or synchronously and without step loss, these standard libraries become bottlenecks. [Lutz Niggl]’s new TeensyStep fast stepper control library offers a great improvement in performance when driving steppers at high speed. It works with all of the Teensy 3.x boards, and is able to handle accelerated synchronous and independent moves of multiple motors at the high pulse rates required for micro-stepping drivers.

The library can be used to turn motors at up to 300,000 steps/sec which works out to an incredible 5625 rpm at 1/16 th micro-stepping. In the demo video below, you can see him push two motors at 160,000 steps/sec — that’s 3000 rpm — without the two arms colliding. Motors can be moved either independently or synchronously. Synchronous movement uses Bresenham’s line algorithm to plan motor movements based on start and end positions. While doing a synchronous move, it can also run other motors independently. The TeensyStep library uses two class objects. The Stepper class does not require any system resources other than 56 bytes of memory. The StepControl class requires one IntervallTimer and two channels of a FTM  (FlexTimer Module) timer. Since all supported Teensys implement four PIT timers and a FTM0 module with eight timer channels, the usage is limited to four StepControl objects existing at the same time. Check out [Lutz]’s project page for some performance figures.

As a comparison, check out Better Stepping with 8-bit Micros — this approach uses DMA channels as high-speed counters, with each count sending a pulse to the motor.

Thanks to [Paul Stoffregen] for tipping us off about this new library. Continue reading “TeensyStep – Fast Stepper Library For Teensy”

Virtual Analog Synth Brings Tunes To The Masses

Part of the problem with getting involved in a new hobby is the cost. Whether you’re learning to surf, weld, garden, or program, often the entry cost is several hundred dollars. We’re huge fans of things with low barriers to entry, though, so we were happy to see the latest project from [pappas.chris] which promises to introduce newcomers to the musical hobby of synthesizers for just over $20.

The build revolves around an STM32F7 microcontroller and offers a 6-voice virtual analog synthesizer. The build is expandable, too, so if you want to build on the STM platform with any other add ons the process is relatively simple. This might not be necessary for a while, though; the current iteration offers many features that a typical synthesizer would have. Exhausting the possibilities with this tiny device will take some effort.

Since the synth is built on a common microcontroller platform, it’s easily programmable too, which isn’t often a feature of commercial synthesizers. You can listen to a sample audio file on the project page, and get started building your own as well. If you don’t have your own keyboard to use with it, there are other DIY synths that cover that area as well.

SiFive Announces RISC-V SoC

At the Linley Processor Conference today, SiFive, the semiconductor company building chips around the Open RISC-V instruction set has announced the availability of a quadcore processor that runs Linux. We’ve seen RISC-V implementations before, and SiFive has already released silicon-based on the RISC-V ISA. These implementations are rather small, though, and this is the first implementation designed for more than simple embedded devices.

This announcement introduces the SiFive U54-MC Coreplex, a true System on Chip that includes four 64-bit CPUs running at 1.5 GHz. This SoC is built with TSMC’s 28 nm process, and fits on a die about 30 mm². Availability will be on a development board sometime in early 2018, and if our expectations match the reality of SiFive’s previous offerings, you’ll be able to buy this Open SoC as a BGA package some months after that.

Continue reading “SiFive Announces RISC-V SoC”

Rocking Playmobil Wedding

Many of us have put our making/hacking/building skills to use as a favor for our friends and family. [Boris Werner] is no different, he set about creating a music festival stage with Playmobil figures and parts for a couple of friends who were getting married. The miniature performers are 1/24 scale models of the forming family. The bride and groom are on guitar and vocals while junior drums.

Turning children’s toys into a wedding-worthy gift isn’t easy but the level of detail [Boris Werner] used is something we can all learn from. The video after the break does a great job of showing just how many cool synchronized lighting features can be crammed into a tiny stage in the flavor of a real show and often using genuine Playmobil parts. Automation was a mix of MOSFET controlled LEDs for the stage lighting, addressable light rings behind the curtain, a disco ball with a stepper motor and music, all controlled by an Arduino.

Unless you are some kind of Playmobil purist, this is way cooler than anything straight out of the box. This is the first mention of Playmobil on Hackaday but miniatures are hardly a new subject like this similarly scaled space sedan.

Continue reading “Rocking Playmobil Wedding”

7-Segment Digits Slide Stylishly On This OLED Clock

Over at Sparkfun, [Alex] shared an OLED clock project that’s currently in progress but has a couple interesting twists. The first is the use of a small OLED screen for each digit, to which [Alex] added a stylistic touch. Digits transition by having segments slide vertically in a smooth animated motion. It’s an attractive effect, and the code is available on his github repository for anyone who wants to try it out.

[Alex] also found that by using an ESP32 microcontroller and synchronizing the clock via NTP over WiFi, the added cost of implementing a real-time clock in hardware becomes unnecessary. Without an RTC, time would drift by a few seconds every day and require a reset. At the moment the clock requires the SSID and password to be hardcoded, but [Alex] would prefer to allow this to be configured via a web page and could use some help. If you have implemented a web server on the ESP32, [Alex] would like to know how you handled multiple pages. “I’ve been scratching my head throughout the build on how to get this done,” he writes. “With the ESP8266, there’s on(const String &uri, handler function), but that seems to have been removed on the ESP32.” If you can point [Alex] in the right direction, be sure to pipe up.

OLED displays and clocks often go together, as we have seen with projects like the DIY OLED Smart Watch, but it’s nice to see someone using the OLED’s strengths to add some visual flair to an otherwise plain display.

Trouble Flashing Your ESP8266? Meet DIO And QIO

[Pete] was building a hot tub controller, using a WEMOS board based on the venerable ESP8266. After assembly, the board was plugged into USB and [Pete] hit the flash button. No dice. Investigation with some terminal software indicated a checksum error.

Assuming the board was dead, [Pete] grabbed another — and suffered the same problem.  The WEMOS boards wouldn’t program, but other boards had no issues. Sensing that something may be amiss, further research was in order. A forum post turned up discussing different programming modes for the ESP8266.

It turns out that there are different types of flash used with the ESP8266, and the correct programming mode must be selected for a given hardware setup. These modes are known as DIO and QIO, meaning “dual IO” and “quad IO” respectively. This refers to the number of IO line used to talk to the flash memory. There are also further modes, known as DOUT and QOUT. It’s important to identify the modes supported by the flash chip on board, by looking at the datasheet. Obviously this can be difficult on some pre-built modules, so experimentation is the key here.

With the wrong mode selected, writes to the flash will fail, and reading back will turn up a checksum error. It’s a simple matter of changing a line in the make file and trying different modes, to see which one works. This forum post has a more in-depth coverage of the issue. 

By choosing different flash memory parts and selecting the DIO or DOUT modes, it’s actually possible to free up more GPIO pins as well. This knowledge is handy when optimizing ESP8266 designs for memory speed or maximum IO flexibility. It’s a good lesson that it always pays to look at the datasheet to get the best out of your parts.