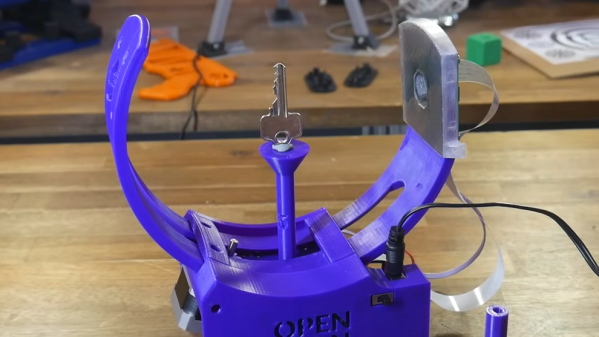
RNode is an open source, unrestricted digital radio transceiver based on — but not limited to — the Reticulum cryptographic networking stack. It is another interesting project in what we might call the “Federated application” space in that it is intended to be used with no central controlling body. It can be used in a LAN or WAN context with the Reticulum network when operating in network adaptor mode, but it also has other use cases.
Essentially, RNode is a software project running on a LilyGO LoRa32 board wrapped up in a snazzy-looking 3D-printed case. Just make sure to grab a version of the board with an u.FL connector in place or somewhere to solder one. If it comes with an SMA connector, you will want to remove that. The device can be standalone, perhaps attached to a mobile device via Wi-Fi, but it needs to be hooked up to a laptop for the really interesting applications. When set to TNC mode, it can act as an APRS gateway, which allows you to access packet radio BBSs and all that fun stuff.
Continue reading “RNODE: A Portable Unrestricted Digital Radio”
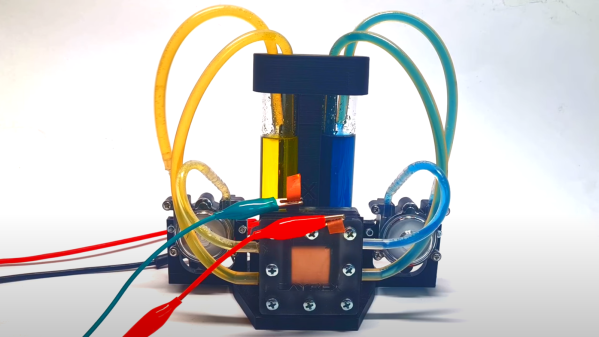
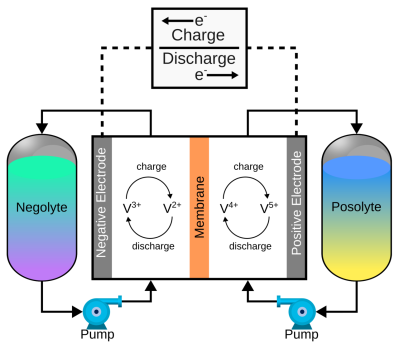 of a pair of electrolytes. These are held externally to the cell and connected with a pair of pumps. The capacity of a flow battery depends not upon the electrodes but instead the volume and concentration of the electrolyte, which means, for stationary installations, to increase storage, you need a bigger pair of tanks. There are even 4 MWh containerised flow batteries installed in various locations where the storage of renewable-derived energy needs a buffer to smooth out the power flow. The neat thing about vanadium flow batteries is centred around the versatility of vanadium itself. It can exist in four stable oxidation states so that a flow battery can utilise it for both sides of the reaction cell.