Arduino Radar Watches You Breathe

We’ve all likely watched an episode of “Star Trek” and admired the level of integration on the sick bay diagnostic bed. With its suite of wireless sensors and flat panel display, even the 1960s imagining of the future blows away the decidedly wired experience of a modern-day ICU stay. But we may be getting closer to [Dr. McCoy]’s experience with this radar-based respiration detector.

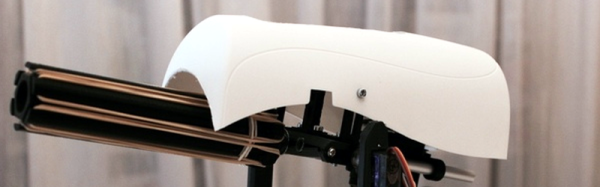
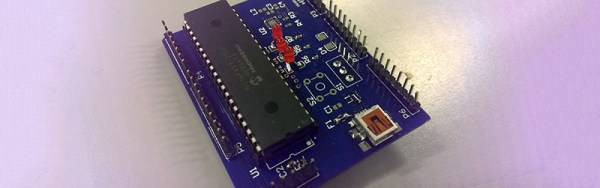
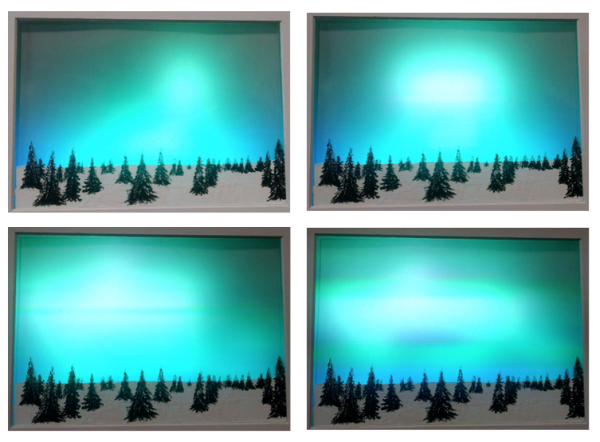
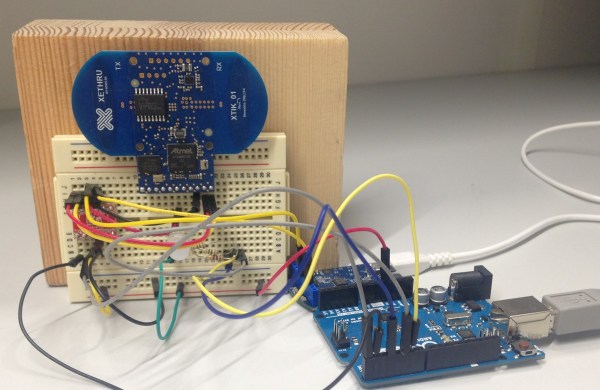
[Øyvind]’s build, which takes the origin of the term “breadboard” to heart, is based on a not-inexpensive Xethru module, which appears to be purpose-built for detecting respiration. The extra-thick PC board seems to house the waveguides internally, which is a neat trick but might limit how the module can be deployed. The module requires both a USB interface and level shifter to interface the 2.8V levels of the module to the 5V Arduino Uno. In the video below, [Øyvind]’s prototype simply lights an RGB LED in response to the chest movement it detects, but there’s plenty of potential for development here. We’ve seen a laser-based baby breathing monitor before; perhaps this systems could be used to the same end without the risk of blinding your tyke. Or perhaps better diagnostics for sleep apnea patients than an intrusive night in a sleep study lab.

Clocking in at $249 for the sensor board and USB interface, this build is not exactly for the faint of heart or the light of wallet. But as an off-the-shelf solution to a specific need that also has a fair bit of hacking potential, it may be just the thing for someone. Of course if radar is your thing, you might rather go big and build something that can see through walls.

Continue reading “Arduino Radar Watches You Breathe”

Arduino Powered Rubber Band Sentry Turret Is Not A Lie

You know that guy in the next cube is sneaking in when you are away and swiping packs of astronaut ice cream out of your desk. Thanks to [Kevin Thomas], if you have an Arduino and a 3D printer, you can build a rubber band sentry gun to protect your geeky comestibles. You’ll also need some metric hardware, an Arduino Uno, and a handful of servo motors.

The video shows [Kevin] manually aiming the gun, but the software can operate the gun autonomously, if you add some sensors to the hardware.  The build details are a bit sparse, but there is a bill of material and that, combined with the 3D printing files and the videos, should allow you to figure it out.

We couldn’t help but wish for a first person view (FPV) camera and control via a cell phone, so you could snipe at those ice cream thieves while hiding in the broom closet. On the other hand, if you got the gun working, adding the remote wouldn’t be hard at all. You probably have a WiFi FPV camera on your quadcopter that finally came out of that tree and there’s lots of ways to do the controls via Bluetooth or WiFi.

Not that you don’t have options. But here at Hackaday HQ, we have lots of rubber bands and not so many green pigs. If you’d rather shoot paintballs, be careful you don’t accidentally repaint the insides of your cube.

Continue reading “Arduino Powered Rubber Band Sentry Turret Is Not A Lie”

It’s Time To Roll Your Own Smartwatch

Giant wristwatches are so hot right now. This is a good thing, because it means they’re available at many price points. Aim just low enough on the scale and you can have a pre-constructed chassis for building your own smartwatch. That’s exactly what [benhur] did, combining a GY-87 10-DOF module, an I²C OLED display, and an Arduino Pro Mini.

The watch uses one button to cycle through its different modes. Date and time are up first, naturally. The next screen shows the current temperature, altitude, and barometric pressure. Compass mode is after that, and then a readout showing your step count and kilocalories burned.

In previous iterations, the watch communicated over Bluetooth to Windows Phone, but it drew too much power. With each new hardware rev, [benhur] made significant strides in battery life, going from one hour to fourteen to a full twenty-fours.

Take the full tour of [benhur]’s smartwatch after the break. He’s open to ideas for the next generation, so share your insight with him in the comments. We’d like to see some kind of feedback system that tells us when we’ve been pounding away at the Model M for too long.  Continue reading “It’s Time To Roll Your Own Smartwatch”

Arduino Based Remote Shutter For Beme

The well-dressed hacker [Sean Hodgins] has put together a neat little project: a battery powered remote shutter. He built it for use with Beme, the latest Snapchat clone that all of the cool kids are now using.

This service is designed to get away from the selfie culture by starting to record when you hold your phone against your chest, so you are looking at the thing being recorded, not your phone. [Sean] wanted a bit more control than that, so he built a remote control that starts the recording by moving the servo arm over the proximity sensor.

He built this neat little device from an Arduino Pro Mini, a battery, a small servo, a couple of power control boards and a cheap RF link from SeedStudio, all glued onto an iPhone case. It’s a bit rough around the edges (the servo makes some noise that is picked up on the recording, for one thing), but it is a great example of how to lash together a quick prototype to test a project out.

Continue reading “Arduino Based Remote Shutter For Beme”

Cat Feeder

Hack Your Cat’s Brain To Hunt For Food

This cat feeder project by [Ben Millam] is fascinating. It all started when he read about a possible explanation for why house cats seem to needlessly explore the same areas around the home. One possibility is that the cat is practicing its mobile hunting skills. The cat is sniffing around, hoping to startle its prey and catch something for dinner. Unfortunately, house cats don’t often get to fulfill this primal desire. [Ben] thought about this problem and came up with a very interesting solution. One that involves hacking an electronic cat feeder, and also hacking his cat’s brain.

First thing’s first. Click past the break to take a look at the demo video and watch [Ben’s] cat hunt for prey. Then watch in amazement as the cat carries its bounty back to the cat feeder to exchange it for some real food.

Continue reading “Hack Your Cat’s Brain To Hunt For Food”

Hackaday Prize Entry: PICs And Arduinos, Cats And Dogs Living Together

Half of our little corner of the Internet complains about the Arduino, how the pin headers of the Arduino standard don’t make any sense, how the Arduino IDE is rubbish, gives well-reasoned arguments why the Arduino language is hindering the next generation of embedded programmers, and laments the fact that everything is commoditized into Arduino-compatible packages. The other half of our little corner of the Internet uses Microchip PICs.

[Jarrett] is stubborn, and he wants to use a PIC with the distinctive Arduino pin layout. Thus was born PIC-On-The-Go. It’s a PIC18F4520 in the familiar goofy-pin package, made specifically for everyone who just wants to buckle down and get some work done.

This isn’t the only PIC-become-Arduino board out there; the Fubarino is a great board that speaks Arduino, but that doesn’t take advantage of our favorite Arduino shields. Either way, we’re surprised something like [Jarrett]’s project doesn’t exist yet, making it a great entry for The Hackaday Prize.

The 2015 Hackaday Prize is sponsored by:

Aurora Painting

“Arduino Borealis” Combines LEDs And Paint

[Stef Cohen] decided to combine three different artistic mediums for her latest project. Those are painting, electronics, and software. The end goal was to recreate the aurora borealis, also known as the northern lights, in a painting.

The first step was to make the painting. [Stef] began with a shadow box. A shadow box is sort of like a picture frame that is extra deep. A snowy scene was painted directly onto the front side of the glass plate of the shadow box using acrylic paint. [Stef] painted the white, snowy ground along with some pine trees. The sky was left unpainted, in order to allow light to shine through from inside of the shadow box. A sheet of vellum paper was fixed to the inside of the glass pane. This serves to diffuse the light from the LEDs that would eventually be placed inside the box.

Next it was time to install the electronics. [Stef] used an off-the-shelf RGB LED matrix from Adafruit. The matrix is configured with 16 rows of 32 LEDs each. This was controlled with an Arduino Uno. The LED matrix was mounted inside the shadow box, behind the vellum paper. The Arduino code was easily written using Adafruit’s RGB Matrix Panel library.

To get the aurora effect just right, [Stef] used a clever trick. She took real world photographs of the aurora and pixelated them using Photoshop. She could then sample the color of each pixel to ensure that each LED was the appropriate color. Various functions from the Adafruit library were used to digitally paint the aurora into the LED matrix. Some subtle animations were also included to give it an extra kick.