Fail Of The Week: Bright Idea For LED Signs Goes Bad

Typically when we select a project for “Fail to the Week” honors, it’s because something went wrong with the technology of the project. But the tech of [Leo Fernekes]’ innovative LED sign system was never the problem; it was the realities of scaling up to production as well as the broken patent process that put a nail in this promising project’s coffin, which [Leo] sums up succinctly as “The Inventor’s Paradox” in the video below.

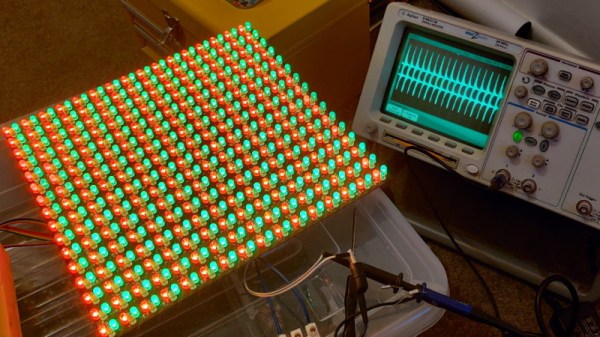
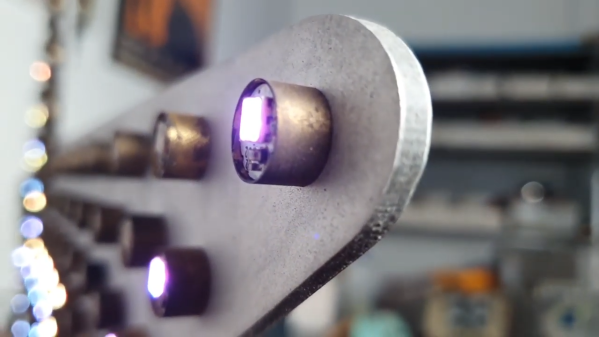
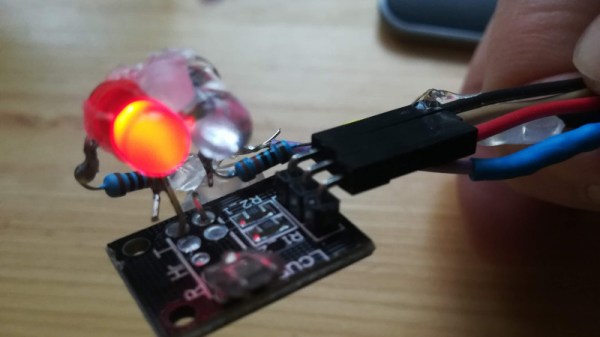
The idea [Leo] had a few years back was pretty smart. He noticed that there was no middle ground between cheap, pre-made LED signs and expensive programmable signboards, so he sought to fill the gap. The result was an ingenious “LED pin”, a tiny module with an RGB LED and a microcontroller along with a small number of support components. The big idea is that each pin would store its own part of a display-wide animation in flash memory. Each pin has two terminals that connect to metal cladding on either side of the board they attach to. These two conductors supply not only power but synchronization for all the pins with a low-frequency square wave. [Leo]’s method for programming the animations — using a light sensor on each pin to receive signals from a video projector — is perhaps even more ingenious than the pins themselves.

[Leo]’s idea seemed destined for greatness, but alas, the cruel realities of scaling up struck hard. Each prototype pin had a low part count, but to be manufactured economically, the entire BOM would have to be reduced to almost nothing. That means an ASIC, but the time and expense involved in tooling up for that were too much to bear. [Leo] has nothing good to say about the patent game, either, which his business partners in this venture insisted on playing. There’s plenty of detail in the video, but he sums it up with a pithy proclamation: “Patents suck.”

Watching this video, it’s hard not to feel sorry for [Leo] for all the time he spent getting the tech right only to have no feasible way to get a return on that investment. It’s a sobering tale for those of us who fancy ourselves to be inventors, and a cautionary tale about the perils of participating in a patent system that clearly operates for the benefit of the corporations rather than the solo inventor. It’s not impossible to win at this game, as our own [Bob Baddeley] shows us, but it is easy to fail.

Continue reading “Fail Of The Week: Bright Idea For LED Signs Goes Bad”

RGB Kitchen Uses Pots To Stir Up Color

Anyone who has done anything with RGB LEDs knows that their ability to display pretty much any color is somehow both the best and worst thing about them. How do you get it right? How do you make your results repeatable? [Thomas] has the answer. He dug around in the ol’ parts cupboard, found a few pots, and got to work making this stay-home stew of a project — an on-demand RGB LED color mixer.

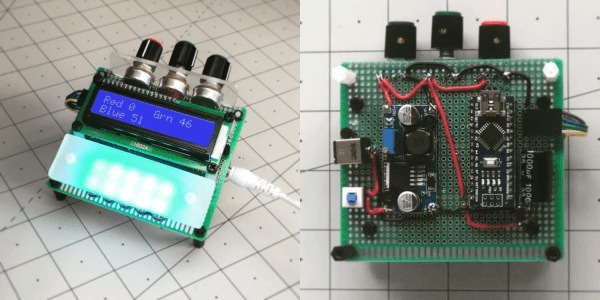
Three cleverly color-coded potentiometers and an Arduino let [Thomas] step through 0-255 to mix various values of red, blue, and green. The shade that gets made is displayed live on a set of 10 individual NeoPixels that are laid out under a frosty diffusing panel. Each of the RGB values are also shown on an 16×2 LCD.

This is one of those projects that hits a sweet spot of being simple, useful, and fun. It’s even nice-looking and compact. What more could you want from a project cobbled together from ingredients on hand? [Thomas] is even giving away the code recipe.

Once you dial in your ideal colors, why not make a gesture-controlled lamp?

LED Clock Strips Time Down To Pulses Of Light

Nietzsche said (essentially) that time is a flat circle — we are doomed to repeat history whether we remember it or not. This is a stark and sobering thought for sure, but it’s bound to dissipate the longer you look at [andrei.erdei]’s literal realization of time as a flat circle.

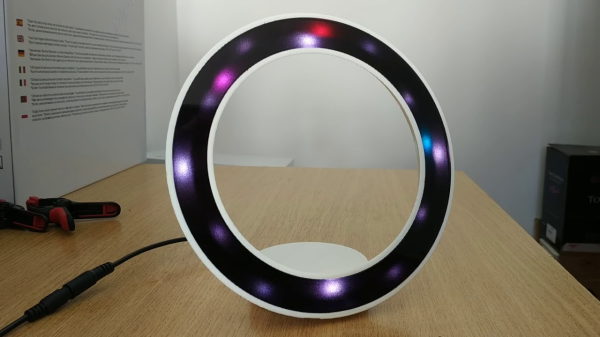
A clock that uses nothing but RGB LEDs to give the time sounds confusing and potentially cluttered, but the result here is quite pleasing and serene. We figure it must be the combination of brighter LEDs to represent 12, 3, 6, and 9, and dimmer LEDs for the rest of the numbers, plus the diffusion scheme. The front plate is smoky acrylic topped with two layers of frosted black window foil.

Inside the printed plastic ring are two adhesive RGB LED strips running on an ESP8266 that ultimately connects to an NTP time server. The strips are two halves of an adhesive 60 LED/meter run that have been stuck together back to back so that the lights are staggered for seamless coverage. This sets up the coolest thing about this clock — the second hand, which is represented by a single pink LED zig-zagging back and forth around the ring. Confused? Watch the short demo after the break and you’ll figure it out in no time.

Now that times are strange, you might be more interested in a straightforward approach to finding out what day it is. The wait is over.

Continue reading “LED Clock Strips Time Down To Pulses Of Light”

NeoPixel Matrix Simulation Lets You Virtually Groove To The Lights

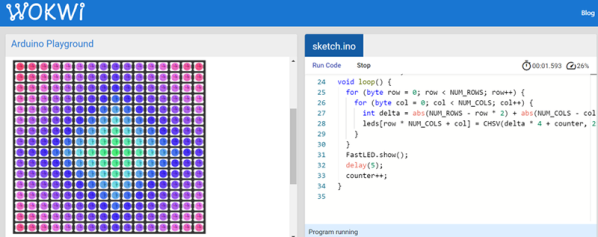
You are stuck at home quarantined and you want to do some Arduino projects. The problem is you don’t have all the cool devices you want to use. Sure, you can order them, but the stores are slow shipping things that aren’t essential these days. If you want to get a headstart while you are waiting for the postman, check out Wokwi’s Playground. For example, you can write code to drive a virtual NeoPixel 16×16 matrix. There’s even example code to get you started.

There are quite a few other choices in the playground including Charlieplexed LEDs, a keypad, and an LCD. There are also challenges. For example, in the traffic light challenge, you are given code that uses a task scheduler library to implement a traffic light. You have to add a turn signal to the code.

In addition to LEDs in various configurations, the site has some serial bus components, an LCD, a keypad, and a NeoPixel strip. There are also a few tools including an EasyEDA to KiCad converter and a way to share sourcecode similar to Pastebin.

Of course, simulations only get you so far, but the site is a fun way to play with some different I/O devices. It would be very nice if you could compose for the different components together, but you could work your code in sections, if necessary. You can do similar things with TinkerCad circuits. If you want to install software, there’s a simulator for you, too.

LED Heart Beats With The Beholder

Many a maker likes to use their craft to create gifts for loved ones. [Jiří Praus] was celebrating having been married for 5 years, and crafted this beautiful LED heart sculpture to commemorate the occasion.

The outer shell was created by first starting with a 3D printed heart shape. This was used as a form upon which the brass wire could be soldered together to form an attractive heart-shaped cage. Inside, an Arduino Nano is hooked up to a series of WS2812b LEDs. The LEDs are flashed in time with the heartbeat of the person holding the heart, thanks to a MAX30102 heartbeat sensor. There’s also a TP4056 charge module and a small lithium battery to provide power for the device.

Adding the heartbeat sensor really makes this project shine, forming a connection between the holder and the device itself. The tasteful craftsmanship of the brass design makes this an excellent gift, one we’re sure anyone would like to receive. We’ve seen [Jiří Praus] make the most of this artform before too, with projects like this stunning tulip or dead-bug Arduino. Video after the break.  Continue reading “LED Heart Beats With The Beholder”

Teardown Of Costco Ceiling Light Reveals Microwave Motion Sensor And Hackable Design

[hclxing] eagerly picked up an LED ceiling light for its ability to be turned on and off remotely, but it turns out that the lamp has quite a few other features. These include adjustable brightness, color temperature, automatic turnoff, light sensing, motion sensing, and more. Before installing, [hclxing] decided to tear it down to see what was involved in bringing all those features to bear, but after opening the lamp there wasn’t much to see. Surprisingly, besides a PCB laden with LEDs, there were exactly two components inside the unit: an AC power adapter and a small white controller unit. That’s it.

Microwave-based motion sensor board on top, controller board for LED ceiling light underneath.

The power adapter is straightforward in that it accepts 100-240 Volts AC and turns it into 30-40 Volts DC for the LEDs, and it appears to provide 5 V for the controller as well. But [hclxing] noticed that the small white controller unit — the only other component besides the LEDs — had an FCC ID on it. A quick bit of online sleuthing revealed that ID is attached to a microwave sensor module. Most of us would probably expect to see a PIR sensor, but this light is motion sensing with microwaves. We have seen such units tested in the past, which links to a video [hclxing] also references.

The microwave motion sensor board is shown here, and underneath it is a dense PCB that controls all other functions. Once [hclxing] identified the wires and their signals, it was off to Costco to buy more because the device looks eminently hackable. We’re sure [hclxing] can do it, given their past history with reverse-engineering WyzeSense hardware.

Laser Artistry Hack Chat

Join us on Wednesday, April 1 at noon Pacific for the Laser Artistry Hack Chat with Seb Lee-Delisle!

It’s hard to forget the first time you see a laser light show. A staple at concerts starting in the 1980s, seeing a green laser lance out over the heads of tens of thousands of screaming fans to trace out an animated figure or pulsating geometric shapes was pure fascination, and wondering how it was all done was half the fun. As we all know now, it was all done with mirrors, tiny and connected to low-inertia galvanometers capable of the twitchiest of movements, yet precise enough to position the beam of light exactly where it needed to be to create the desired illusion. It was engineering, science, and art all wrapped up into one package.

Fast forward to the present day, and laser show technology has certainly advanced. Bulky laser tubes have been replaced by solid-state devices, more colors are available, and galvo designs have improved. The art and artistry of the laserist have grown with the tech, which is where our guest Seb Lee-Delisle comes into his own. We’ve featured some of Seb’s work before, like an Asteroids laser vector display and enormous public laser displays. And now he’ll stop by to talk about how the art and the tech combine in his hands to produce something much greater than the sum of its parts.

join-hack-chatOur Hack Chats are live community events in the Hackaday.io Hack Chat group messaging. This week we’ll be sitting down on Wednesday, April 1 at 12:00 PM Pacific time. If time zones have got you down, we have a handy time zone converter.

Click that speech bubble to the right, and you’ll be taken directly to the Hack Chat group on Hackaday.io. You don’t have to wait until Wednesday; join whenever you want and you can see what the community is talking about.

Continue reading “Laser Artistry Hack Chat”