Logitech Joystick Gets A Mechanical Sidekick

The mechanical keyboard rabbit hole is a deep one, and can swallow up as much money and time as you want to spend. If you’ve become spoiled on the touch and responsiveness of a Cherry MX or other mechanical switch, you might even start putting them on other user interfaces as well, such as this Logitech joystick that now sports a few very usable mechanical keys for the touch-conscious among us.

The Logitech Extreme 3D Pro that [ErkHal] and friend [HeKeKe] modified to accept the mechanical keys originally had a set of input buttons on the side, but these were unreliable and error-prone with a very long, inconsistent push. Soldering some mechanical switches directly on the existing board was a nice improvement, but the pair decided that they could do even better and rolled out an entire custom PCB to mount the keys more ergonomically. The switches are Kailh Choc V2 Browns and seem to have done a great job of improving the responsiveness of the joystick’s side buttons. If you want to spin up your own version, they’ve made the PCBs available on their GitHub page.

While [ErkHal] notes the switches aren’t the best and were only used since they were available, they certainly appear to work much better than what the joystick shipped with originally. In fact, we recently saw similar switches used to make a custom mechanical keyboard made for the PinePhone.

An Epic Quest For A Motorized Volume Knob

[Haris Andrianakis] likes his Logitech Z623 sound system. He likes it a lot. Which is why he was willing to hack in his own remote volume control rather than just get a new pair of speakers. But he certainly didn’t make things easy on himself. Rather than trying to tap into the electronics, he decided to take the long way around and motorize the volume knob.

The belt drive looked great, but didn’t work.

The idea seemed simple enough. Just drill a hole through the PCB behind the knob’s potentiometer, attach some kind of extension to the axle, and turn it with a small servo. Modifying the PCB and potentiometer went well enough, but the trouble came when [Haris] actually tried to turn the thing.

Attaching the servo directly to the axle worked, but it made turning the knob by hand extremely difficult. His next idea was to add a small belt into the mix so there would be some slip in the system. But after designing a 3D printed servo mount and turning custom pulleys on the lathe, it ended up having too much slip, and the knob didn’t always move when the servo turned.

He then swapped out the servo for a small stepper motor. The motor was easy enough to spin when powered down, but didn’t have quite enough torque to turn the knob. He tried with a larger stepper motor that he salvaged from an old printer, but since he could only run it at half the recommended 24 VDC, it too had a tendency to skip steps.

After experimenting with some 3D printed reduction gears, [Haris] finally stumbled upon the 28BYJ-48. This small stepper with an integrated gearbox proved to be the perfect solution, as it had enough muscle to turn the knob while at the same time not restricting its movement when powered down. The rest of the project was relatively easy; with a DRV8825, an ESP8266, and an IR receiver, he’s able to spin the stepper with his TV’s remote. A simple web page running on the ESP8266 even allows him to control volume over the network with his smartphone. Based on similar projects we’ve seen, he could probably add support for HDMI CEC as well.

[Haris] says you shouldn’t follow his example, but we’re not so sure. He kept going when others would have given up, and the engineering and thought that went into each attempt is certainly commendable. Even if he hadn’t ultimately gotten this project working, we’d still say it was a valiant hack worthy of praise.

What The Scale? Mouse Teardown Throws Up A Few Surprises

[Eric Weinhoffer] and his colleagues did a great comparative tear down of the MX Master 3 and the MX Master 2S mice from Logitech. Tear down’s are great fun and often end up teaching us a lot. Looking at the insides of a product can tell us a great deal about how to solve certain problems, or avoid pitfalls. Opening up two versions of the same product provides an even greater wealth of useful information on how product design evolves based on lessons learned from the earlier versions. Logitech is no greenhorn when it comes to Mice design, so the MX Master 2S was already almost perfect. But looking at the Master MX 3 shows where the earlier version fell short of expectations and how it could be improved upon.

These mice have intelligent scroll wheels, which can rotate in either “detente” or “freewheel” modes. Detente allows slower, precise scrolling, while freewheeling allows rapid scrolling. The two mice models have completely different, and interesting, methods of achieving these actions. The older version has a rubber-coated wheel and uses a motor, which turns a cam. This forces a detent ball onto the inside of the wheel for detent mode and releases it for free mode. Once the rubber wears off, the mouse is pretty much headed for the dumpster. The new metal wheel does away with the rubber coating as well as the noisy, slow, and prone to wear-and-tear motor assembly. The actuation is now done using a bi-stable electromagnet. A 25 V pulse magnetizes the coil which sits inside the wheel and it pulls on little metal teeth on the inside rim of the wheel. This gives a noiseless detente feel, without any physical contact. A second 25 V spike de-magnetizes the coil, allowing the scroll wheel to spin freely.

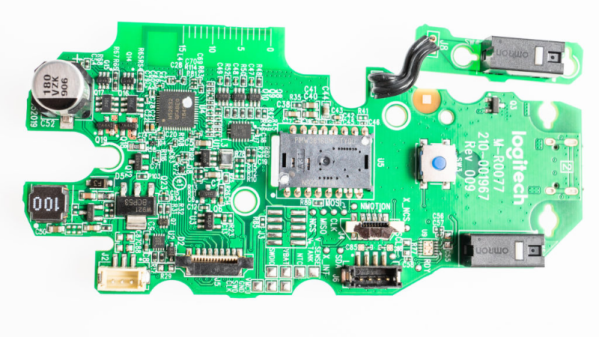
[Eric] points out several incremental changes in design which have resulted in improved ergonomics. He also uncovers a few nuggets of useful information. The use of interchangeable mold inserts help make molds last longer while still offering the flexibility to make changes in the molded part. It’s interesting to see special components being used for withstanding vibration and high-G forces. Some of these insights can be useful for those moving from prototyping to production. There’s one puzzling feature on the new PCB that [Eric] cannot figure out. There is a 15 mm scale screen-printed over the blue tooth antenna. If you have an answer on its purpose, let us know in the comments below.

If you are left-handed (which makes 10% of us), you’re out of luck with these right-handed mice and might like to sign one of the several online petitions demanding lefty versions.

Wireless Mouse Power-Up: Logitech MX Master Gets USB-C And Big Battery

When the internal rechargeable battery in his wireless mouse died, [cmot17] decided it was the perfect excuse for making a couple of modifications. The Logitech MX Master isn’t exactly a budget mouse to begin with, but that doesn’t mean there’s no room for improvement. With the addition of a larger battery and USB-C charging port, a very nice mouse just got even better.

As it turns out, there’s plenty of empty space inside the Logitech MX Master, which made it easy to add a larger battery. The original 500 mAh pack was replaced with a new 950 mAh one, which is often sold under the model number 603443. Realistically, if you wanted to go even bigger it looks like any three wire 3.7 V Li-Po pack would probably work in this application, but nearly doubling the capacity is already a pretty serious bump.

Adding the USB-C connector ended up being quite a bit trickier. [cmot17] ordered a breakout board from Adafruit that was just a little too large to fit inside the mouse. In the end, not only did some of the case need to get cut away internally, but the breakout PCB itself got a considerable trimming. Once it was shoehorned in there, a healthy dose of hot glue was used to make sure nothing shifts around.

Since [cmot17] didn’t change the mouse’s original electronics, the newly upgraded Logitech MX Master won’t actually benefit from the faster charging offered by USB-C. If anything, it’s actually going to charge slower thanks to the beefier battery. But considering how infrequently it will need to be charged with the upgraded capacity (Logitech advertised 40 days with the original 500 mAh battery), we don’t think it will be a problem.

Over the years, we’ve seen plenty of stuff crammed into the lowly mouse. Everything from a full computer, to malicious firmware code has been grafted onto that most ubiquitous of computer peripherals. So in the grand scheme of things, this is perhaps one of the most practical mouse modifications to ever grace these pages.

Harmony Hub Hacked And Patched

When we say “hack” here we most often mean either modifying something to do something different or building something out of parts. But as we build more Internet-connected things, it is worthwhile to think about the other kind of hack where people gain unauthorized access to a system. For example, you wouldn’t think a remote control would be a big deal for hackers. But the Logitech Harmony Hub connects to the Internet and runs Linux. What’s more is it can control smart devices like door locks and thermostats, so hacking it could cause problems. FireEye’s Mandian Red Team set out to hack the Harmony and found it had a lot of huge security problems.

The remote didn’t check Logitech’s SSL certificate for validity. It didn’t have a secure update process. There were developer tools (an SSH server) left inactive in the production firmware and — surprisingly — the root password was blank! The team shared their findings with Logitech before publishing the report and the latest patch from the company fixes these problems. But it is instructive to think about how your Raspberry Pi project would fare under the same scrutiny.

In fact, that’s the most interesting part of the story is the blow-by-blow description of the attack. We won’t spoil the details, but the approach was to feed the device a fake update package that turned on a dormant ssh server. Although they started by trying to solder wires to a serial port, that wasn’t productive and the final attack didn’t require any of that.

We’ve looked at some ways to harden Linux systems like the Raspberry Pi before, but honestly, it is an ongoing battle. We’ve seen plenty of devices with cybersecurity holes in them — some not found by good guy hackers first.

Wireless Protocol Reverse Engineered To Create Wrist Wearable Mouse

We’ve seen a few near-future sci-fi films recently where computers respond not just to touchscreen gestures but also to broad commands, like swiping a phone to throw its display onto a large flat panel display. It’s a nice metaphor, and if we’re going to see something like it soon, perhaps this wrist-mounted pointing device will be one way to get there.

The video below shows the finished product in action, with the cursor controlled by arm movements. Finger gestures that are very much like handling a real mouse’s buttons are interpreted as clicks. The wearable has a Nano, an MPU6050 IMU, and a nRF24L01 transceiver, all powered by some coin cells and tucked nicely into a 3D-printed case. To be honest, as cool as [Ronan Gaillard]’s wrist mouse is, the real story here is the reverse engineering he and his classmate did to pull this one off.

The road to the finished product was very interesting and more detail is shared in their final presentation (in French and heavy with memes). Our French is sufficient only to decipher “Le dongle Logitech,” but there are enough packet diagrams supporting into get the gist. They sniffed the packets going between a wireless keyboard and its dongle and figured out how to imitate mouse movements using an NRF24 module. Translating wrist and finger movements to cursor position via the 6-axis IMU involved some fairly fancy math, but it all seems to have worked in the end, and it makes for a very impressive project.

Is sniffing wireless packets in your future? Perhaps this guide to Wireshark and the nRF24L01 will prove useful.

Continue reading “Wireless Protocol Reverse Engineered To Create Wrist Wearable Mouse”

Remote Controlled Streaming Speakers

For want of a better use of a spare Raspberry Pi Zero W and a set of LogitechZ-680 surround sound speakers, [Andre van Kammen] hacked them together to make them stream music playing from his phone.

It was stumbling across the Pi Music Box distribution that really got the ball rolling, and the purchase of a pHAT DAC laid the foundation. Cracking open the speakers’ controller case, [Kammen] was able to get 5V of power off some terminals even when the speakers were on standby — awesome! — which the Pi could use. Power and volume are controlled via the Pi’s GPIO pins with a diode to drop the voltage and prevent shorts.

Now, how to tell whether the speakers are on or off? Well, a pin on the display connector changes to 4.3V when it’s on, so wiring a 10k resistor and a diode to said pin is a hackable solution. Finishing off the wired connections, it proved possible to cram the pHAT DAC inside the controller case with the GPIO header sticking out the back to mount the Pi upon with no other external wires — double awesome!

Continue reading “Remote Controlled Streaming Speakers”