Putting Your Time In

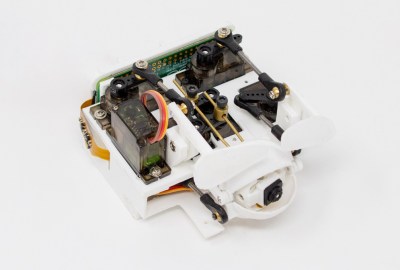
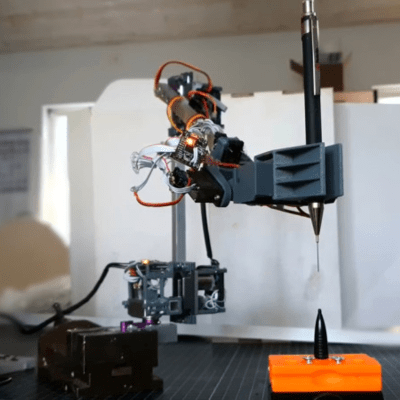
I was absolutely struck by a hack this week — [Adam Bäckström]’s amazing robot arm built with modified hobby servos. Basically, he’s taken apart and re-built some affordable off-the-shelf servo motors, and like the 6-Million-Dollar Man, he’s rebuilt them better, stronger, faster. OK, and smoother. We have the technology.

The results are undeniably fantastic, and enable the experienced hacker to get champagne robot motion control on a grape-juice budget by employing some heavy control theory, and redundant sensors to overcome geartrain backlash, which is the devil of cheap servos. But this didn’t come out of nowhere. In his writeup, [Adam] starts off with “You could say this project started when I ordered six endless servos in middle school, more than 15 years ago.” And it shows.

Go check out this video of his first version of the modified servos, from a six-axis arm he built in 2009(!). He’s built in analog position sensors in the motors, which lets him control the speed and makes it work better than any other hobby servo arm you’ve ever seen, but there’s still visible backlash in the gears. A mere twelve years later, he’s got magnetic encoders on the output and a fast inner loop compensates for the backlash. The result is that the current arm moves faster and smoother, while retaining accuracy.

Twelve years. I assume that [Adam] has had some other projects on his plate as well, but that’s a long term project by any account. I’m stoked to see his work, not the least because it should help a lot of others who are ready to step up their desktop servo-arm projects. But the real take-home lesson here is that if you’ve got a tough problem that you’re hacking on, you don’t have to get it done this weekend. You don’t have to get it done next weekend either. Keep hammering on it as long as you need, but keep on hammering. When you get it done, the results will be all the better for the long, slow, brewing time. What’s the longest project that you’ve ever worked on?

Coil Winding Machine Makes It Easy

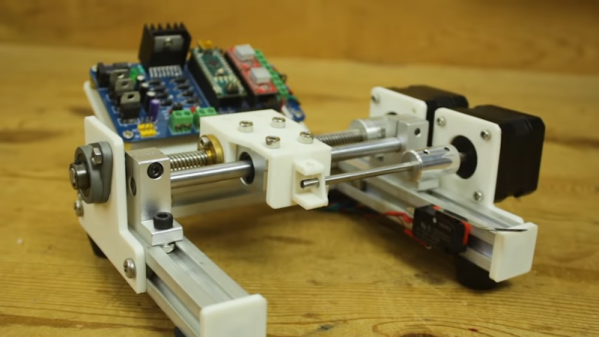
[Mr Innovative] needed to wind some coils, and decided to make a machine to do the work. Making such machines has become a lot easier over the years. There was a time when we might probably have had to hack an old printer or scanner to get linear rods and stepper motors. Now, thanks to widespread 3D printing, we can order parts like that from lots of places. The 3D printing helps, too, to fabricate all the little custom widgets you need to put something like that together.

The machine looks great. It uses a number of parts that would look at home on a 3D printer or CNC build. We thought his Chinese mini table saw did a great job cutting the aluminum extrusions, but we did worry about the safety of his fingers. We’ll admit we are generally lazy and buy the extrusions precut.

Continue reading “Coil Winding Machine Makes It Easy”

Buttonpusher Automates Animal Crossing Tasks

Press button, wait, press button again, repeat. There must be a better way! If that kind of interaction drives you nuts, you’ll probably appreciate [Tommy]’s buttonpusher, which has only one job: automate away some of the more boring parts of Nintendo’s Animal Crossing. On one hand the job the device does is very simple: press a button on the Nintendo joy-con in a preprogrammed pattern. There’s no feedback loop, it just dumbly presses and waits. But there are still quite a few interesting bits to this build.

Rigid mounting combined with interfacing the actuator to the servo horn (instead of to the servo shaft) were the keys to reliable button pushing.

For one thing, [Tommy] discovered that the little 9g RC servo can reliably exert enough force to press the button on the joy-con with the right adapter. He had assumed the servo would be too weak to do the job without a greater mechanical advantage, but a simple hammer-style actuator that attaches to the servo horn easily does the job. Well, it does as long as the servo and joy-con are held rigidly; his first version allowed a little too much wiggle in how well the parts were held, and button presses didn’t quite register. With a 3D-printed fixture to rigidly mount both the servo and the joy-con, things were fine.

In the process of making buttonpusher, which uses CircuitPython, [Tommy] created a tool to automate away another pesky task he was running into: circuitpython_tools was created to automatically watch for code changes, convert the .py files into (smaller) MicroPython bytecode .mpy files, then automatically deploy to the board. This saved [Tommy] a lot of time and hassle during development, but it was only necessary because he quickly ran out of memory on his M0 Metro Express board, and couldn’t fit his code in any other way.

Still, it’s a good example of how one project can sometimes spawn others, and lead to all kinds of lessons learned. You can see buttonpusher automate the crafting process in Animal Crossing in the video, embedded below.

Continue reading “Buttonpusher Automates Animal Crossing Tasks”

Simple Slide Whistle Gets A MIDI Makeover

On today’s episode of “Will it MIDI?” we have the common slide whistle. Spoiler alert: yes, it will, and the results are just on the edge of charming and — well, a little weird.

As maker [mitxela] points out, for all its simplicity, the slide whistle is a difficult instrument to play. Or, at least a difficult one to hit a note repeatably. It’s a bit like a tiny plastic trombone, in that both lack keys or stops that limit the vibrating column of air to a specific length. Actually, the beginning of the video below shows a clever fix for that problem on the slide whistle using magnets, but that’s mainly a side project.

[mitxela]’s MIDI-fication of the slide whistle required a bit more than a few magnets. To move the slide to defined positions, a pair of high-precision servos was connected by a laser-cut plywood scissors linkage. The lung-power of the musician is replaced by a small electric blower, mounted away from the whistle and supplying air through a long hose. The fan’s speed, and therefore the speed of the airflow, can be varied; this prevents low notes from shifting up in register from over-blowing, if that’s the right term. Another servo controls a damper that shuts off the flow of air from the mouth of the whistle to control notes without having to turn off the fan completely. The main article goes into detail about the control electronics and the calibration process.

The video has a few YouTube copyright strikes demo songs, and we have to say we’re impressed with the responsiveness of the mechanism. Some will object to the excess servo noise, but we found it nice — almost like guitar string-squeak. We like the tunes where [mitxela]’s servo-plucked music box joined in, too.

Logic Meter Aims To Make Hobby Electronics Troubleshooting Easier

The basic test instrument suite — a bench power supply, a good multimeter and perhaps an oscilloscope — is extremely flexible, but not exactly “plug and play” when it comes to diagnosing problems with some common hardware setups. A problem with a servo driver, for example, might be easy enough to sort of with a scope, but setting everything up to see what’s going on with the PWM signal takes some time.

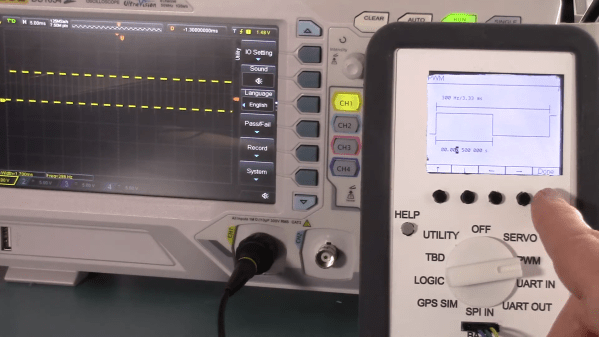
There’s got to be a better way to diagnose hobby electronics woes, and if [Bob Alexander] has his way, his “Logic Meter”, or something very close to it, will be the next must-have bench tool. The Logic Meter combines some of the functionality of an oscilloscope and a logic analyzer into a handy instrument that’s as easy to use as a multimeter. The Logic Meter’s probes connect to logic-level signals in a circuit and can be set up to capture or send serial data, either directly to or from a UART or via an SPI bus connection. There are also functions for testing servos and similar devices with a configurable PWM output. [Bob] rounds out the functionality with a GPS simulator and a simple logic analyzer, plus some utility functions.

The beauty part of the Logic Meter is that [Bob] has left where it goes next largely up to the community. He’s got a GitHub repo with details on the PIC32-based hardware, and the video below makes it clear that this is just a jumping-off point to further work that he hopes results in a commercial version of the Logic Meter. That’s a refreshing attitude, and we hope it pays off; from the look of a few of [Bob]’s retrocomputing makeovers, something like the Logic Meter could come in pretty handy.

Continue reading “Logic Meter Aims To Make Hobby Electronics Troubleshooting Easier”

Chain Link Clock Drags Time Along

When it comes to building quirky clocks that also double up as beautiful animated sculptures, [Ekaggrat Singh Kalsi] is a master par excellence. His latest offering is the Getula, a time piece inspired by an old, discarded bicycle chain, while the name seems inspired by the chain kingsnake — Lampropeltis getula – due to its snake like movements. Getula shows time by manipulating eight short pieces of chain to show four digits representing hours and minutes. But wrangling a flexible piece of chain to morph in to numerals turned out to be a far more complex endeavour than he bargained for, and he had to settle for a few compromises along the way.

He could not use real bicycle chains because they are too flexible and heavy, which made it impossible for them to hold the shapes he desired. Instead, he designed custom 3D printed chains similar to drag link chains used for cable management. For rigidity, he added O-rings in the chain joints to increase friction. But even this was not sufficient to completely form each digit using a single piece of chain.

The compromise was to use two pieces of chain per digit, which results in a more artistic expression of time keeping. Each piece of chain is pushed or pulled using stepper motors, and bent in to shape using servos. The end result is a mesmerising dance of chain links, steppers and servos every minute, around the clock.

Designing the clock was no trivial exercise, so [Ekaggrat] improved it over a couple of iterations. There are four modular blocks working in synchronism — each consisting of an Arduino Nano, two stepper motor drives with motors and two servos. Each chain has an embedded magnet at its start, which is sensed by a hall sensor to initialise the chain to a known position. A DS1307 RTC module provides timekeeping. The project is still work in progress, and [Ekaggrat] has managed to finish off just one module out of four — giving us a tantalizing glimpse of Getula welcoming 2021.

If you’d prefer something more shiny, check out his Unique Clock that finally unites Hackers and Sequins, while some of his other creations, such as the Edgytokei Clock and the Torlo Clock feature beautiful and intricate 3D printed mechanisms.

Continue reading “Chain Link Clock Drags Time Along”

Remote Control Robot Deals Dominoes

Oh, dominoes — the fun of knocking them down is inversely proportional to the pain of setting them all up again. [DIY Machines] is saving loads of time by automating the boring part with a remote control domino-laying machine. If only it could pick them back up.

This machine can be driven directly over Bluetooth like an R/C car, or programmed to follow a predetermined path via Arduino code. Here’s how it works: an Arduino Uno drives two servos and one motor. The 1:90 geared motor drives the robot around using a 180° servo to steer. A continuous servo turns the carousel, which holds nearly 140 dominoes. We love that the carousel is designed to be hot-swappable, so you can keep a spare ready to go.

[DIY Machines] really thought of everything. Every dozen or so dominoes, the machine leaves a gap in case one of the dominoes is tipped prematurely. There are also a couple of accessories for it, like a speedy domino loading stick and a fun little staircase bridge to add to your domino creations. Though all the machine files are freely available, [DIY Machines] requests a small donation for the accessories files. Check out the complete build video after the break, followed by a bonus video that focuses on upgrading the machine with an HM10 Bluetooth module for controlling it directly with a phone.

This certainly isn’t the first domino-laying device we’ve seen, though it might be the most accessorized. [Matthias Wandel]’s version uses only one motor to move and deal the dominoes.

Continue reading “Remote Control Robot Deals Dominoes”