Samsung Releases Minimum Viable Galaxy Upcycling

It’s a tragedy every time a modern smartphone is tossed into e-waste. We prefer to find another life for these bundles of useful hardware. But given all the on-board barriers erected by manufacturers, it’s impractical to repurpose smartphones without their support. A bit of good news on this front is Samsung testing the waters with a public beta of their “Galaxy Upcycling at Home” program, turning a few select devices into SmartThings sensor nodes.

More devices and functionality are promised, but this initial release is barely a shadow of what Samsung promised in 2017. Missed the announcement back then? Head over to a “How it started/How it’s going” comparison from iFixit, who minced no words starting with their title Galaxy Upcycling: How Samsung Ruined Their Best Idea in Years. They saw a bunch of Samsung engineers at Bay Area Maker Faire 2017, showing off a bunch of fun projects reusing old phones as open hardware. The placeholder GitHub repository left from that announcement still has a vision of a community of makers dreaming up novel uses. This is our jam! But sadly it has remained a placeholder for four years and, given what we see today, it is more likely to be taken down than to become reality.

The stark difference between original promise and actual results feel like an amateur Kickstarter, not something from a giant international conglomerate. Possibly for the same reason: lack of resources and expertise for execution. It’s hard to find support in a large corporate bureaucracy when there is no obvious contribution to the bottom line. Even today’s limited form has only a tenuous link of possibly helping to sell other SmartThings-enabled smart home devices.

Ars Technica was similarly unimpressed with launch functionality, but was more diplomatic describing the beta as “a very modest starting point”. XDA-Developers likewise pinned their hopes on the “more devices will be supported in the future” part of Samsung’s announcement. Until Samsung delivers on more of the original promise, we’ll continue to be hampered by all the existing reasons hacking our old cell phones are harder than they should be. Sometimes an idea can be fulfilled by helpful apps but other times will require hacking into our devices the old-fashioned way.

WiFi Penetration Testing With An ESP32

WiFi is one of those technologies that most of us would have trouble living without. Unfortunately, there are several vulnerabilities in the underlying 802.11 standards that could potentially be exploited. To demonstrate just how simple this can be, [risinek] developed the ESP32 Wi-Fi Penetration Tool that runs on cheap dev boards and can execute deauthentication and Denial of Service attacks, and capture handshakes and PMKIDs.

The main challenge in this project is to implement these attacks while using the ESP-IDF development framework. The closed source WiFi libraries of the ESP-IDF block specific arbitrary frames like deauthentication frames. To get around this [risinek] used two different approaches. The first is to bypass the declaration of the blocking function at compile-time, which is borrowed from the esp32-deauther project. The second approach doesn’t require any modifications to the ESP-IDF. It works by creating a rogue access point (AP) identical to the targeted access point, which will send a deauthentication frame whenever one of the devices tries to connect to it instead of the real AP.

WPA/WPA2 handshakes are captured by passively listening for devices connecting to the target network, or running a deauth attack and then listening for when devices reconnect. PMKIDs are captured from APs with the roaming feature enabled, by analyzing the first message of a WPA handshake. ESP32 Wi-Fi Penetration Tool will also format the captured data into PCAP and HCCAPX files ready to be used with Wireshark and Hashcat. To manage the tool, it creates a management access point where the target and attack type is selected, and the resulting data can be downloaded. Pair the ESP32 with a battery, and everything can be done on the go. The project is part of [risinek]’s master’s thesis, and the full academic article is an educating read. Continue reading “WiFi Penetration Testing With An ESP32”

Obsessively Explaining The Visual Effects In Flight Of The Navigator

[Captain Disillusion] has earned a reputation on YouTube for debunking hoaxes and spreading a healthy sense of skepticism while having some of the highest production value on the platform and pretending to be some kind of inter-dimensional superhero. You’ve likely seen him give a careful explanation of how some viral video was faked alongside a generous dose of sarcastic humor and his own impressive visual effects. VFXcool is a series on his channel that takes deep dives into movies that are historically significant in the effects industry. For this installment, [Captain Disillusion]’s “intern”, [Alan], takes over to breakdown how filmmakers brought a futuristic spaceship to life in 1986’s Flight of the Navigator.

Making a movie requires hacks upon hacks, and that goes double in the era when the technology and techniques we now take for granted were being developed even as they were being put to film. The range of topics covered here is extreme: from full-scale props to models; from robotic motion control rigs to stop motion animation; from early computer graphics to the convoluted optical compositing that was necessary before digital workflows were possible. The tools themselves may be outdated, but understanding the history and the processes allows for a deeper insight into how we accomplish these kinds of effects today. And, really, it’s just so… cool.

[Captain Disillusion]’s previous VFXcool is all about the Back to the Future trilogy, and it’s a little shorter with more information on motion control rigs. We also love seeing how people make DIY effects in their own homes. LEGO actually seems like a pretty popular option for putting together whole scenes in amateur filmmaking.

Continue reading “Obsessively Explaining The Visual Effects In Flight Of The Navigator

Yet Another Rigol DS1054Z Viewer

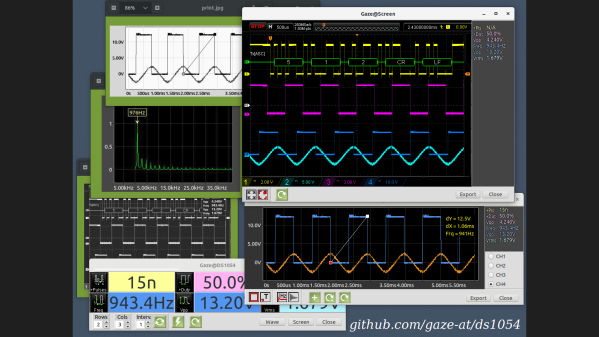
Tired of squinting at the small numbers on the oscilloscope display, [Alfred] aka [Gaze@] decided to take matters into his own hands and wrote yet another tool to remotely view images from a Rigol DS1054Z. At least that was the initial idea. But, it grew unexpectedly — as [Alfred] says, “the more the project turned out to be fun, the more it got out of hand”. We know the feeling well.

In addition to being able to simply view and export the screen, the program implements waveform measurements (we’re not sure if it is using the measurement ability of the ‘scope, or actually performing measurements in the program). And as you can see in the animated GIF of the program in operation over on the GitHub repository, the numbers are certainly clear and legible. His problem of squinting at the small screen has indeed been solved.

This is coded in Pascal (FPC Lazarus), but we weren’t able to browse the program because [Alfred] hasn’t posted the source code yet. It is written only for Linux, and he has tested it on Ubuntu, Debian, Fedora, and Manjaro. The project relies on Python, PyVisa, and gtk2, and talks to your DS1054Z over USB or LAN. The installation instructions are well documented, but as [Alfred] himself warns, if you encounter trouble arising from subtle dependency version conflicts, you may need to be a nerd and/or a pensioner with unlimited time on your hands to solve them. There is no users guide nor extensive help according to [Alfred]. However, simple hints might be found in hover text or by pressing F1. Disclaimers aside, this looks like an interesting project to try out.

As [Alfred] notes, there are many other tools available to fetch data and images from your Rigol oscilloscope. [Jenny List] wrote a two-part series on using Python to control your test instruments, and here’s an example of a simple Python script that does a screen grab. Do you have a favorite way to remotely operate your oscilloscope? Let us know in the comments below.

Speech Recognition On An Arduino Nano?

Like most of us, [Peter] had a bit of extra time on his hands during quarantine and decided to take a look back at speech recognition technology in the 1970s. Quickly, he started thinking to himself, “Hmm…I wonder if I could do this with an Arduino Nano?” We’ve all probably had similar thoughts, but [Peter] really put his theory to the test.

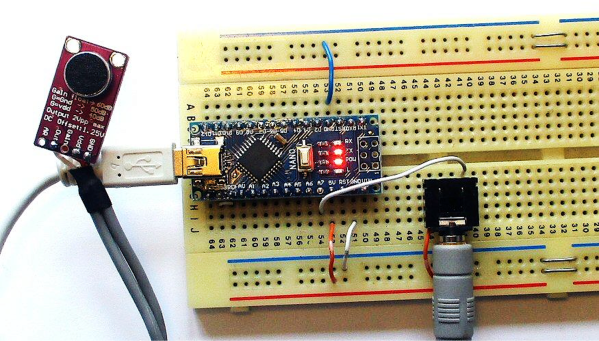
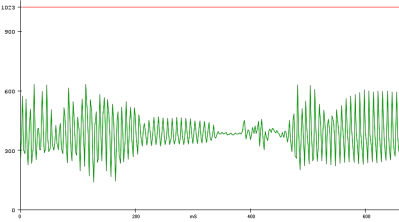
The hardware itself is pretty straightforward. There is an Arduino Nano to run the speech recognition algorithm and a MAX9814 microphone amplifier to capture the voice commands. However, the beauty of [Peter’s] approach, lies in his software implementation. [Peter] has a bit of an interplay between a custom PC program he wrote and the Arduino Nano. The learning aspect of his algorithm is done on a PC, but the implementation is done in real-time on the Arduino Nano, a typical approach for really any machine learning algorithm deployed on a microcontroller. To capture sample audio commands, or utterances, [Peter] first had to optimize the Nano’s ADC so he could get sufficient sample rates for speech processing. Doing a bit of low-level programming, he achieved a sample rate of 9ksps, which is plenty fast for audio processing.

To analyze the utterances, he first divided each sample utterance into 50 ms segments. Think of dividing a single spoken word into its different syllables. Like analyzing the “se-” in “seven” separate from the “-ven.” 50 ms might be too long or too short to capture each syllable cleanly, but hopefully, that gives you a good mental picture of what [Peter’s] program is doing. He then calculated the energy of 5 different frequency bands, for every segment of every utterance. Normally that’s done using a Fourier transform, but the Nano doesn’t have enough processing power to compute the Fourier transform in real-time, so Peter tried a different approach. Instead, he implemented 5 sets of digital bandpass filters, allowing him to more easily compute the energy of the signal in each frequency band.

The energy of each frequency band for every segment is then sent to a PC where a custom-written program creates “templates” based on the sample utterances he generates. The crux of his algorithm is comparing how closely the energy of each frequency band for each utterance (and for each segment) is to the template. The PC program produces a .h file that can be compiled directly on the Nano. He uses the example of being able to recognize the numbers 0-9, but you could change those commands to “start” or “stop,” for example, if you would like to.

[Peter] admits that you can’t implement the type of speech recognition on an Arduino Nano that we’ve come to expect from those covert listening devices, but he mentions small, hands-free devices like a head-mounted multimeter could benefit from a single word or single phrase voice command. And maybe it could put your mind at ease knowing everything you say isn’t immediately getting beamed into the cloud and given to our AI overlords. Or maybe we’re all starting to get used to this. Whatever your position is on the current state of AI, hopefully, you’ve gained some inspiration for your next project.

All-Wheel Drive Bicycle Using Hand Drill Parts

A skilled mountain biker can cross some extreme terrain, but [The Q] thought there might be room for improvement, so he converted a fat bike to all-wheel drive.

The major challenge here is transferring pedal power to the front wheels, especially around the headset. [The Q] solved this by effectively building a differential from the parts of a very old hand drill. Since the front wheel needs to rotate at the same speed as the rear, one long chain loops from the rear wheel to the headset, tensioned by a pair of derailleurs. This front sprocket turns a series of spur gears and bevel gear arranged around the headset, which transfers the power down to the front wheel via another chain.

It would be interesting to feel what the bike rides like in soft sand, mud, and over rocks. We can see it has some advantages in those conditions but were unsure if it would be enough to offset the penalty in weight and complexity. The additional chains and gears certainly look like they’re asking to catch foliage, clothing, and maybe even skin. However, we suspect [The Q] was more likely doing it for the challenge of the build, which we can certainly appreciate. With the rise of e-bikes, adding a hub motor to the front wheel seems like a simpler option.

We’ve seen several interesting bicycle hacks over the years, including a strandbeest rear end, 3D printed tires and an automatic shifter. Continue reading “All-Wheel Drive Bicycle Using Hand Drill Parts”

ESP8266 Adds WiFi To A 433 MHz Weather Station

There’s no shortage of cheap weather stations on the market that pull in data from several wireless sensors running in the 433 to 900 MHz range and present you with a slick little desktop display, but that’s usually where the flow of information stops. Looking to bridge the gap and bring all that local climate data onto the Internet, [Jonathan Diamond] decided to reverse engineer how his weather station worked.

The first phase of this project involved an RTL-SDR receiver, GNURadio, and a sprinkling of Python. [Jonathan] was able to lock onto the signal and piece together the data packets that reported variables such as temperature, wind speed, and rainfall. Each one of these was a small puzzle in itself, and in the end, there’s still a few bits which he hasn’t quite figured out. But he at least had enough to move onto the next step.

Tapping into the radio module.

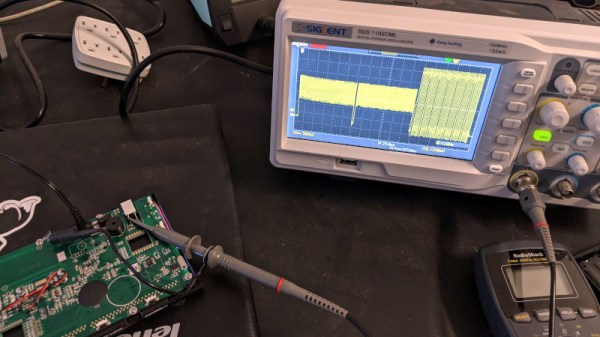
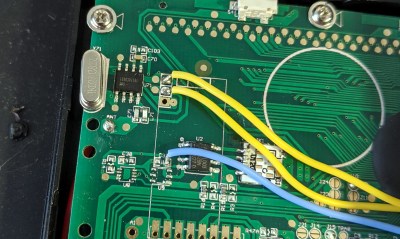
Now at this point, he could have pulled the data right out of the air with his RTL-SDR. But looking to push his skills to the next level, [Jonathan] decided to open up the base station and isolate its receiver. Since he already decoded the packets on the RF side, he knew exactly what he was looking for with his oscilloscope and logic analyzer. Once he was tapped into the feed coming from the radio, the final step was writing some code for the ESP8266 that could listen on the line, interpret the data packets, and push the resulting variables out over the network.

In this case, [Jonathan] decided to funnel all the data into Weather Underground by way of the Personal Weather Station API. This not only let him view the data through their web interface and smartphone application, but brought their hyperlocal forecasting technology into the mix at no extra charge. If you’re not interested in sharing your info with the public, it would be a trivial matter to change the firmware so the data is published to a local MQTT broker, or whatever else floats your proverbial boat.

If you’re really lucky, your own weather station may already have an ESP8266 onboard and is dumping all its collected data to the serial port. But if not, projects like this one that break down how to reverse engineer a wireless signal can be a great source of inspiration and guidance should you decide to try and crack the code.