Bike Computer Exploration Uncovers A Hidden Android

As a happy side-effect of the smartphone revolution, the world is now awash with tiny computers that are incredibly cheap thanks to the nearly unfathomable volumes in which their components are manufactured. There wouldn’t be a $10 Raspberry Pi Zero if the billions of smartphones that were pumped out before it hadn’t dropped the cost of the individual components to literal pennies. That also means that smartphone hardware, or at least systems that are very close to it, have started to pop up in some unexpected places.

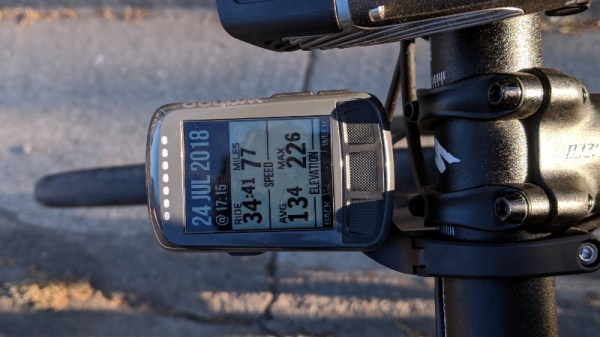
When [Joshua Wise] recently took ownership of a Wahoo ELEMNT BOLT bike computer, he wondered how it worked. With impressive list of features such as Internet connectivity, GPS mapping, and Bluetooth Low Energy support, he reasoned the pocket-sized device must have some pretty decent hardware under the hood. With some poking and prodding he found the device was powered by a MediaTek SoC and incredibly had a full-blown install of Android running in the background.

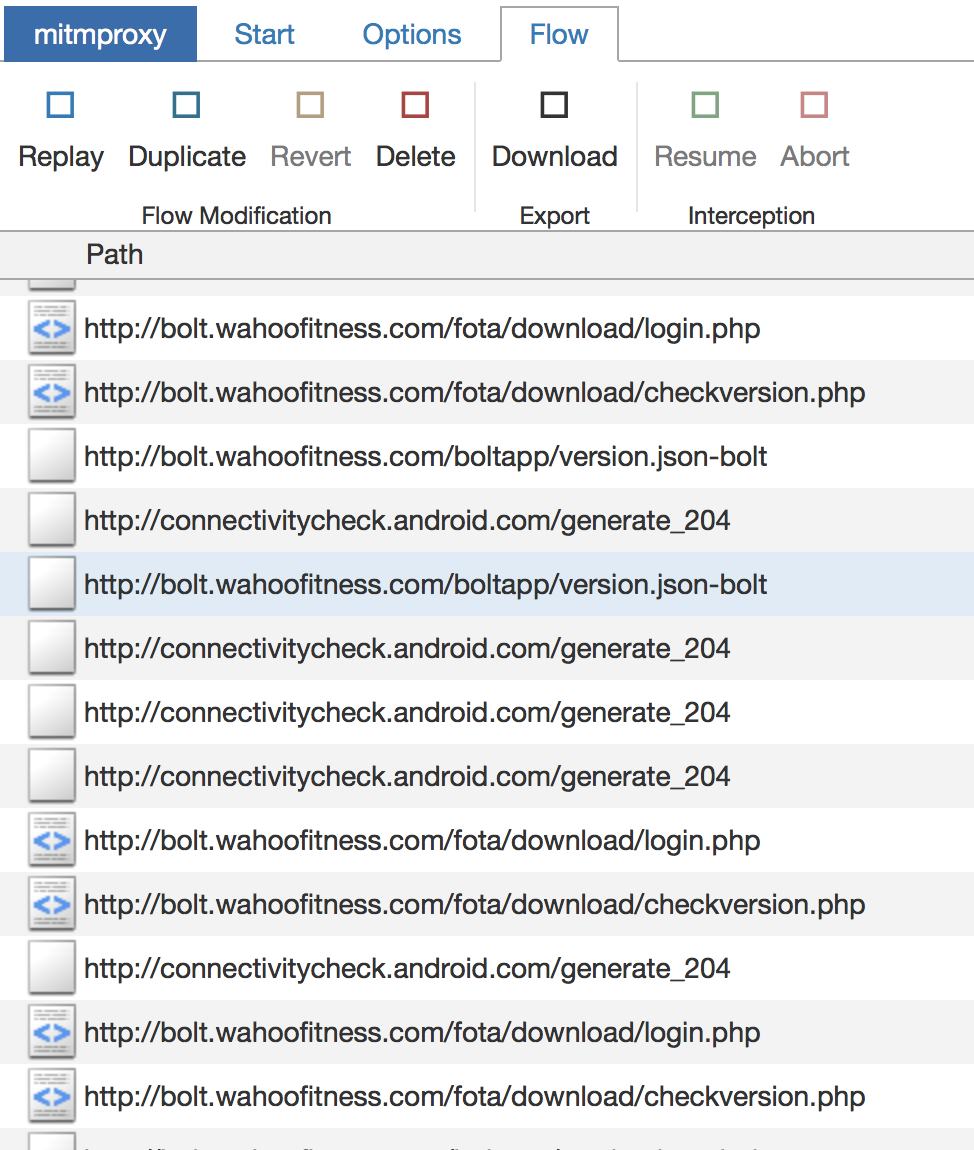
So how does one find out that their lowly bike computer is essentially a cleverly disguised smartphone? If you’re [Joshua], you listen to who it’s trying to talk do when doing a firmware update over the Internet. He used mitmproxy running between his Internet connection and a WiFi access point setup specifically for the BOLT, from there, he was able to see all of the servers it was connecting to. Seeing the device pull some data down from MediaTek’s servers was a pretty good indication of whose hardware was actually inside the thing, and when it ultimately downloaded some Android .apk files from the Wahoo website, it became pretty clear what operating system it was running underneath the customized user interface.

Further examination of the Bolt’s software brought to light a few troubling issues. It turned out that the firmware made extensive use of Apache-licensed code, for which no attribution was given. [Joshua] contacted the company and was eventually referred to the Wahoo’s CEO, Chip Hawkins. Refreshingly, Chip was not only very interested in getting the licensing issues sorted out, but even had some tips on hacking and modifying the device, including how to enable ADB.

Before the publication of this article, we reached out to Chip Hawkins (yes, he really does respond to emails) for a comment, and he told us that not only has he made sure that all of the open source packages used have now been properly attributed to their original authors, but that his team has been providing source code and information to those who request it. He says that he’s been proud to see owners of his products modifying them for their specific needs, and he’s happy to facilitate that in any way that he can.

Open source license compliance is a big deal in the hacking community, and we’ve seen how being on the wrong side of the GPL can lead to lost sales. It’s good to see Wahoo taking steps to make sure they comply with all applicable licences, but we’re even more impressed with their positive stance on customers exploring and modifying their products. If more companies took such an enlightened approach to hacking, we’d all be a lot better off.

[Thanks to Roman for the tip.]

3D Printing With Multiple Soluble Filaments

Complex 3D-printed designs often require the use of an automatically generated support structure around them for stability. While this enables some truly incredible results, it adds considerable time and cost to the printing process. Plus there’s the painstaking process of removing all the support material without damaging the object itself. If you’ve got a suitably high-end 3D printer, one solution to this problem is doing the supports in a water soluble filament; just toss the print into a bath and wait for the support to dissolve away.

But what if you’re trying to print something that’s complex and also needs to be soluble? That’s precisely what [Jacob Blitzer] has been experimenting with recently. The trick is finding two filaments that can be printed at the same time but are dissolved with two different solutions. His experimentation has proved it’s possible to do with consumer-level hardware, but it isn’t easy and it’s definitely not cheap.

You might be wondering what the possible application for this technique is. For [Jacob], he wanted to be able to print hollow molds in complex geometric shapes that would ultimately be filled with concrete. The molds required extensive internal supports that would have been all but impossible to remove if they weren’t printed in a soluble filament. But he also wanted to be able to dissolve the mold once the concrete inside had cured. So he needed one easy to dissolve filament for the supports, and a harder to dissolve one for the actual mold.

For the mold itself, [Jacob] went with High Impact Polystyrene (HIPS) which can be dissolved with an industrial degreaser called Limonene. It’s expensive, and rather nasty to work with, but it does an excellent job of eating away the HIPS so that’s one problem solved. Finding a water-soluble filament for the supports that could be printed at similar temperatures to the HIPS took months of research, but eventually he found one called HyroFill that fit the bill. Unfortunately, it costs an eye-watering $175 USD per kilogram.

So you have the filaments, but what can actually print them at the same time? Multi-material 3D printing is a tricky topic, and there’s a few different approaches that have been developed over the years. In the end, [Jacob] opted to go with the FORMBOT T-Rex that uses the old-school method of having two individual hotends and extruders. It’s the simplest method conceptually, but calibrating such a machine is notoriously difficult. Running two exotic and temperamental filaments at the same time certainly doesn’t help matters.

After all the time, money, and effort put into the project (he also had to write the software that would create the 3D models in the first place) [Jacob] says he’s not exactly thrilled with the results. He’s produced some undeniably stunning pieces, but the failure rate is very high. Still, it’s fascinating research that appears to be the first of its kind, so we’re glad that he’s shared it for the benefit of the community and look forward to seeing where it goes from here.

A Chrome Extension For Configuring RGB LEDs

Like pretty much all of us, [Andy Schwarz] loves RGB LEDs. Specifically he likes to put them on RC vehicles, such as navigation lights on airplanes or flashers and headlights on cars. He found himself often rewriting very similar Arduino code for each one of these installations, and eventually decided he could save himself (and all the other hackers in the world) some time by creating a customizable Arduino firmware specifically for driving RGB LEDs.

The software side of this project, which he’s calling BitsyLED, actually comes in two parts. The first is the firmware itself, which is designed to control common RGB LEDs such as the WS2812 or members of the NeoPixel family. It can run on an Arduino Pro Mini with no problems, but [Andy] has also designed his own open hardware control board based on the ATtiny84 that you can build yourself. Currently you need a USBASP to program it, but he’s working on a second version which will add USB support.

With your controller of choice running the BitsyLED firmware, you need something to configure it. For that, [Andy] has developed a Chrome extension which offers a very slick user interface for setting up colors and patterns. The tool even allows you to create a visual representation of your LEDs so you can get an idea of what it’s going to look like when all the hardware is powered up.

RGB LEDs such as the WS2812 are some of the most common components we see in projects today, mainly because they’re so easy to physically interface with a microcontroller. But even though it only takes a couple of wires to control a large number of LEDs, you still need to write the code for it all. BitsyLED takes a lot of the hassle out of that last part, and we’re very interested to see what the hacker community makes of it.

Continue reading “A Chrome Extension For Configuring RGB LEDs”

Putting Some Smarts Into An Electric Car Charger

Many electric cars feature a timer capability that allows the owner to set which hours they want the vehicle to start pulling a charge. This lets the thrifty EV owner take advantage of the fact that the cost of electricity generally goes down late at night when the demand is lower. The Renault Zoe that [Ryan Walmsley] owns has this feature, but not only does it cost him extra to have it enabled, it’s kind of a hassle to use. So being an enterprising hacker, he decided to implement his own timer in the charger itself.

Now controlling high voltages with a lowly microcontroller might sound dangerous, but it’s actually not nearly as tricky as you might think. The charger and the vehicle actually communicate with low-voltage signals to determine things like the charge rate, so it turns out you don’t need to cut into the AC side of things at all. You just need to intercept the control signals between the two devices and modify them accordingly.

Or do you? As [Ryan] eventually realized, he didn’t need to bother learning how the control signals actually worked since he wasn’t trying to do anything tricky like set the charge rate. He just wanted to be able to stop and start the charging according to what time it was. So all he had to do was put the control signal from his car through a relay controlled by a Particle Photon, allowing him to selectively block communication.

The charger also had an optional key lock, which essentially turns the controller off when the contacts are shorted. [Ryan] put a relay on that as well so he could be absolutely sure the charger cuts the juice at the appropriate time. Then it was just a matter of getting the schedule configured with IFTTT. He mentions the system could even be tweaked to automatically control the charger based on the instantaneous cost of electricity provided by the utility company, rather than assuming overnight is always the most economical.

We’ve seen a fair amount of electric car hacking, but with only a few exceptions, the projects always steer clear of modifying the actual chargers themselves. In general hackers feel a lot safer playing around in the world of DC, but as [Ryan] has shown, safely hacking your EV charger is possible if you do your homework.

Driving A 16×2 LCD With Voltage Modulation

The basic 16×2 LCD is an extremely popular component that we’ve seen used in more projects than we could possibly count. Part of that is because modern microcontrollers make it so easy to work with; if you’ve got an I2C variant of the display, it only takes four wires to drive it. That puts printing a line of text on one of these LCDs a step or two above blinking an LED on a digital pin on the hierarchy of beginner’s electronics projects.

What’s that? Even four wires is too many? In that case, you might be interested in this hack from [Vinod] which shows how you can drive the classic 16×2 with data and power on the same pair of wires. You’ll still need a microcontroller “backpack” for the LCD to interpret the modulated voltage, but if you’ve got an application for a simple remote display, this is definitely worth checking out.

The basic idea is to “blink” the 5 V line so quick that a capacitor on the LCD side can float the electronics over the dips in voltage. As long as one of the pins of the microcontroller is connected to the 5 V line before the capacitor, it will be able to pick up when the line goes low. With a high enough data rate and a large enough capacitor as a buffer, you’re well on the way to encoding your data to be displayed.

For the transmitting side, [Vinod] is using a Python script on his computer that’s sending out the text for the LCD over a standard USB to UART converter. That’s fed into a small circuit put together on a scrap of perfboard that triggers a MOSFET off of the UART TX line.

We actually covered the theory behind this technique years ago, but it’s always interesting to see somebody put together a real-world example. There might not be too many practical uses for this trick in the era of dirt-cheap microcontrollers bristling with I/O, but it might make a fun gag at your hackerspace.

Continue reading “Driving A 16×2 LCD With Voltage Modulation”

Resistance Is Futile, You Want This LED Cube

We’re suckers for a good desk toy here at Hackaday, so this 2019 Hackaday Prize entry from [Jack Flynn] certainly caught our eye. The idea is that by using professionally manufactured dual layer PCBs and only surface mount components, you can create a cube that has an LED matrix on each face and all of the electronics hidden within. We’re not entirely sure if there’s any practical application for such a device, but we know we’d certainly like to have one blinking madly away on our shelf regardless.

Before having any of the PCBs manufactured, [Jack] is putting a considerable amount of thought into the design so he doesn’t end up painting himself info a corner (which is of course eight times as bad when you’re building a cube). By importing the PCB files into OnShape, he’s able to “assemble” a virtual representation of the final product to better understand how everything will fit together. He wants to limit the amount of times the cube will need to be pulled apart, so everything from how it will sit in its 3D printed cradle to the placement of breakaway tabs that ensure the internal power switch is accessible are being carefully planned out.

The current design puts the “brains” on the bottom board, with every other panel holding a daisy-chained MAX7219 to drive its own individual 64 LED matrix. Initially the dimensions of the ATmega328p powered cube will be 42 x 42 x 42 mm, with a total of 384 LEDs. Ultimately, [Jack] hopes the modular nature of the design could allow the size of the cube to be increased, or perhaps even take on a different shape entirely.

Generally the LED cubes we see are of the more wiry variety, so it’s particularly interesting when they take on solid forms like this one. Given the nearly universal popularity of blinking LED gadgets, we think this particular project is well positioned to make the leap from one-off hack to a commercial product.

Continue reading “Resistance Is Futile, You Want This LED Cube”

RFID Payment Ring Made From Dissolved Credit Card

RFID payment systems are one of those things that the community seems to be divided on. Some only see the technology as a potential security liability, and will go a far as to disable the RFID chip in their card so that it can’t be read by a would-be attacker. Others think the ease and convenience of paying for goods by tapping their card or smartphone on the register more than makes up for the relatively remote risk of RFID sniffers. Given the time and effort [David Sikes] put into creating this contactless payment ring, we think it’s pretty clear which camp he’s in.

Alright, so the whole ring making part sounds easy enough, but how does one get an RFID chip that’s linked to their account? Easy. Just call the bank and ask them for one. Of course, they won’t just send you out a little RFID chip and antenna to mount in your hacked up project. (If only things were so simple!) But they will send you a new card if you tell them your old one is getting worn out and needs a replacement. All you have to do when it gets there is liberate the electronics without damaging them.

[David] found that an hour or so in an acetone bath was enough to dissolve the plastic and expose the epoxy-encased RFID chip, assuming you scrape the outer layers of the card off first. He notes that you can speed this part of the process up considerably if you know the exact placement and size of the RFID chip; that way you can cut out just the area you’re interested in rather than having to liquefy the whole card.

Once you have your chip, you just need to mount it into a ring. [David] has designed a 3D printable frame (if you’ve got a high-resolution SLA machine, that is) which accepts the chip and a new antenna made from a coil of 38 AWG magnet wire. With the components settled into the printed frame, its off to a silicone mold and the liberal application of epoxy resin to encapsulate the whole thing in a durable shell.

If a ring is not personal enough for you, then the next step is getting the RFID chip implanted directly into your hand. There are even folks at hacker cons who will do that sort of thing for you, if you’re squeamish.

Continue reading “RFID Payment Ring Made From Dissolved Credit Card”