Raspberry Pi Breathes Life Into A Scale Model SEGA

Miniature game consoles are all the rage right now. Many of the big names in gaming are releasing their own official “mini” versions of their classic machines, but naturally we see plenty of DIY builds around these parts as well. Generally they’re enclosed in a 3D printed model of whatever system they’re looking to emulate, but as you might expect that involves a lot of sanding and painting to achieve a professional look.

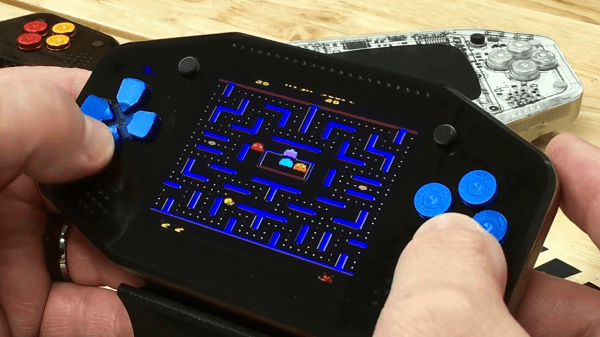
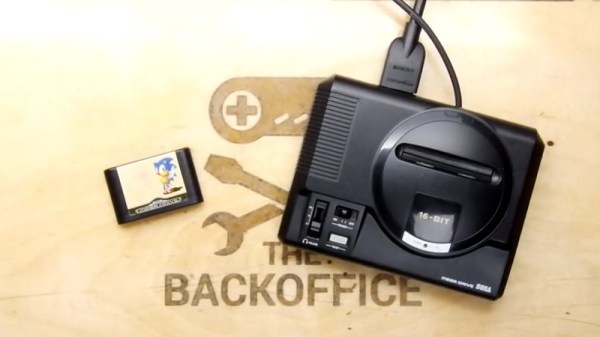
But for SEGA Genesis (or Mega Drive as it was known outside the US) fans, there’s a new option. A company by the name of Retro Electro Models has released a high-fidelity scale model of SEGA’s classic console, so naturally somebody hacked it to hold a Raspberry Pi. Wanting to do the scale detailing of the model justice, [Andrew Armstrong] went the extra mile to get the power button on the front of the console working, and even added support for swapping games via RFID tags.

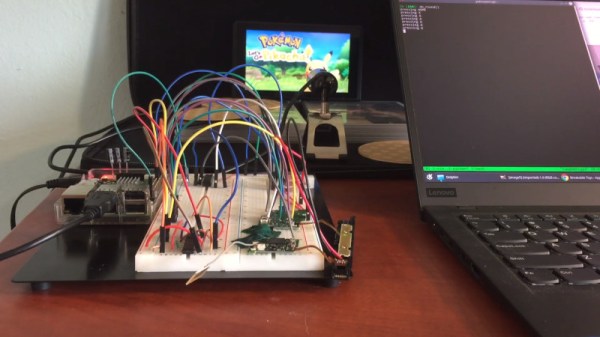
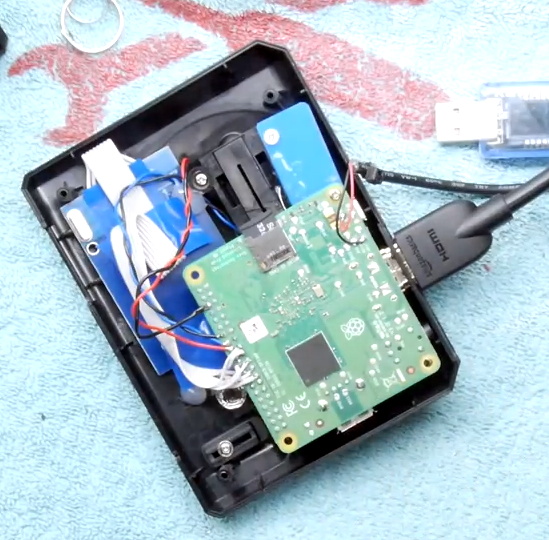
[Andrew] uses the Raspberry Pi 3 A+ which ended up being the perfect size to fit inside the model. Fitting the Pi Zero would have been even easier, but it lacks the horsepower of its bigger siblings. The RFID reader is connected to the Pi over SPI, and the reed switch used to detect when the power switch has been moved is wired directly to the GPIO pins. The system is powered by a USB cable soldered directly to Pi’s PCB and ran out a small hole in the back of the case.

For input, [Andrew] is using a small wireless keyboard that includes a touch pad and gaming controls. Unfortunately, it has a proprietary receiver which had to be integrated into the system. In a particularly nice touch, he used snipped off component leads to “wire” the receiver’s PCB directly to the pins of the Pi’s USB port. Not only does it look cool, but provides a rigid enough connection that he didn’t even need to glue it down to keep it from rattling around inside the case. Definitely a tip to keep in the back of your mind.

The software side of this project is about what you’d expect for an emulation console, though with the added trickery of loading games based on their RFID tag. At this point [Andrew] only has a single “cartridge” for the system, so he simply drops the tags into the cartridge slot of the console to load up a new title. It doesn’t look like Retro Electro Models is selling loose cartridges (which makes sense, all things considered), so there might still be a job for your 3D printer yet if you want to have a library of scale cartridges to go with your console.

For those of you who were on Team Nintendo in the 1990’s, we’ve seen a similar build done with a 3D printed case. Of course, if even these consoles are a bit too recent for your tastes, you could build a miniature Vectrex instead.

Continue reading “Raspberry Pi Breathes Life Into A Scale Model SEGA”

The Repair And Refurbishment Of Silicone Keyboards

There are a lot of retrocomputers out there sitting in garages and attics, and most of them need work. After thirty or forty years, you’re looking at a lot of corrosion, leaking caps, and general wear and tear. When it comes to extreme refurbishment, we haven’t seen anyone better than [Drygol], and this time he’s back with an exceptional example of how far repair and refurbishment can go. He’s repairing the silicone keyboard of a Commodore 116 using some very interesting techniques, and something that opens up the door to anyone building their own silicone keypad.

This project comes from from a member of a demoscene group that found an old C116 that needed a lot of work. The C116 shipped with a silicone membrane keyboard instead of the mechanical keyswitches of the C64 and other, higher-end computers. Unfortunately, this silicone keypad had a few keys ripped out of it. No one, as far as we can tell, has ever figured out how to make these silicone keypads from scratch, but [Drygol] did come up with a way to replace the ripped and missing keys. The process starts with making a silicone mold of the existing keyboard, then casting silicone into the negative of that mold. After a few attempts , [Drygol] had a custom silicone button that matched the shape and color of the original C116 keyboard. The only thing left to do was to attach tiny conductive carbon pads to the bottom of the newly cast buttons and fit them into the existing keyboard.

This is an interesting refurbishment, because there are a lot of vintage computers that used silicone keyboards in the place of mechanical keyswitches. The Speccy, The Commodore TED machines, and a lot of vintage calculators all used silicone keyboards. Until now, no one has figured out how to make DIY silicone keypads, and repairing silicone was out of the question. [Drygol]’s attempt isn’t perfect — it needs key labels, but screen or pad printing will take care of that — but it’s the best we’ve seen yet and opens the doors to a lot of interesting projects in the world of vintage computer repair.

Yet Another DIY Handheld Pi Gaming Console

The Raspberry Pi is a great platform for running retro video games, and with the addition of some buttons, a TFT screen and some speakers it’s relatively inexpensive and easy to get a working console up and running. If you have access to even a cheap 3D printer, a good-looking DIY console is well within reach for not a lot of money. YouTube user [DIY Engineering] has a bunch of consumer-grade fabrication tools and has designed and built a high-end but still DIY RetroPi gaming console, the RKDR II.

Among the tools that [DIY Engineering] has are both a FDM and DLP 3D printer, a reflow oven, a couple of different CNC machines and a laser cutter. They are all consumer grade, but not necessarily cheap – especially combined! [DIY Engineering] uses Fusion3D to model the case, bezel and circuit board, the latter of which is a 4 layer board designed in Eagle and sent off to be fabbed. The buttons, D-pad, screen and battery are bought off the shelf, but everything else is DIY. Check out the video for the details – the tools used, and the design files, are linked in the information section under the video on YouTube.

Continue reading “Yet Another DIY Handheld Pi Gaming Console”

Quantum Computing With QISKit

We all know that quantum computing is coming, but it is hard to know how to get started with it. [Mtreinish] suggests Qiskit — an Apache Licensed SDK for developing quantum applications. He has a presentation he gave in Singapore that you can see below, and a notebook you can go through on GitHub. If you are impatient, you can even run the notebook online through Google.

The tools can work against several backends including a simulator or the real hardware available from IBM. The official site has a different notebook you can use as a tutorial. Interestingly, the foundation of all Qiskit programs is “Terra” (the Earth) and permeating all Qiskit elements is Aer or air. There are also fire and water elements. At the bottom of the official notebook, you’ll find a lot of community notebooks that go deeper into specific topics.

Continue reading “Quantum Computing With QISKit”

Custom Inflatables Are Only A Laser Beam Away

Carl Sagan one said “If you wish to make an apple pie from scratch, you must first invent the universe.” It might not be a very accurate description of the relative difficulty level of baking, but the logic is sound enough: there’s often a lot of ground work that needs to be to covered before you hit your ultimate goal. A perfect example of this principle is the inflatable raft that [ralph124c] hopes to eventually create; before he can set sail he has to perfect making balloon animals with his laser cutter.

In the long run, the raft will be constructed from sheets of TPU coated fabric that are fused together with a hot iron. But before he spends the time and money on building the real thing, he wants to do some scaled down tests to make sure his design works as expected. He makes a cryptic remark about learning the hard way that inflatables are prone to bouts of strange behavior, and out of an overabundance of caution we’ll just take his word for it.

He hoped to test his designs with the much cheaper LDPE film, but he found that the hot iron didn’t fuse it together in the way he was hoping. His mind turned to his 60 watt laser cutter, and wondered if the desired effect could be achieved by turning the power down as low as possible and quickly moving across the material.

His first attempts either blew right through the film or did absolutely nothing, but eventually he had the bright idea to move the laser farther from the LDPE. This put the beam out of focus, which not only expanded the area it would cover, but reduced the energy being delivered to the surface. With a bit more experimentation, he found he was able to neatly weld the pieces of material together. He even found that he could increase the power slightly to cut through the film without having to adjust the laser focus. With the ability to create complex inflatable shapes, perhaps [ralph124c] will create balloon version of Carl Sagan or an apple pie to celebrate.

Of course, this technology isn’t limited to birthday balloons and model rafts. The ability to quickly and easily produce custom inflatable shapes could be a huge boon to anyone working in soft robotics, and we’ve even seen similar concepts applied to haptic feedback systems.

[Thanks to Arthur for the tip.]

A Word Clock, The Hard Way

We’ve all seen word clocks, and they’re great, but there are only so many ways to show the time in words. This word clock with 114 servos is the hard way to do it.

We’re not sure what [Moritz v. Sivers] was aiming for with this projection clock, but he certainly got it right. The basic idea is to project the characters needed to compose the time messages onto a translucent PVC screen, which could certainly have been accomplished with just a simple character mask and some LEDs. But for extra effect, [Moritz] mounted each character to a letterbox mounted over a Neopixel. The letterboxes are attached to a rack and pinion driven by a micro servo. The closer they get to the screen, the sharper the focus and the smaller the size of the character. Add in a little color changing and the time appears to float out from a jumbled, unfocused background. It’s quite eye-catching, and worth the 200+ hours of printing time it took to make all the parts. Complete build instructions are available, and a demo video is after the break.

We like pretty much any word clock – big, small, or even widescreen. This one really pushes all our buttons, though.

Continue reading “A Word Clock, The Hard Way”

Farming Items With RasPi-Modified Joycons

The Pokémon games have delighted legions of Nintendo gamers over the years, and show no signs of slowing down any time soon. Despite its popularity, there are certain aspects of the games that are unarguably about simply grinding your way to success. For [Mori Bellamy], this simply wouldn’t do – yet their thirst for gold bottlecaps was insatiable. What to do? Automate it, of course.

The first step was to hack the Joycons from the Nintendo Switch. A DG333A analog switch IC was hooked up to the buttons inside, and controlled by the GPIO pins of a Raspberry PI. The joystick was then controlled with an MCP4725 DAC, allowing the system to fully emulate control inputs to the console.

With the console now under control by the Raspberry Pi, the next step was to add intelligence. Google’s Tesseract OCR platform was combined with a helping of Python code. This allows the script to read dialog boxes from the game, and use this data to determine which buttons to press to farm items.

[Mori] has provided the code on GitHub for others to use, noting that it should be generalizable to other games with a little work. Fundamentally, the underlying hardware could readily be repurposed to other controllers, too. There’s plenty of other ways to automate the drudgery of gaming, even if you have to use a touch screen. Video after the break.

Continue reading “Farming Items With RasPi-Modified Joycons”