Retrotechtacular: Car Navigation Like It’s 1971

Anyone old enough to have driven before the GPS era probably wonders, as we do, how anyone ever found anything. Navigation back then meant outdated paper maps, long detours because of missed turns, and the far too frequent stops at dingy gas stations for the humiliation of asking for directions. It took forever sometimes, and though we got where we were going, it always seemed like there had to be a better way.

Indeed there was, but instead of waiting for the future and a constellation of satellites to guide the way, some clever folks in the early 1970s had a go at dead reckoning systems for car navigation. The video below shows one, called Cassette Navigation, in action. It consisted of a controller mounted under the dash and a modified cassette player. Special tapes, with spoken turn-by-turn instructions recorded for a specific route, were used. Each step was separated from the next by a tone, the length of which encoded the distance the car would cover before the next step needed to be played. The controller was hooked to the speedometer cable, and when the distance traveled corresponded to the tone length, the next instruction was played. There’s a long list of problems with this method, not least of which is no choice in road tunes while using it, but given the limitations at the time, it was pretty ingenious.

Dead reckoning is better than nothing, but it’s a far cry from GPS navigation. If you’re still baffled by how that cloud of satellites points you to the nearest Waffle House at 3:00 AM, check out our GPS primer for the details.

Continue reading “Retrotechtacular: Car Navigation Like It’s 1971”
FPV-Rover 2.0 Has 3D Printed Treads And Plenty Of Zip

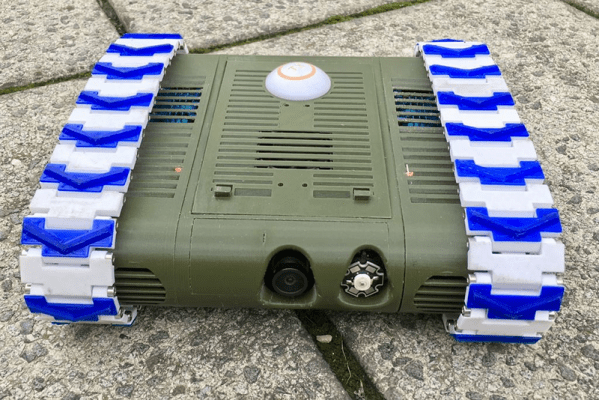
[Markus_p] has already finished one really successful 3D printed tracked robot build. Now he’s finished a second one using standard motors and incorporating what he learned from the first. The results are pretty impressive and you can see a video demo of the beast, below.

Most of the robot is PLA, although there are some parts that use PETG and flex plastic. There is an infrared-capable camera up front and another regular camera on the rear. All the electronics are pretty much off the shelf modules like an FPV transmitter and an electronic controller for the motors. There’s a servo to tilt the camera, as you can see in the second video.

The body fits together using nuts and magnets. The robot in the video takes a good beating and doesn’t seem to fall apart so it must be sufficient. What appealed to us was the size of the thing. It looks like it would be trivially easy to mount some processing power inside or on top of the rover and it could make a great motion base for a more sophisticated robot.

We’ve seen some similar projects, of course. This tracked robot uses mind control. And OpenWheel is a great place to get treads and other locomotion designs.

Continue reading “FPV-Rover 2.0 Has 3D Printed Treads And Plenty Of Zip”

Cheap Front Panels With Dibond Aluminium

The production capability available to the individual hacker today is really quite incredible. Even a low-end laser engraver can etch your PCBs, and it doesn’t take a top of the line 3D printer to knock out a nice looking enclosure. With the wide availability of these (relatively) cheap machines, the home builder can churn out a very impressive one-off device on a fairly meager budget. Even low volume production isn’t entirely out of the question. But there’s still one element to a professional looking device that remains frustratingly difficult: a good looking front panel.

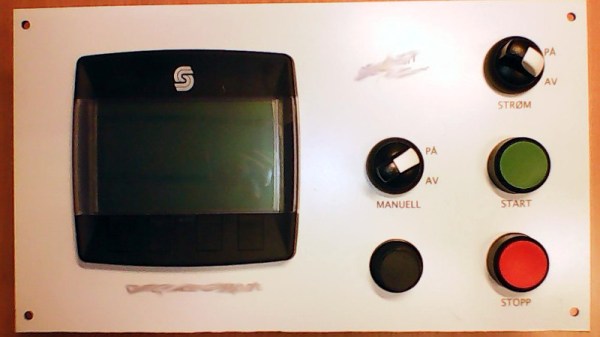
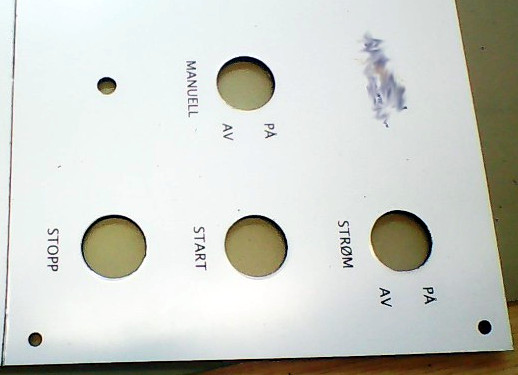
Now if your laser is strong enough to engrave (and ideally cut) aluminum sheets, then you’ve largely solved this problem. But for those of us who are plodding along with a cheap imported diode laser, getting text and images onto a piece of metal can be rather tricky. On Hackaday.io, [oaox] has demonstrated a cost effective way to create metal front panels for your devices using a print service that offers Dibond aluminum. Consisting of two thin layers of aluminum with a solid polyethylene core, this composite material was designed specifically for signage. Through various online services, you can have whatever you wish printed on a sheet of pre-cut Dibond without spending a lot of money.

As explained by [oaox], the first step is putting together the image you’ll send off to the printer using a software package like Inkscape. The key is to properly define the size of the Dibond plate in your software and work within those confines, otherwise the layout might not look how you expected once the finish piece gets back to you. It’s also important to avoid lossy compression formats like JPEG when sending the file out for production, as it can turn text into a mushy mess.

When you get the sheet back, all you need to do is put your holes in it. Thanks to the plastic core, Dibond is fairly easy to cut and drill as long as you take your time. [oaox] used a step drill for the holes, and a small coping saw for the larger openings. The final result looks great, and required very little effort in the grand scheme of things.

But how much does it cost? Looking around online, we were quoted prices as low as $7 USD to do a full-color 4×4 inch Dibond panel, and one site offered a 12×12 panel for $20. For a small production run, you could fit several copies of the graphics onto one larger panel and cut them out with a bandsaw; that could drop the per-unit price to only a couple bucks.

We’ve seen some clever attempts at professional looking front panels, from inkjet printing on transparencies to taking the nuclear option and laser cutting thin plywood. This is one of those issues the community has been struggling with for years, but at least it looks like we’re finally getting some decent options.

Frozen Rat Kidney Shipping Container

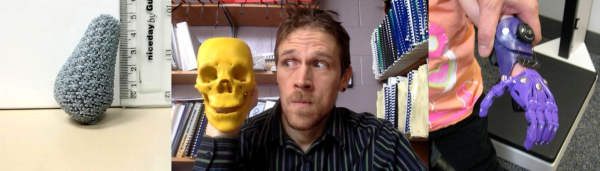
The biggest allure of 3D printing, to us at least, is the ability to make hyper-personalized objects that would otherwise fall through the cracks of our mass-market economy. Take, for instance, the Frozen Rat Kidney Shipping Container, or maybe some of the less bizarro applications in the US National Institute of Health’s 3D Print Exchange.

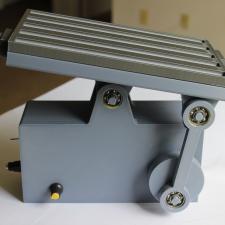
The Exchange is dominated, at least in terms of sheer numbers, by 3D models of proteins and other biochemical structures. But there are two sections that will appeal to the hacker in you: prosthetics and lab equipment. Indeed, we were sent there after finding a nice model of a tray-agitator that we wanted to use for PCB etching. We haven’t printed one yet, but check out this flexible micropositioner.

While it’s nowhere near as comprehensive a resource as some other 3D printing model sites, the focus on 3D printing for science labs should really help those who have that particular itch to find exactly the right scratcher. Or a tailor-made flexible container for slicing frozen rat kidneys. Whatever you’re into. We don’t judge.

Man with skull image: [jaqtikkun]

DIY Coil Winding Machine Counts The Hacky Way

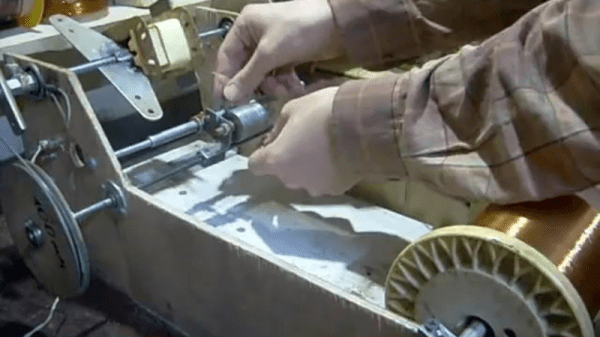
“Wait, was that 423 or 424?” When you’re stuck winding a transformer or coil that has more than a few hundred turns, you’re going to want to spend some time on a winding jig. This video, embedded below, displays a simple but sufficient machine — with a few twists.

The first elaboration is the addition of a shuttle that moves back and forth in sync with the main spindle to lay the windings down nice and smooth. Here, it’s tremendously simple — a piece of threaded rod and a set of interchangeable wheels that are driven by a big o-ring belt. We love the low-tech solution of simply adding a twist into the belt to swap directions. We would have way overthought the mechanism.

But then the hack is the digital counter made out of an old calculator. We’ve seen this before, of course, but here’s a great real-world application.

Thanks [Jānis] for the tip!

Continue reading “DIY Coil Winding Machine Counts The Hacky Way”

3D Printer Tech Cuts Paper

While 3D printing has been a great thing all by itself, it has also made electromechanical hardware a commodity item. Instead of raiding an old printer for motors and rods of unknown provenance, you can now buy everything very inexpensively due to the economy of scale and offshore manufacturing.

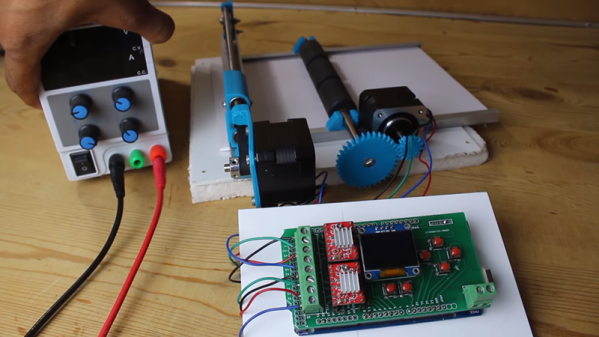
[Mr. Innovation] proves this point with his recent paper cutting machine which feeds and slices paper strips with user-selected width and quantity. He did steal one roller assembly from an old printer, but most of it is straight out of a 3D printer build. There’s NEMA stepper motors, modular motor driver boards, smooth rods, belts, and pulleys.

The blade of the cutter is just a standard snap off box cutter blade. It is angled so it doesn’t drag when the motor pulls it back to the home position after a cut. Honestly, we might have made the paper mechanism retract the paper a bit at that point, but that would be simple to add to the device’s firmware.

Continue reading “3D Printer Tech Cuts Paper”

Definitely-Not-Neopixel Rings, From Scratch!

The WS2812 addressable LED is a marvellous component. Any colour light you want, all under the control of your favourite microcontroller, and daisy-chainable to your heart’s content. Unsurprisingly they have become extremely popular, and can be found in a significant number of the project s you might read about in these pages.

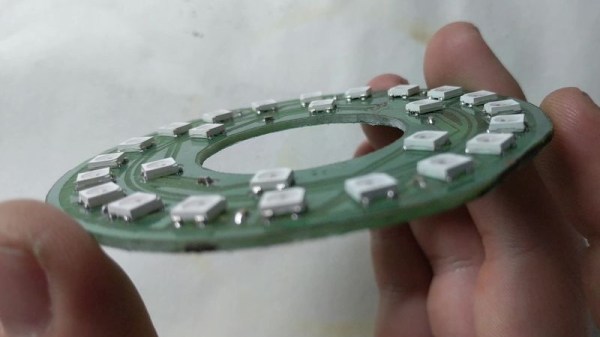
A host of products have appeared containing WS2812s, among which Adafruit’s Neopixel rings are one of the more memorable. But they aren’t quite as cheap as [Hyperlon] would like, so the ever-resourceful hacker has created an alternative for the constructor of more limited means. It takes the form of a circular PCB that apes the Adafruit original, and it claims to deliver a Bill of Materials cost that is 85% cheaper.

In reality the Instructables tutorial linked above is as much about how to create a PCB and surface-mount solder as it is specific to the pixel ring, and many readers will already be familiar with those procedures. But we won’t rest until everyone out there has tried their hands at spinning their own PCB project, and this certainly proves that such an endeavour is not out of reach. Whether or not you pay for the convenience of the original or follow this lead is your own choice.

The real thing has been in so many projects it’s difficult to pick just one to link to. This Christmas tree is rather nice.