False Claims On Kickstarter: What’s New?

Kickstarter and its ilk seem like the Wild West when it comes to claims of being “The world’s most (Insert feature here) device!” It does add something special when you can truly say you have the world record for a device though, and [MellBell Electronics] are currently running a Kickstarter claiming the worlds smallest Arduino compatible board called Pico.

We don’t want to knock them too much, they seem like a legit Kickstarter campaign who have at time of writing doubled their goal, but after watching their promo video, checking out their Kickstarter, and around a couple of minutes research, their claim of being the world’s smallest Arduino-compatible board seems to have been debunked. The Pico measures in at an impressive 0.6 in. x 0.6 in. with a total area of 0.36 sq.in. which is nothing to be sniffed at, but the Nanite 85 which we wrote up back in 2014 measures up at around 0.4 in. x  0.7in. with a total area of around 0.28 sq.in.. In this post-fact, fake news world we live in, does it really matter? Are we splitting hairs? Or are the Pico team a little fast and loose with facts and the truth?

There may be smaller Arduino compatible boards out there, and this is just a case study between these two. We think when it comes to making bold claims like “worlds smallest” or something similar perhaps performing a simple Google search just to be sure may be an idea.

Continue reading “False Claims On Kickstarter: What’s New?”

Arduino Vs. Arduino: Musto Out, Banzi In

Federico Musto, who until two days ago owned the largest part of Arduino AG has been bought out, having today been replaced by a combination of Massimo Banzi and Fabio Violante.

This should bring to a close the saga that began with a fork where two companies called themselves “Arduino” and bizarrely continued for almost a year after the reconciliation of the two was announced. What remains today is one corporation called Arduino AG, now captained by Massimo Banzi as Chairman and CTO, and Fabio Violante as CEO.

Massimo Banzi was one of the original founders of Arduino and one side of the trademark litigation during the period in which there were two companies. With the buyout of Musto, Banzi moves back to the top spot. This change in leadership occurred as a company called BCMI bought all shares of Arduino AG. BCMI was started by four of the original Arduino co-founders; you could say the old gang rides again.

Arduino AG is in essence a hardware company, manufacturing and selling the officially branded Arduino boards. But right now they still maintain the official codebase which most people see as belonging to the community. Despite changes at the top, the proof will still be in the pudding. When will we see the Arduino Foundation come to life and take control of the Arduino IDE? Hackaday will continue to look into it and provide updates.


KIM-1 To COSMAC Elf Conversion — Sort Of

In the mid-1970s, if you had your own computer, you probably built it. If you had a lot of money and considerable building skill, you could make an Altair 8800 for about $395 — better than the $650 to have it built. However, cheaper alternatives were not far behind.

In 1976, Popular Electronics published plans for a computer called the COSMAC Elf which you could build for under $100, and much less if you had a good junk box. The design was simple enough that you could build it on a piece of perf board or using wire wrap. We featured the online archive of the entire Popular Electronics collection, but hit up page 33 of this PDF if you want to jump right to the article that started it all. The COSMAC Elf is a great little machine built around a 40-pin RCA 1802 processor, and for many was the first computer they owned. I lost my original 1802 computer in a storm and my recent rebuild in another completely different kind of storm. But there is a way to reclaim those glory days without starting from scratch.  I’m going to repurpose another retro-computing recreation; the KIM-1.

I’ll admit it, Rewiring a real KIM-1 to take an 1802 CPU would be difficult and unnecessary and that’s not what this article is about. However, I did have a KIM UNO — [Oscar’s] respin of the classic computer using an Arduino mini pro. Looking at the keyboard, it occurred to me that the Arduino could just as easily simulate an 1802 as it could a 6502. Heck, that’s only two digits different, right?

The result is pretty pleasing. A “real” Elf had 8 toggle switches, but there were several variations that did have keypads, so it isn’t that far off. Most Elf computers had 256 bytes of memory (without an upgrade) but the 1802 UNO (as I’m calling it) has 1K. There’s also a host of other features, including a ROM and a monitor for loading and debugging programs that doesn’t require any space in the emulated 1802.

Continue reading “KIM-1 To COSMAC Elf Conversion — Sort Of”

Play It Again, Arduino

[MrRedBeard] wanted to play a particular song from an Arduino program and got tired of trying to hand transcribe the notes. A little research turned up that there was a project to convert Music XML (MXL) files to the Arduino. However, [MrRedBeard] wasn’t a fan of the language it used, so he created his own means of doing the same thing. He learned a lot along the way and was willing to share it in a tutorial that will help you if you want to do the same thing. You can see a video of his results, below.

Continue reading “Play It Again, Arduino”

Control The Volume

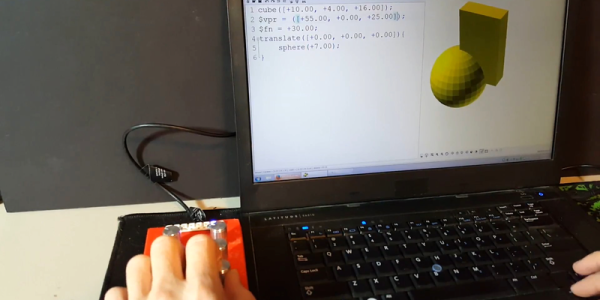
For anyone who has owned a boombox or an old(er) cassette player, the digital age volume controls feel incredibly awkward. Keep pressing buttons to get the volume just right can get tiresome real quick. The volume knob just makes sense and in a simple project, [Jeremy S Cook] brings us the Custom Computer Volume Control Knob.

The build employs an Adafruit Trinket board coupled with a rotary encoder and a push button as described by the designers themselves. We reached out to [Jeremy S Cook] to enquire about the build and it turns out his version uses an MDF enclosure as well as an MDF knob. A larger PCB has the encoder and button solder on with the Trinket board connecting to them via multi strand wires. An Acrylic sheet cut to the size serves as the top cover and completes the build.

The button serves as a play/pause button and can come in handy. Since the device enumerates as an HMI device, it should work with almost any OS. It could easily be extended to work with Android Tablets or even iPads. Check out the video below for a demonstration and if you like the idea of custom input devices, check out this DIY shortcut Keyboard. Continue reading “Control The Volume”

Read Amiga Floppies Using An Arduino

So you spent your youth learning your craft in front of an Amiga 500+, but a quarter century later all you have left is a broken computer and a pile of floppies you can’t read any more. What’s to be done? This was the position [Rob Smith] found himself in, and since some of the commercial solutions to ripping Amiga floppies were rather expensive, he decided to have a go at making his own.

His write-up makes for a fascinating read, as he delves into the physical interface of the PC floppy drive he used, and into the timing required from the Arduino that controlled it. He faced some challenges in getting his code to be fast enough for the task, and goes into some of the optimisation techniques he employed. His code for both Arduino and Windows  is open-source, and can be downloaded from his GitHub repository. Future plans involve supporting the FDI disc format as well as ADF, and adding the ability to write discs.

We’ve shown you a lot of Amigas over the years, but perhaps of most relevance here in our archive are this Raspberry Pi floppy emulator and this floppy autoloader for archiving a disc collection.

Via Hacker News.

Innovating A Backyard Solar Battery System

Ever on the lookout for creative applications for tech, [Andres Leon] built a solar powered battery system to keep his Christmas lights shining. It worked, but — pushing for innovation — it is now capable of so much more.

The shorthand of this system is two, 100 amp-hour, deep-cycle AGM batteries charged by four, 100 W solar panels mounted on an adjustable angle wood frame. Once back at the drawing board, however, [Leon] wanted to be able track real-time statistics of power collected, stored and discharged, and the ability to control it remotely. So, he introduced a Raspberry Pi running Raspbian Jessie Lite that publishes all the collected data to Home Assistant to be accessed and enable control of the system from the convenience of his smartphone. A pair of Arduino Deuemilanoves reporting to the Pi control a solid state relay powering a 12 V, 800 W DC-to-AC inverter and monitor a linear current sensor — although the latter still needs some tinkering. A in-depth video tour of the system follows after the break!

Continue reading “Innovating A Backyard Solar Battery System”