One of the nicest amenities of interpreted programming languages is that you can test out the code that you’re developing in a shell, one line at a time, and see the results instantly. No matter how quickly your write-compile-flash cycle has gotten on the microcontroller of your choice, it’s still less fun than writing blink_led() and having it do so right then and there. Why don’t we have that experience yet?
If you’ve used any modern scripting language on your big computer, it comes with a shell, a read-eval-print loop (REPL) in which you can interactively try out your code just about as fast as you can type it. It’s great for interactive or exploratory programming, and it’s great for newbies who can test and learn things step by step. A good REPL lets you test out your ideas line by line, essentially running a little test of your code every time you hit enter.
The obvious tradeoff for ease of development is speed. Compiled languages are almost always faster, and this is especially relevant in the constrained world of microcontrollers. Or maybe it used to be. I learned to program in an interpreted language — BASIC — on computers that were not much more powerful than a $5 microcontroller these days, and there’s a BASIC for most every micro out there. I write in Forth, which is faster and less resource intensive than BASIC, and has a very comprehensive REPL, but is admittedly an acquired taste. MicroPython has been ported over to a number of micros, and is probably a lot more familiar.
But still, developing MicroPython for your microcontroller isn’t developing on your microcontroller, and if you follow any of the guides out there, you’ll end up editing a file on your computer, uploading it to the microcontroller, and running it from within the REPL. This creates a flow that’s just about as awkward as the write-compile-flash cycle of C.
What’s missing? A good editor (or IDE?) running on the microcontroller that would let you do both your exploratory coding and record its history into a more permanent form. Imagine, for instance, a web-based MicroPython IDE served off of an ESP32, which provided both a shell for experiments and a way to copy the line you just typed into the shell into the file you’re working on. We’re very close to this being a viable idea, and it would reduce the introductory hurdles for newbies to almost nothing, while letting experienced programmers play.
Or has someone done this already? Why isn’t an interpreted introduction to microcontrollers the standard?
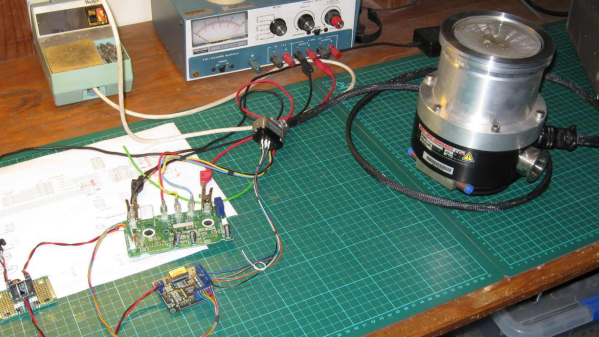
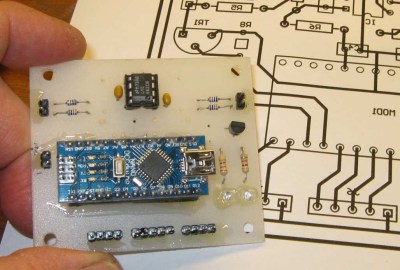 With FPGA code, IGBT wiring and power supply issues sorted, the next step was to add a supervisory micro-controller, using an Arduino Nano. Its functions included interfacing with a touch screen LCD as a user interface, communicating with the FPGA module, and controlling several relays to switch power to the motor power supply, the roughing pump, TMP cooling fan, and a solenoid for the vacuum vent. Spindle current is calculated by measuring voltage drop across shunt resistors on the low side of the IGBT. Motor speed is measured using one of the motor hall sensors, and a thermistor provides motor temperature sensing. [Mark]’s PCB fabrication technique seems a bit different too. Using an Excellon drill file, he drills holes in a piece of plastic using a laser cutter to create a bare board, and then solders copper tracks by hand.