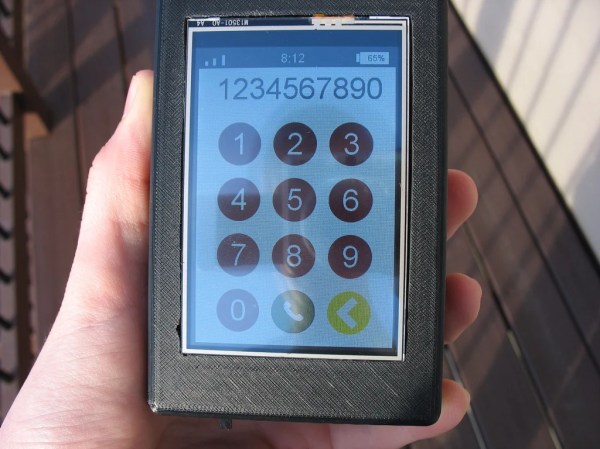
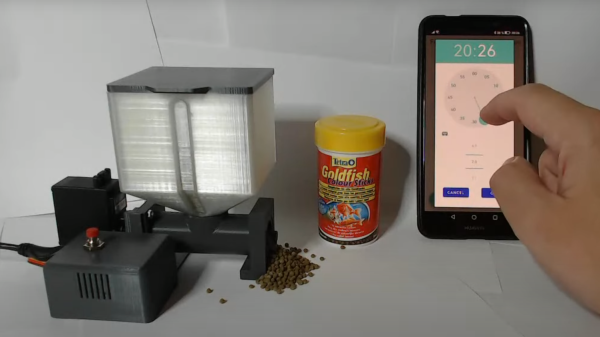
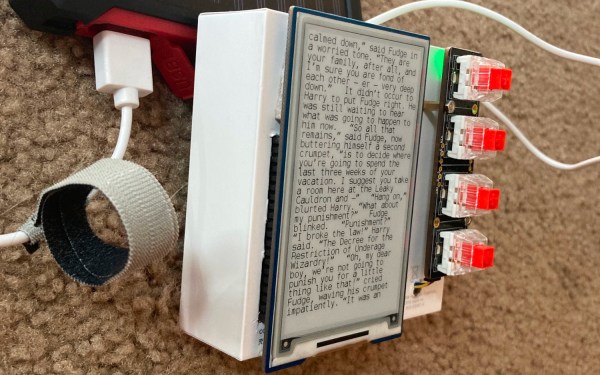
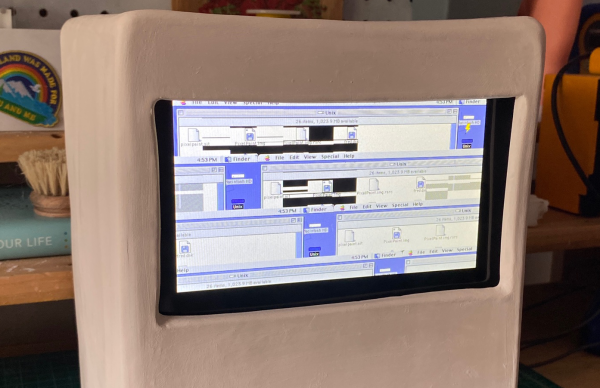
A Hombrew Retro Laptop

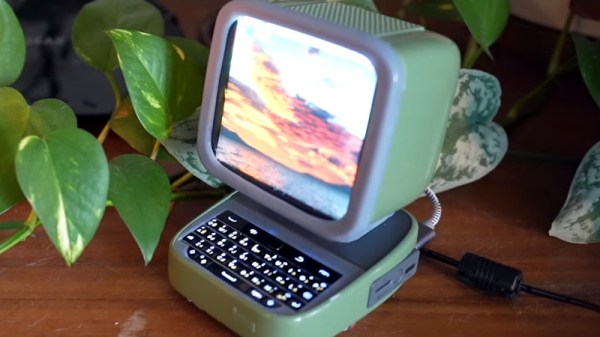
We feel bad when we see a retrocomputer project and think, “Hey! That’s not that old.” But, usually, when we think about it, it really is. Take the Penkesu. It looks like one of the little organizer computers that were popular — ok — a long time ago.

Inside is a Raspberry Pi Zero 2W, a 7.9 inch 400×1280 screen and a 48-key mechanical keyboard. Unsurprisingly, the case is mostly 3D printed, but it does use Gameboy Advance SP hinges.

Continue reading “A Hombrew Retro Laptop”

Tiny TV Celebrates The Forgotten Tech Of CRTs

For those of us who grew up before the Internet, the center of pretty much every house was the TV. It was the shrine before which we all worshipped, gathering together at the appointed times to receive the shared wisdom of mass entertainment. In retrospect, it really wasn’t that much. But it’s what we had.

Content aside, one thing all these glowing boxes had in common was that which did the glowing — the cathode ray tube (CRT). Celebrating the marvel of engineering that the CRT represents is the idea behind [Matt Evan]’s tiny desktop TV. The design centers around a 1.5″ CRT that once served as a viewfinder on a 1980s-vintage Sony camcorder. [Matt] salvaged the tube and the two PCB assemblies that drive it, mounting everything in a custom-built acrylic case, the better to show off the bulky but beautiful tube.

The viewfinder originally used a mirror to make the optical path more compact; this forced [Matt] to adapt the circuit to un-reverse the image for direct viewing. Rather than receiving analog signals off the air as we did in the old days — and we liked it that way! — the mini monitor gets its video from a Raspberry Pi, which is set to play clips of TV shows from [Matt]’s youth. Rendered in glorious black and white and nearly needing a magnifying glass to see, it almost recaptures the very earliest days of television broadcasting, when TVs all had screens that looked more like oscilloscope CRTs.

This project is a nice homage to a dying technology, and [Matt] says it has spurred more than one conversation from people you grew up knowing only LCD displays. That’s not to say CRTs are totally dead — if you want to build your own old-school TV, there’s a kit for that.

BenAkrin-PlottyBot-TypeWriterMode

PlottyBot: A DrawBot That Plots A Lot

Fire up those 3D printers because if you’re like us, you’ll want your own PlottyBot. Still, have a pile of “thank you notes” to write from recent winter holiday gift exchanges? Hoping to hand letter invitations to a wedding or other significant event? Need some new art to adorn your lock-down shelter or shop? It sounds like [Ben] could help you with that.

Besides being a handsomely designed desktop DrawBot, this project from [Ben] looks to have some solid software to run it, a community of makers who have tested the waters, and very detailed build instructions. Those include everything from a BOM with links for ordering parts to animated GIF assembly for the trickier steps.

If you’d like to graduate from “handwritten” cards and letters to something poster-sized are customization tips for expanded X and Y dimensions. As we’ve included in other recent articles, one caveat to mention is the current scarcity of the Raspberry Pi Zeros that PlottyBots require. But if you have one on hand or think you’ll be able to source one by the time you’ve 3D printed all the parts, it might just be the perfect time to add another bot to your family. As a heads up, this project is self-hosted on a solar-powered server, so maybe take turns reading the complete build log.

A nice bonus if you need help drawing something suitably complex to require a robot’s help, [Ben] also created MandalGaba which looks like an awesome online tool for drawings like the ones shown above.

No ARM Printer Driver? Just Write Your Own

When you think of the small machines that print the sticky labels on packages, you might not expect to find a complex printer with its own programming language (ZPL). However, [Dan Pastusek] was looking around online and found a small label printer on everyone’s favorite online warehouse for a great price that suggested it supported ZPL. Unfortunately, [Dan] had big dreams for creating a Raspberry Pi-based print station and found the drivers packaged for this particular printer were not ARM compatible. Not quite content to leave it there, he began to chip away at the layers until he had a working driver.

ZPL, at its core, is just a language describing ASCII commands transmitted over a serial connection. So while the printer showed up as an endpoint, it wasn’t working as the filters (the part of the driver that knows how to convert from a PNG to ZPL) was x86 only. On Linux, printer drivers also have a PPD file that describes what a printer can handle in paper size and other settings. The PPD file for the little printer gave the first clue. In the ShortNickName field, it identifies itself as HPRT N41, which is a popular HP printer. So this little printer must be a clone of a printer in that family. Notably, they don’t support ZPL. Instead, the HPRT series support TSPL, another printer language developed by TSC.

This presented a problem as the shipping service that provided the labels that [Dan] was using offered labels in three formats: PNG, PDF, and ZPL. Currently, it does seem like there’s a TSPL to ZPL converter out there for use, so rather than write his own, he took a shortcut and wrote a rasterizer instead. Initially, he tried to use some sample code that he found, and while he got something to come out of the printer, it was blank. So the next test was to save the raw TSPL output from a filer and cat directly to the serial port. This worked amazingly. Next, he wrote a converter to take a PNG and convert them into the bitmap format the TSPL has. The converter is in Javascript as it runs as part of the webserver that manages the print station. Could it be faster in a different language? Sure. But a different language wouldn’t make the printer any faster.

With the addition of a wireless barcode scanner, it’s satisfying to see the print station up and running. Here at Hackaday, we’re no stranger to seeing folks take apart printers to peel back the software and physical layers that make them up.

Two shots of the dispenser in question next to each other, showing it from different sides. One is showing the front panel, and the other shot gives us a better look at the top part, with a rotating disk that has openings for treats to be placed in.

Open-Hardware Dog Treat Dispenser Is A Stepping Stone For Behavioral Research

The principles of open-source hardware are starting to make great strides in scientific research fields. [Walker Arce] tells us about his paper co-authored with [Jeffrey R. Stevens], about a dog treat dispenser designed with scientific researchers in mind – indispensable for behavior research purposes, and easily reproducible so that our science can be, too. Use of Raspberry Pi, NEMA steppers and a whole lot of 3D printed parts make this build cheap (< $200 USD) and easy to repeat for any experiments involving dogs or other treat-loving animals.

Even if you’re not a scientist, you could always build one for your own pet training purposes – this design is that simple and easy to reproduce! The majority of the parts are hobbyist-grade, and chances are, you can find most of the parts for this around your workshop. Wondering how this dispenser works, and most importantly, if the dogs are satisfied with it? Check out a short demonstration video after the break.

Despite such dispensers being commercially available, having a new kind of dispenser designed and verified is more valuable than you’d expect – authors report that, in their experience, off-the-shelf dispensers have 20-30% error rate while theirs can boast just 4%, and they have test results to back that up. We can’t help but be happy that the better-performing one is available for any of us to build. The GitHub repository has everything you could want – from STLs and PCB files, to a Raspberry Pi SD card image and a 14-page assembly and setup guide PDF.

Open hardware and science are a match made in heaven, even if the relationship is still developing. The Hackaday community has come together to discuss open hardware in science before, and every now and then, open-source scientific equipment graces our pages, just like this recent assortment of biosensing hacks using repurposed consumer-grade equipment.

Continue reading “Open-Hardware Dog Treat Dispenser Is A Stepping Stone For Behavioral Research”

A 64-Bit Raspberry Pi OS At Last

Long-term Raspberry Pi watchers will have seen a lot of OS upgrades in their time, from the first Debian Squeeze previews through the Raspbian years to the current Raspberry Pi OS. Their latest OS version is something different though, and could be one of the most important releases in the platform’s history so far, as finally there’s an official release of a 64-bit Raspberry Pi OS.

Would-be 64-bit Pi users have of course had the chance to run 64-bit GNU/Linux operating system builds from other distributions for nearly as long as there have been Pi models with 64-bit processors, but until now the official distribution has only been available as a 32-bit build. In their blog post they outline their reasons for this move in terms of compatibility and performance, and indeed we look forward to giving it a try.

Aside from being a more appropriate OS for a 64-bit Pi, this marks an interesting moment for the folks from Cambridge in that it is the first distribution that won’t run on all Pi models. Instead it requires a Pi 3 or better, which is to say the Pi 3, Zero 2 W, Pi 4, Pi 400, and the more powerful Compute Modules. All models with earlier processors including the original Pi, Pi Zero, and we think the dual-core Pi 2 require a 32-bit version, and while the Pi Zero, B+ and A+ featuring the original CPU are still in production this marks an inevitable move to 64-bit in a similar fashion to that experienced by the PC industry a decade or more ago.

As far as we know the Zero is still flying off the shelves, but this move towards an OS that will leave it behind is the expected signal that eventually there will be a Pi line-up without the original chip being present. We’re sure the 32-bit Pi will be supported for years to come, but it should be clear that the Pi’s future lies firmly in the 64-bit arena. They’ve retained their position as the board to watch oddly not by always making the most impressive hardware but by having the most well-supported operating system, and this will help them retain that advantage by ensuring that OS stays relevant.

On the subject of the future course of the Pi ship, our analysis that the Compute Module 4 is their most exciting piece of hardware still stands.

A Portable Projecting Pi For Education

We cover a lot of cyberdeck projects here at Hackaday, custom portable computers often built around the Raspberry Pi. It’s not often that we cover a computer that perfectly achieves and exceeds what a cyberdeck is trying to do without being a cyberdeck in any way, but that’s what [Subir Bhaduri] has done. In addressing the need for Indian schoolchildren to catch up on two years of COVID-disrupted schooling he’s created the pπ, a Raspberry Pi, projector, and keyboard all-in-one computer in a neat sheet-metal case that looks as though it might be just another set of spanners or similar. At a stroke he’s effortlessly achieved the ultimate cyberdeck, because this machine is no sci-fi prop, instead it has a defined use which it fulfills admirably.

All the files to build your own can be found in a GitLab repository. The case is laser-cut sheet metal, and he’s put in a cost breakdown which comes out at a relatively healthy 17200 Indian rupees, or around 230 US dollars. We hope that it serves its purpose well and provides a rugged and reliable teaching aid for a generation from whom COVID has taken so much. You can see more in the video below the break.

Continue reading “A Portable Projecting Pi For Education”