Bluetooth devices are everywhere these days, and nothing compromises your opsec more than a bevy of smartphones, smart watches, fitbits, strange electronic conference badges, and other electronic ephemera we adorn ourselves with to make us better people, happier, and more productive members of society.
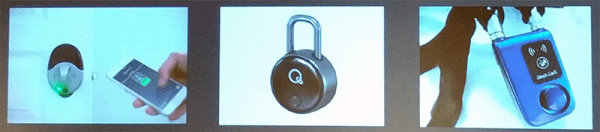
Bluetooth isn’t limited to wearables, either; deadbolts, garage door openers, and security systems are shipping with Bluetooth modules. Manufacturers of physical security paraphernalia are wont to add the Internet of Things label to their packaging, it seems. Although these devices should be designed with security in mind, most aren’t, making the state of Bluetooth smart locks one of the most inexplicable trends in recent memory.
At this year’s DEF CON, [Anthony Rose] have given a talk on compromising BTLE locks from a quarter-mile away. Actually, that ‘quarter mile’ qualifier is a bit of a misnomer – some of these Bluetooth locks are terrible locks, period. The Kwikset Kevo Doorlock – a $200 deadbolt – can be opened with a flathead screwdriver. Other Bluetooth ‘smart locks’ are made of plastic.
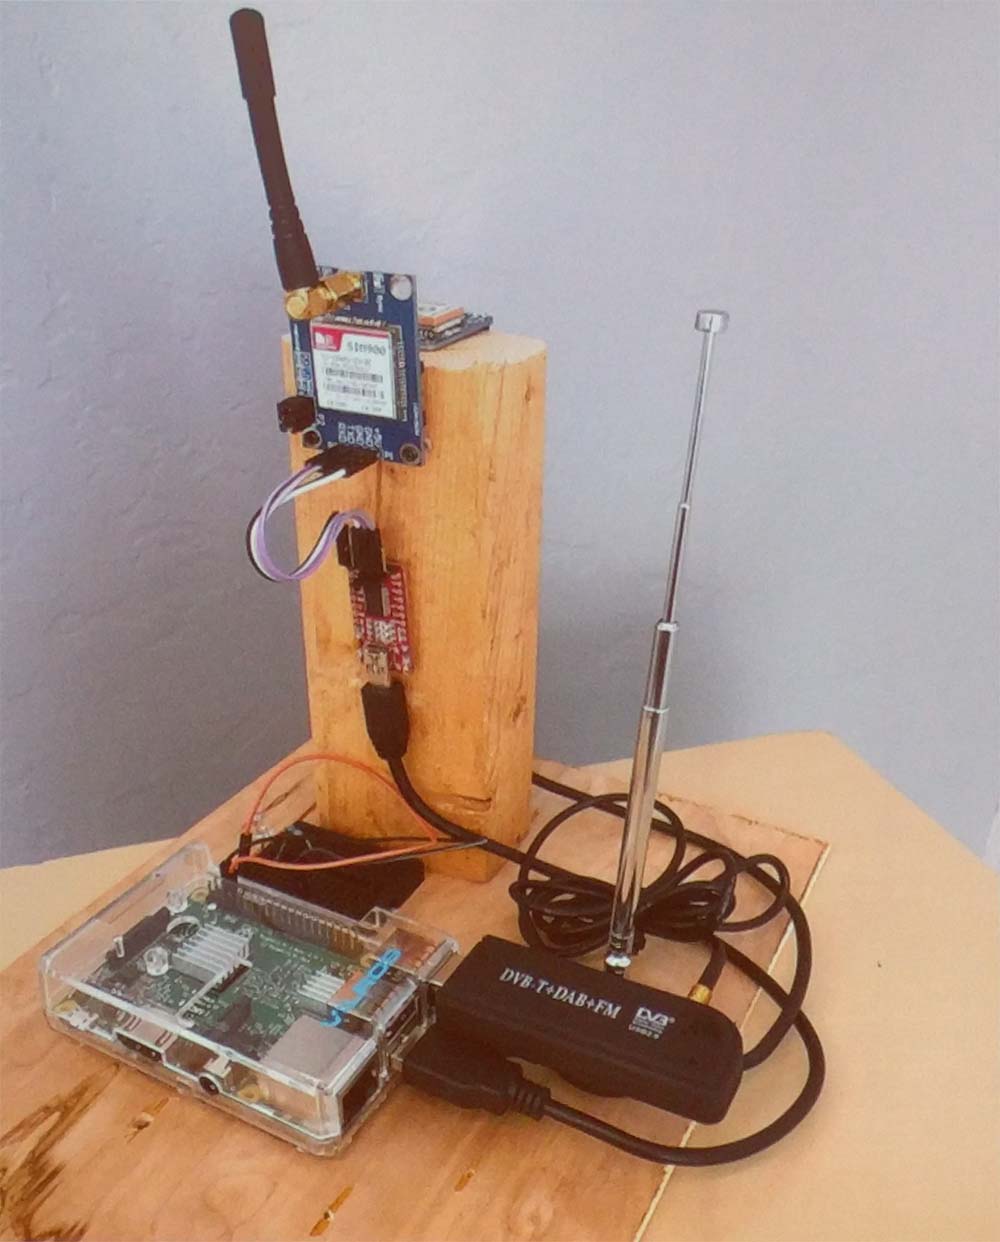
The tools [Anthony] used for these wireless lockpicking investigations included the Ubertooth One, a Bluetooth device for receive-only promiscuous sniffing, a cantenna, a Bluetooth USB dongle, and a Raspberry Pi. This entire setup can be powered by a single battery, making it very stealthy.
The attacks on these Bluetooth locks varied, from sniffing the password sent in plain text to the lock (!), replay attacks, to more advanced techniques such as decompiling the APK used to unlock these smart locks. When all else fails, brute forcing locks works surprisingly well, with quite a few models of smart lock using eight digit pins. Even locks with ‘patented security’ (read: custom crypto, bad) were terrible; this patented security was just an XOR with a hardcoded key.
What was the takeaway from this talk? Secure Bluetooth locks can be made. These locks use proper AES encryption, a truly random nonce, two factor authentication, no hard-coded keys, allow the use of long passwords, and cannot be opened with a screwdriver. These locks are rare. Twelve of the sixteen locks tested could be easily broken. The majority of Bluetooth smart locks are not built with security in mind, which, by the way, is the entire point of a lock.
[Anthony]’s work going forward will concentrate expanding his library of scripts to exploit these locks, and evaluate the Bluetooth locks on ATMs. Yes, ATMs also use Bluetooth locks. The mind reels.