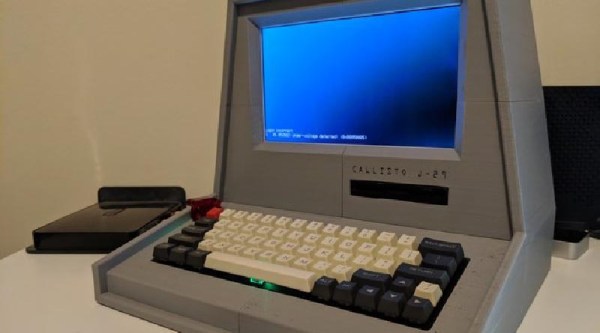
The Fallout series of video games provide a wonderful alternative history that answers the question of what might have happened had the microchip never been invented. Yes, most things run on tubes, and apparently you can implement an AI that passes a Turing test in tubes (does the Turing test apply if you’re comparing it against NPCs?). Of course, as with all of computer history, the coolest parts of Fallout are the computer terminals, so [Pigeonaut] decided to build one. All the files are available, and if you have a Pi sitting around this is a good weekend project.
This terminal has a host of features that are well-suited for the modern vault dweller. Of note, the entire case is 3D printed, in multiple pieces. Sure, considering the display is an LCD it’s a tiny bit thick, but you don’t get the Atomic age aesthetic without a big CRT, do you? The keyboard is a standard, off-the-shelf mechanical keyboard for clicky goodness with vintage-style keycaps. There’s a 3.5″ USB floppy drive, because there’s nothing that will survive a nuclear holocaust like magnetic media. The rest of the build is a Raspberry Pi 3B+, which is more than enough compute power to open a door shaped like a gear.
As for what you would do with a retro-inspired Pi terminal, well, it would make a good computer for the workbench, and since the case is already designed for a 3.5″ drive, you could use this to archive some old media. If there’s one thing the apocalypse tells us, it’s that these old terminals will still be kicking after a few hundred years.

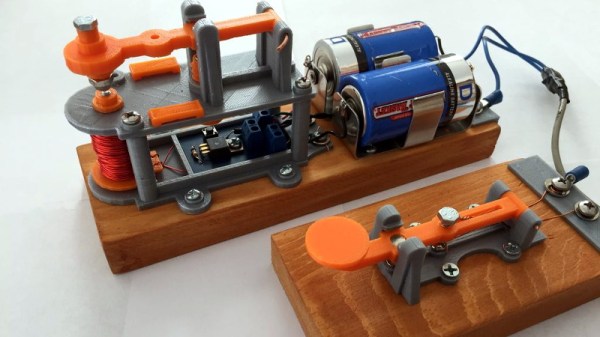
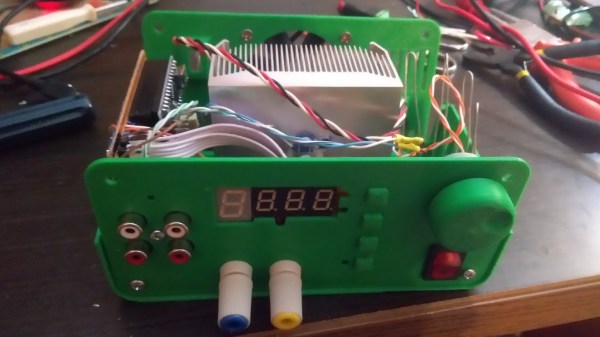
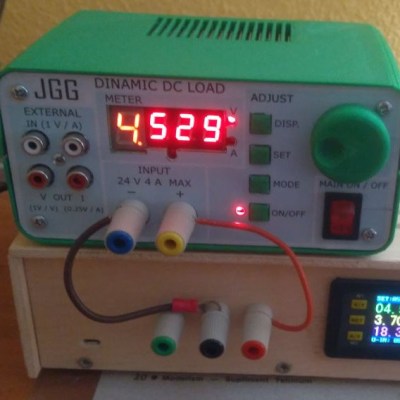 The first thing to catch one’s eye might be that leftmost seven-segment digit. There is a simple reason it doesn’t match its neighbors: [Juan] had to use what he had available, and that meant a mismatched digit. Fortunately, 3D printing one’s own enclosure meant it could be gracefully worked into the design, instead of getting a Dremel or utility knife involved. The next is a bit less obvious: the display lacked a decimal point in the second digit position, so an LED tucked in underneath does the job. Finally, the knob on the right could reasonably be thought to be a rotary encoder, but it’s actually connected to a small DC motor. By biasing the motor with a small DC voltage applied to one lead and reading the resulting voltage from the other, the knob’s speed and direction can be detected, doing a serviceable job as rotary encoder substitute.