You’d Print A Part, But Would You Print A Foot?

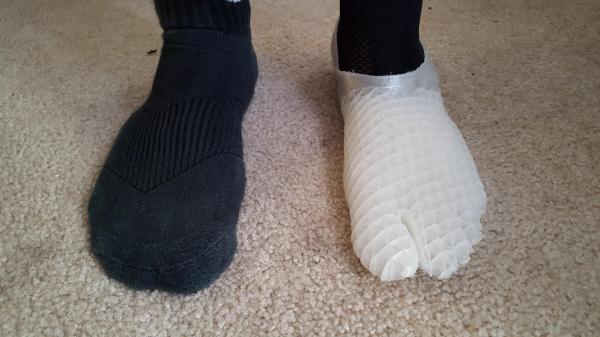
Born with just one foot, [Nerraw99] had to work around prosthetics all his life. Finally getting fed up with the various shortcomings of his leather and foam foot, he designed, tweaked, printed and tested his own replacement!

After using Structure Sensor to scan both his feet, [Nerraw99] began tooling around with the model in Blender and 3D printing them at his local fablab/makerspace: MakerLabs. It ended up taking nearly a dozen printed iterations — multiple printing issues notwithstanding — to get the size right and the fit comfortable. Not all of the attempts were useless; one version turned out to be a suitable water shoe for days at the beach!

Continue reading “You’d Print A Part, But Would You Print A Foot?”

Decorate Your 3D Prints With Detailed Hydrographic Printing

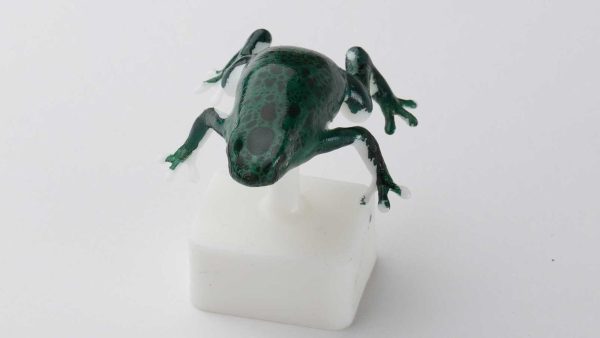
It’s like the old quip from [Henry Ford]: You can have your 3D prints in any color you want, as long as it’s one. Some strides have been made to bringing more color to your extruded goodies, but for anything beyond a few colors, you’re going to need to look at post-print processing of some sort. For photorealistic 3D prints, you might want to look into a simple hydrographic printing method that can be performed right on a printer.

If some of the prints in the video below look familiar, it’s because we covered the original method when it was presented at SIGGRAPH 2015. [Amos Dudley] was intrigued enough by the method, which uses computational modeling of complex surfaces to compose a distorted image that will be stretched back into shape when the object is dipped, to contact the original authors for permission to use the software. He got a resounding, “Nope!” – it appears that the authors’ institution isn’t big into sharing information. So, [Amos] hacked the method.

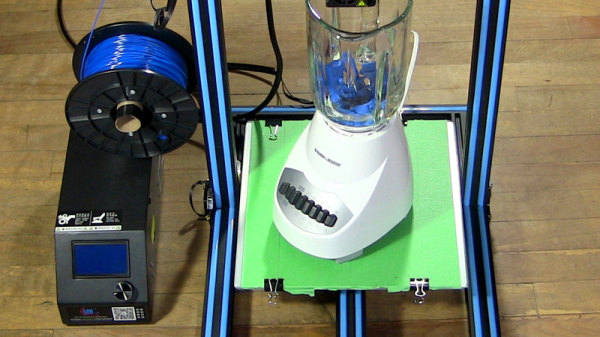
In place of the original software, [Amos] used Blender to simulate the hydrographic film as a piece of cloth interacting with the 3D-printed surface. This allowed him to print an image on PVA film that will “un-distort” as the object is dipped. He built a simple tank with overflow for the printer bed, used the Z-axis to dip the print, and viola! Photo-realistic frogs and globes.

[Amos]’ method has its limitations, but the results are pretty satisfying already. With a little more tweaking, we’re sure he’ll get to the point that the original authors did, and without their help, thank you very much.

Continue reading “Decorate Your 3D Prints With Detailed Hydrographic Printing”

My DIY BB-8 interior

My DIY BB-8: Problems, Solutions, Lessons Learned

Imagine trying to make a ball-shaped robot that rolls in any direction but with a head that stays on. When I saw the BB-8 droid doing just that in the first Star Wars: The Force Awakens trailer, it was an interesting engineering challenge that I couldn’t resist. All the details for how I made it would fill a book, so here are the highlights: the problems I ran into, how I solved them and what I learned.

Continue reading “My DIY BB-8: Problems, Solutions, Lessons Learned”

Fashion Mannequin Is Fiberglass Reinforced Paper Craft

[Leah and Ailee] run their own handmade clothing business and needed a mannequin to drape their creations onto for display and photography. Since ready-made busts are quite pricey and also didn’t really suit their style, [Leah] set out to make her own mannequins by cleverly combining paper craft techniques and fiberglass.

Continue reading “Fashion Mannequin Is Fiberglass Reinforced Paper Craft”

Development Tools Of The Prop-Making World

We’ve seen them before. The pixel-perfect Portal 2 replica, the Iron Man Arc Reactor, the Jedi Lightsaber. With the rise of shared knowledge via the internet, we can finally take a peek into a world hidden behind garage doors, basements, and commandeered coffee tables strewn with nuts, bolts, and other scraps. That world is prop-making. As fab equipment like 3D printers and laser cutters start to spill into the hands of more people, fellow DIY enthusiasts have developed effective workflows and corresponding software tools to lighten their loads. I figured I’d take a brief look at a few software tools that can open the possibilities for folks at home to don the respirator and goggles and start churning out props.

Continue reading “Development Tools Of The Prop-Making World”

Hacklet 31 – Software Tools

For every computer error, there are two human errors, and one of them is blaming the computer. Whenever a human blames a computer for something, there are two tools, and one of them is the computer.

Not all of your nifty tools need to be fancy robots, CNC machines, or nifty Robertson screwdrivers; a computer is equally capable of being a fantastic tool, provided it has the right software. For this week’s Hacklet, we’re going through some of the best software tools on hackaday.io.

6653681421957570397[Alan] was inspired to build a software tool for making sewing patterns. Sewing patterns are usually designed for the ‘average’ person, but if you’re making custom wearables, you should end up with a piece of clothing that fits perfectly.

The first project [Alan] is using this tool for is a fleece cap that fits the contour of his head. He captured a 3D mesh of his head, imported the mesh into Blender, and unwrapped the resulting mesh. The two halves of the hat were then plotted with a Silhouette Cameo, cut out of fleece, and sewn together. The result is a beanie that fits perfectly around [Alan]’s head. It’s an extremely cool and novel application of 3D modeling, and if you ever need to wrap a 3D object with a 2D material, this is the project you want to check out.

5869061407871295021 And you thought the autorouter in Eagle was bad.

[Anderson] built a tool called Pyrite that will take a schematic and build a layout in three-dimensional space. He calls them Volumetric Circuits, and it’s basically the point-to-point wiring found in old radios and amplifiers taken to the next level. We featured this project before, and there haven’t been many updates since then. Maybe giving [Anderson]’s project a few skulls will help motivate him to get back to the project.

133031421839442989 Not satisfied with the existing free and open source CAM programs, [Snegovick] started work on his own.

[Snegovick] calls his project BCAM, and it’s exactly what you need to mill holes in PCBs, cut gears with a CNC router, engrave plastic, and anything else a 2.5 axis CNC machine can do. The project is written in Python, and yes, the source is available. Supported operations include drilling, path following, offset path following, and pocketing.

Write enough microcontroller projects, and you’ll eventually come up with your own library of common code that does one thing and one thing well. If you’re smart, you’ll reuse that code in future projects. [ericwazhung] is cutting through the hard part of developing all this code and released some things that are useful in a whole lot of projects.

Included in the commonCode library are the usual ‘heartbeat LED’, non-blocking input, a standard interface for AVR timers, bitmaps of text characters, DC motor control, and a whole bunch more. Extremely useful in any event.

That’s it for this round of the Hacklet, bringing you the best hackaday.io has to offer.

The Radius T-T Velomobile

The Radius T-T Velomobile human powered vehicle


Over the past year, [Dave] has been hard at work on his human powered vehicle. One year and six hundred hours of build time later, the Radius T-T Velomobile is complete. This 80 lb. vehicle features a custom body, mirrors, and integrated lights.

The Radius T-T started out as a TerraTrike recumbent tricycle. [Dave] built the body by laying up fiber glass on a foam mold. To that he added a variety of 3D printed accessories such as lights and mirrors. Inside the cockpit, the driver can control turn signals and flashers.

[Dave]’s blog provides a massive amount of documentation on the build. Everything from 3D modelling of the vehicle in Blender to the rear view mirror design is discussed. This great looking build should move along quickly with its lightweight design, but we’re still waiting to hear how fast it goes. Either way, it should be a fun mode of transport which will definitely turn some heads.