Farming has been undergoing quite a revolution in the past few years. Since World War 2, most industrial farming has relied on synthetic fertilizer, large machinery, and huge farms with single crops. Now there is a growing number of successful farmers bucking that trend with small farms growing many crops and using natural methods of fertilizing that don’t require as much industry. Of course even with these types of farms, some machinery is still nice to have, so this farmer has been developing an open-source automated farming robot.
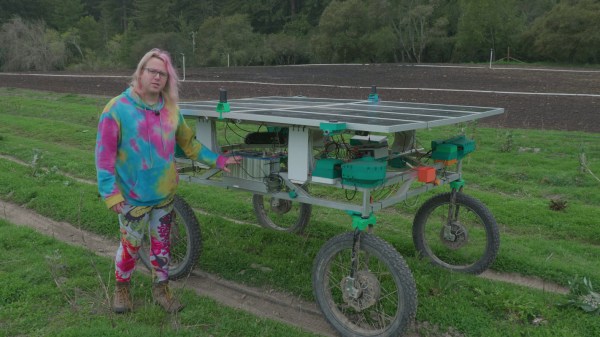
The robot is known as Acorn and is the project of [taylor] who farms in California. The platform is powered by an 800 watt solar array feeding a set of supercapacitors for energy storage. It uses mountain bike wheels and tires fitted with electric hub motors which give it four wheel drive and four wheel steering to make it capable even in muddy fields. The farming tools, as well as any computer vision and automation hardware, can be housed under the solar panels. This prototype uses an Nvidia Jetson module to handle the heavy lifting of machine learning and automation, with a Raspberry Pi to handle the basic operation of the robot, and can navigate itself around a farm using highly precise GPS units.
While the robot’s development is currently ongoing, [taylor] hopes to develop a community that will build their own versions and help develop the platform. Farming improvements like this are certainly needed as more and more farmers shift from unsustainable monocultures to more ecologically friendly methods involving multiple simultaneous crops, carbon sequestration, and off-season cover crops. It’s certainly a long row to hoe but plenty of people are already plowing ahead.