Automatic Cut-Off Saw Takes The Tedium Out Of A Twenty-Minute Job

For [Turbo Conquering Mega Eagle], the question was simple: Do I spend 20 minutes slaving away in front of a bandsaw to cut a bunch of short brass rods into even shorter pieces of brass rod? Or do I spend days designing and building an automatic cutoff saw to do the same job? The answer is obvious.

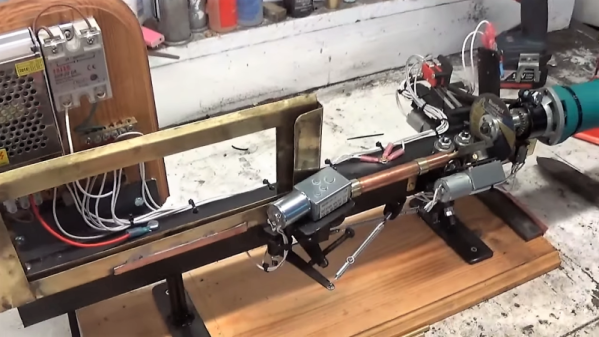
It’s only at the end of the video below that [TCME] reveals the need for these brass bits: they’re for riveting together the handles of knives he makes and sells. That makes the effort that went into his “Auto Mega Cut-O-Matic” a little easier to swallow, although we still think he ran afoul of this relevant XKCD. The saw is built out of scraps and odd bits using angle iron as a base and an electric die grinder to spin a cut-off wheel. A small gear motor feeds the brass rod down a guide tube until it hits a microswitch stop, which starts the cut cycle. Another motor swivels the saw to make the cut then moves it out of the way so the stock can advance. The impressive thing is that the only control mechanism is a series of microswitches, cams, levers, and springs  – no Arduino needed. Heck, there’s not even a 555, which we find a refreshing change.

Yes, it’s overkill, but he had fun and made something pretty ingenious. [Turbo Conquering Mega Eagle] always has something interesting going on in the shop, and we couldn’t help but notice him using his aluminum-melting tea kettle to make some parts for this build.

Continue reading “Automatic Cut-Off Saw Takes The Tedium Out Of A Twenty-Minute Job”

Robotic Cheetah Teaches A Motors Class

It seems like modern roboticists have decided to have a competition to see which group can develop the most terrifying robot ever invented. As of this writing the leading candidate seems to be the robot that can fuel itself by “eating” organic matter. We can only hope that the engineers involved will decide not to flesh that one out completely. Anyway, if we can get past the horrifying and/or uncanny valley-type situations we find ourselves in when looking at these robots, it turns out they have a lot to teach us about the theories behind a lot of complicated electric motors.

This research paper (gigantic PDF warning) focuses on the construction methods behind MIT’s cheetah robot. It has twelve degrees of freedom and uses a number of exceptionally low-cost modular actuators as motors to control its four legs. Compared to other robots of this type, this helps them jump a major hurdle of cost while still retaining an impressive amount of mobility and control. They were able to integrate a brushless motor, a smart ESC system with feedback, and a planetary gearbox all into the motor itself. That alone is worth the price of admission!

The details on how they did it are well-documented in the 102-page academic document and the source code is available on GitHub if you need a motor like this for any other sort of project, but if you’re here just for the cheetah doing backflips you can also keep up with the build progress at the project’s blog page. We also featured this build earlier in its history as well.

Making Microfluidics Simpler With Shrinky Dinks

It’s as if the go-to analogy these days for anything technical is, “It’s like a series of tubes.” Explanations thus based work better for some things than others, and even when the comparison is apt from a physics standpoint it often breaks down in the details. With microfluidics, the analogy is perfect because it literally is a series of tubes, which properly arranged and filled with liquids or gasses can perform some of the same control functions that electronics can, and some that it can’t.

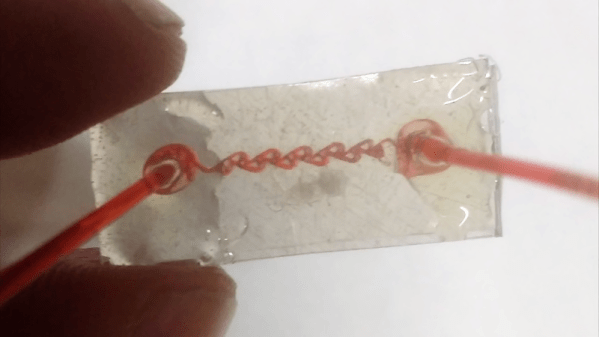
But exploring microfluidics can be tough, what with the need to machine tiny passages for fluids to flow. Luckily, [Justin] has turned the process into child’s play with these microfluidic elements made from Shrinky Dinks. For those unfamiliar with this product, which was advertised incessantly on Saturday morning cartoon shows, Shrinky Dinks are just sheets of polystyrene film that can be decorated with markers. When placed in a low oven, the film shrinks about three times in length and width while expanding to about nine times its pre-shrunk thickness. [Justin] capitalized on this by CNC machining fine grooves into the film which become deeper after shrinking. Microfluidics circuits can be built up from multiple layers. The video below shows a mixer and a simple cell sorter, as well as a Tesla valve, which is a little like a diode.

We find [Justin]’s Shrinky Dink microfluidics intriguing and can’t wait to see what kind of useful devices he comes up with. He’s got a lot going on, though, from spider-powered beer to desktop radio telescopes. And we wonder how this technique might help with his CNC-machined microstrip bandpass filters.

Continue reading “Making Microfluidics Simpler With Shrinky Dinks”

Test PCBs On A Bed Of Nails

While it might be tempting to start soldering a circuit together once the design looks good on paper, experience tells us that it’s still good to test it out on a breadboard first to make sure everything works properly. That might be where the process ends for one-off projects, but for large production runs you’re going to need to test all the PCBs after they’re built, too. While you would use a breadboard for prototyping, the platform you’re going to need for quality control is called a “bed of nails“.

This project comes to us by way of [Thom] who has been doing a large production run of circuits meant to drive nixie tubes. After the each board is completed, they are laid on top of a number of pins arranged to mate to various points on the PCB. Without needing to use alligator clamps or anything else labor-intensive to test, this simple jig with all the test points built-in means that each board can be laid on the bed and tested to ensure it works properly. The test bed looks like a bed of nails as well, hence the name.

There are other ways of testing PCBs after production, too, but if your board doesn’t involve any type of processing they might be hard to implement. Nixie tubes are mostly in the “analog” realm so this test setup works well for [Thom]’s needs.

Giant Robot Arm Uses Fluid Power, Not Electronics

Fair warning that [Freerk Wieringa]’s videos documenting his giant non-electric robot build are long. We’ve only watched the first two episodes and the latest installment so far, all of which are posted after the break. Consider it an investment to watch a metalworking artist undertake an incredible build.

The first video starts with the construction of the upper arm of the robot. Everything is fabricated using simple tools; the most sophisticated tools are a lathe and a TIG welder. As the arm build proceeds we see that there are no electronic controls to be found. Control is through hydraulic cylinders in a master-slave setup; the slave opens a pneumatic valve attached to the elbow of the arm, which moves the lower arm until the valve closes and brings the forelimb to a smooth stop. It’s a very clever way of providing feedback without the usual sensors and microcontrollers. And the hand that goes at the end of the arm is something else, too, with four fingers made from complex linkages, all separately actuated by cylinders of their own. The whole arm looks to be part of a large robot, probably about 3 or 4 meters tall. At least we hope so, and we hope we get to see it by the end of the series.

True, we’ve seen terrifyingly large robots before, but to see one using fluid power for everything is a treat.

Continue reading “Giant Robot Arm Uses Fluid Power, Not Electronics”

Reflowduino: Put That Toaster Oven To Good Use

There are few scenes in life more moving than the moment the solder paste melts as the component slides smoothly into place. We’re willing to bet the only reason you don’t have a reflow oven is the cost. Why wouldn’t you want one? Fortunately, the vastly cheaper DIY route has become a whole lot easier since the birth of the Reflowduino – an open source controller for reflow ovens.

This Hackaday Prize entry by [Timothy Woo] provides a super quick way to create your own reflow setup, using any cheap means of heating you have lying around. [Tim] uses a toaster oven he paid $21 for, but anything with a suitable thermal mass will do. The hardware of the Reflowduino is all open source and has been very well documented – both on the main hackaday.io page and over on the project’s GitHub.

The board itself is built around the ATMega32u4 and sports an integrated MAX31855 thermocouple interface (for the all-important PID control), LiPo battery charging, a buzzer for alerting you when input is needed, and Bluetooth. Why Bluetooth? An Android app has been developed for easy control of the Reflowduino, and will even graph the temperature profile.

When it comes to controlling the toaster oven/miscellaneous heat source, a “sidekick” board is available, with a solid state relay hooked up to a mains plug. This makes it a breeze to setup any mains appliance for Arduino control.

We actually covered the Reflowduino last year, but since then [Tim] has also created the Reflowduino32 – a backpack for the DOIT ESP32 dev board. There’s also an Indiegogo campaign now, and some new software as well.

If a toaster oven still doesn’t feel hacky enough for you, we’ve got reflowing with hair straighteners, and even car headlights.

Playing Jedi Mind-Tricks On Your TV

Gesture-enabled controls mean you get to live out your fantasy of wielding force powers. It does, however, take a bit of hacking to make that possible. Directly from the team at [circuito.io] comes a hand gesture controller for Jedi mind-trick manipulation of your devices!

The star of the show here is the APDS-9960 RGB and gesture sensor, with an Arduino Pro Mini 328 doing the thinking and an IR transmitter LED putting that to good use. The Arduino Sketch is a chimera of two code examples for IR LEDs and the gesture sensor — courtesy of the always estimable Ken Shirriff, and SparkFun respectively.

Of course, you can have the output trigger different devices, but since this particular build is meant to control a TV the team had to use a separate Arduino and IR receiver to discover the codes for the commands they wanted  to use. Once they were added to the Sketch, moving your hand above the sensor in X, Y or Z-axes executes the command. Voila! — Jedi powers.

Continue reading “Playing Jedi Mind-Tricks On Your TV”