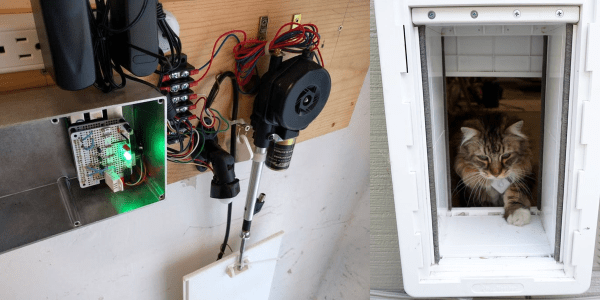
Monitor Your 3D Printer With Node-RED And Tasker

Anyone with a desktop 3D printer knows that it can be a bit nerve-wracking to leave the machine alone for any extended period of time. Unfortunately, it’s often unavoidable given how long more complicated prints can take. With big prints easily stretching beyond the 20 hour mark, at some point you’re going to need to leave the house or go to sleep. We hope, anyway.

In an effort to make his time away from his printer a bit less stressful, [Mat] from NotEnoughTECH has put together a comprehensive framework for monitoring his machine on the go. After looking at existing remote monitoring solutions, he found none gave him the level of information he was after. His system collects up an incredible number of data points about the printer’s current status and pushes it all to his Android phone as a rich notification. Best of all, he’s documented the entire system in exquisite detail for anyone else who might want to follow in his footsteps.

There’s a considerable amount of hardware and software involved in this system, and getting it up and running won’t be quite as straightforward as using some of the turn-key solutions out there. Octoprint is responsible for controlling and monitoring the printer, and [Mat] is pulling data from its API using Node-RED. That data is formatted and ultimately delivered to his Android device as a notification with Tasker. On the hardware side he’s got a Sonoff POW R2 to not only turn the printer on and off but measure its energy consumption, a USB camera to provide a live view of the printer, and a couple of Raspberry Pis to run it all.

Even if you don’t have a 3D printer, or maybe just don’t leave the house to begin with, the video [Mat] has put together after the break that shows how all the elements of this system are pulled together in Node-RED is a fascinating look at the flow-based visual programming tool. Similarly, it’s a great demonstration on how Tasker can be used to add some very slick Android notifications for your project without having to commit to developing a native application for the platform.

If you like the idea of remotely monitoring your printer but aren’t ready to dive into the deep end like [Mat], there are easier options. With a Raspberry Pi running Octoprint added to your 3D printer and one of the existing mobile monitoring and control front-ends installed, you’ll be well on the way to tackling those big prints without having to pitch a tent in the lab.

Continue reading “Monitor Your 3D Printer With Node-RED And Tasker”

Add Nest Functionality To Your Thermostat For $5

The Nest Thermostat revolutionized the way that people control the climate in their homes. It has features more features than even the best programmable thermostats. But, all of the premium features also come at a premium price. On the other hand, for only $5, a little coding, and the realization that thermostats are glorified switches, you can easily have your own thermostat that can do everything a Nest can do.

[Mat’s] solution uses a Sonoff WiFi switch that he ties directly into the thermostat’s control wiring. That’s really the easy part, since most thermostats have a ground or common wire, a signal wire, and a power wire. The real interesting work for this build is in setting up the WiFi interface and doing the backend programming. [Mat’s] thermostat is controlled by software written in Node-RED. It can even interface with Alexa. Thanks to the open source software, it’s easy to add any features you might want.

[Mat] goes through a lot of detail on the project site on how his implementation works, as far as interfacing all of the devices and the timing and some of the coding problems he solved. If you’ve been thinking about a Nest but are turned off by the price, this is a great way to get something similar — provided you’re willing to put in a little extra work. This might also be the perfect point to fall down the home automation rabbit hole, so be careful!

Continue reading “Add Nest Functionality To Your Thermostat For $5”

Adding Energy Use And Cost To “Laundry Done” Notifications

Some time ago [Xose Pérez] got interested in generating a notification when his washer had completed a cycle, and now with added features like reporting power usage and cost, he’s put it all together into a Node-Red node that makes it easy to modify or integrate with other projects.

[Xose] started this journey with a Laundry Monitor he created that effectively used cheap hardware (and his own firmware) to monitor his washing machine’s current usage. That sensor was used as the basis for sending notifications informing him whenever the appliance’s cycle was done. Since then, he has continued to take household power monitoring seriously, and with a bit of added work can not only tell when a given appliance has been started and stopped, but can also summarize the energy usage and cost of the appliance, making the notifications more useful. The package is named node-red-contrib-power-monitor and is also hosted on GitHub.

Cheap WiFi-enabled smart switches are making it possible for even the dumbest of appliances to join the Internet of Things, so don’t ignore [Xose]’s complementary work on ESPurna, which is an alternative open-source firmware for a wide variety of ESP8266 and ESP8285 based smart switches, lights and sensors.

Internet Of Laundry — Let The ESP8266 Watch Your Dirty Drawers Get Clean

When you think of world-changing devices, you usually don’t think of the washing machine. However, making laundry manageable changed not only how we dress but how much time people spent getting their clothes clean. So complaining about how laborious our laundry is today would make someone from the 1800s laugh. Still, we all hate the laundry and [Andrew Dupont], in particular, hates having to check on the machine to see if it is done. So he made Laundry Spy.

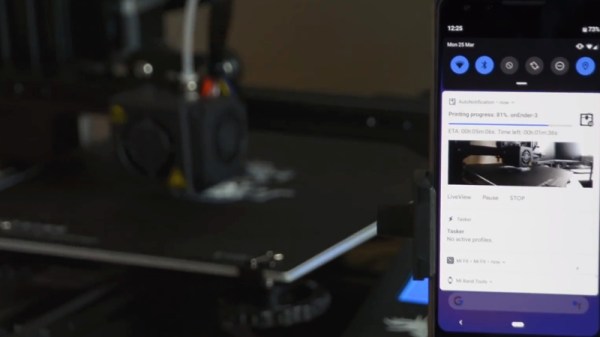
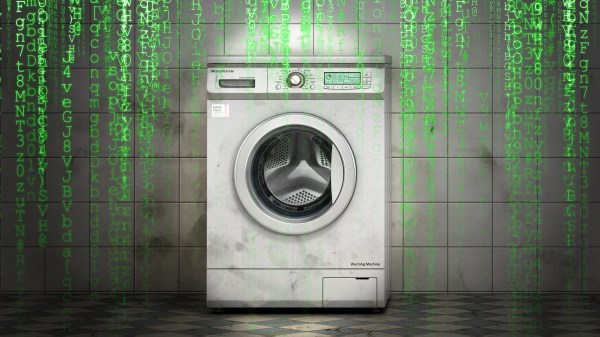
How do you sense when the machine — either a washer or a dryer — is done? [Andrew] thought about sensing current but didn’t want to mess with house current. His machines don’t have LED indicators, so using a light sensor wasn’t going to work either. However, an accelerometer can detect vibrations in the machine and most washers and dryers vibrate plenty while they are running.

The four-part build log shows how he took an ESP8266 and made it sense when the washer and dryer were done so it could text his cell phone. He’d already done a similar project with an Adafruit HUZZAH. But he wanted to build in some new ideas and currently likes working with NodeMCU. While he was at it he upgraded the motion sensor to an LIS3DH which was cheaper than the original sensor.

[Andrew] already runs Node – RED on a Raspberry Pi, so incorporating this project with his system was a snap. Of course, you could adapt the approach to lots of other things, as well. The device produces MQTT messages and Node – RED subscribes to them. The Pushover handles the text messaging. Node – RED has a graphical workflow that makes integrating all the pieces very intuitive. Here’s the high-level workflow:

You might wonder why he didn’t just have the ESP8266 talk directly to Pushover. That is possible, of course, but in part 2, [Andrew] enumerates some good reasons for his design. He wants to decouple components in the system for easier future upgrades. And MQTT is simple to publish on the sensor side of things compared to API calls which are handled by the Raspberry Pi for now.

Laundry monitoring isn’t a unique idea and everyone has a slightly different take on it, even some Hackaday authors. If phone notification is too subtle for you, you can always go bigger.

Hackaday Prize Entry: Automated Wildlife Recognition

Trail and wildlife cameras are commonly available nowadays, but the Wild Eye project aims to go beyond simply taking digital snapshots of critters. [Brenda Armour] uses a Raspberry Pi to not only take photos of wildlife who wander into the camera’s field of view, but to also automatically identify and categorize the animals seen using a visual recognition API from IBM via the Node-RED infrastructure. The result is a system that captures an image when motion is detected, sends the image to the visual recognition API, and attempts to identify any wildlife based on the returned data.

The visual recognition isn’t flawless, but a recent proof of concept shows promising results with crows, a cat, and a dog having been successfully identified. Perhaps when the project is ready to move deeper into the woods, elements from these solar-powered networked birdhouses (which also use the Raspberry Pi) could help cut some cords.

Solving IoT Problems With Node.js For Hardware

Tod Kurt knows a thing or two about IoT devices. As the creator of blink(1), he’s shipped over 30,000 units that are now out in the wild and in use for custom signaling on everything from compile status to those emotionally important social media indicators. His talk at the 2016 Hackaday SuperConference covers the last mile that bridges your Internet of Things devices with its intended use. This is where IoT actually happens, and of course where it usually goes astray.

Continue reading “Solving IoT Problems With Node.js For Hardware”

Water Gun

Motion Sensing Water Gun Tweets Photos To Embarrass Enemies

[Ashish] is bringing office warfare to the next level with a motion sensing water gun. Not only does this water gun automatically fire when it detects motion, but it also takes a photo of the victim and publishes it on Twitter.

This hack began with the watergun. [Ashish] used a Super Soaker Thunderstorm motorized water gun. He pulled the case apart and cut one of the battery wires. he then lengthened the exposed ends and ran them out of the gun to his control circuit. He also placed a protection diode to help prevent any reverse EMF from damaging his more sensitive electronics. The new control wires run to a MOSFET on a bread board.

[Ashish] is using a Lightblue Bean board as a microcontroller. The Bean is Arduino compatible and can be programmed via low energy Bluetooth. The Bean uses an external PIR sensor to detect motion in the room. When it senses the motion, it activates the MOSFET which then turns on the water gun.

[Ashish] decided to use Node-RED and Python to link the Bean to a Twitter account. The system runs on a computer and monitor’s the Bean’s serial output. If it detects the proper command, it launches a Python script which takes a photo using a webcam. A second script will upload that photo to a Twitter account. The Node-RED server can also monitor the Twitter account for incoming direct messages. If it detects a message with the correct password, it can use the rest of the message as a command to enable or disable the gun.