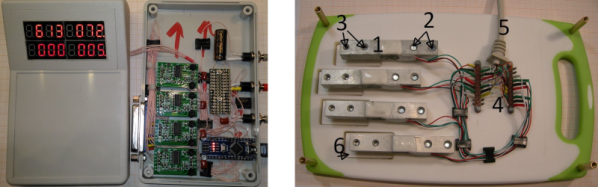
Almost two years ago, a research team showed that it was possible to get fine motor control from cheap, brushless DC motors. Normally this is not feasible because the motors are built-in such a way that the torque applied is not uniform for every position of the motor, a phenomenon known as “cogging”. This is fine for something that doesn’t need low-speed control like a fan motor, but for robotics it’s a little more important. Since that team published their results, though, we are starting to see others implement their own low-speed brushless motor controllers.
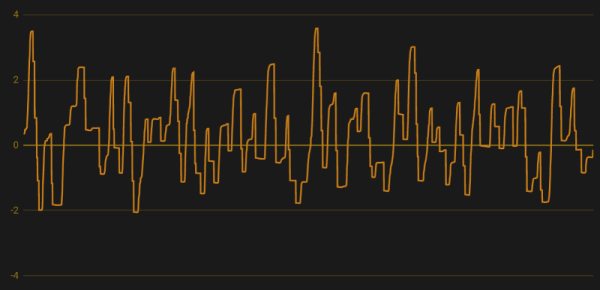
The new method of implementing anti-cogging maps out the holding torque required for any position of the motor’s shaft so this information can be used later on. Of course this requires a fair amount of calibration; [madcowswe] reports that this method requires around 5-10 minutes of calibration. [madcowswe] also did analysis of his motors to show how much harmonic content is contained in these waveforms, which helps to understand how this phenomenon arises and how to help eliminate it.
While [madcowswe] plans to add more features to this motor control algorithm such as reverse-mapping, scaling based on speed, and better memory usage, it’s a good implementation that has visible improvements over the stock motors. The original research is also worth investigating if a cheaper, better motor is something you need.
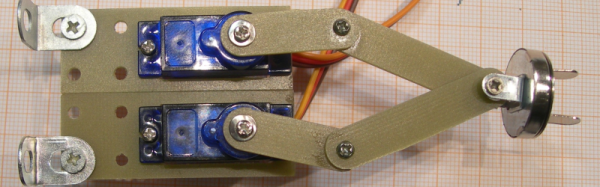
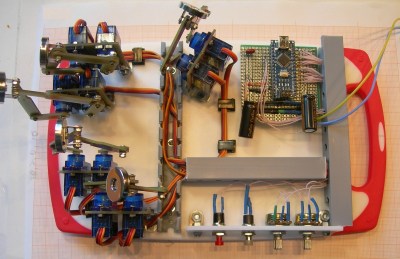 He’s using ten hobby micro servos connected to an Arduino Nano, all mounted on a kitchen chopping board, with a few other bits thrown in to round out the build. There’s one pair of servos for each finger. A five bar linkage converts the servo rotations to two-dimensional motion. The end of the linkage has a swiveling metallic disk. Patient fingers are attached to these discs via magnetic metal pads that are attached to the end of the fingers using adhesive plaster tape. Two push buttons cycle through a large number of exercise modes and two potentiometer’s help adjust the speed and smoothness (the number of points calculated for the desired motion). Two 7-segment LED display modules connected to the Arduino provides a visual interface showing program modes, speed, number of cycles and other relevant information. Replicating the project ought to be very straightforward since the device uses off-the-shelf parts which are easy to put together using the detailed build instructions, photos and code posted on [Sergei]’s project page. Check out the videos below to see the rehab helper in action.