IoT Doorman: Eye-Controlled Door For A Girl With Cerebral Palsy

Kyleigh has an eye-controlled computer on her wheelchair but something as simple as her bedroom door was still beyond her reach… until now! [Bill Binko], recently filmed a demo of an automatic, IoT door opener built for the young girl with cerebral palsy. [Bill] is a co-founder of ATMakers, an organization that enables makers interested in assistive technologies to collaborate with users to improve quality of life.

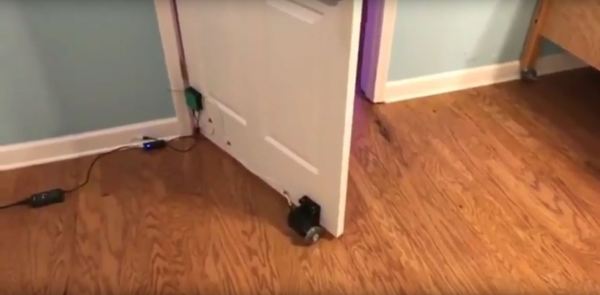
Using her eye tracking tablet (PRC Device), Kyleigh has two new icons that make the relevant call to a website, pushing a simple command to either open or close her bedroom door. The device attached to the door uses an Adafruit M0 WiFi Feather board, a DC stepper motor and wheel, a UBEC buck converter, and a potentiometer.

Since other family members are also going to be opening and closing the door, there’s potentiometer which measures the door position for proper operation next time Kyleigh wishes to use the door. The installation also maintains a fairly inconspicuous profile for the assistance it gives — the ‘brain’ is enclosed in a small box on the door, with the motor only slightly larger on the door’s base.

[Bill] believes the project has a few quibbles and wants to work out a smaller wait before the open/close process is executed and optimizing the open/close speed. You have to check out the video below to see that it works really really. We’re also excited to see Kyleigh using her gaze control to talk to an Amazon Echo. [Bill] foresee a door control improvement that links it to Alexa. And how much did it cost to improve the quality of life for this young girl? $70.

We love seeing makers help people, and cannot wait to see what 2018 will bring! If you’re looking for more inspiration, don’t miss the eye-controlled wheelchair project called Eyedrivomatic which won the 2015 Hackaday Prize. There’s also the top Assistive Technology projects from the Hackaday Prize.

Continue reading “IoT Doorman: Eye-Controlled Door For A Girl With Cerebral Palsy”

3D Print The Blasphemous Helicopter Part Known As A Jesus Nut

Today, when we say “Jesus nut”, we’re not referring to the people who spend their days proselytizing down at the mall. The term, likely spawned in the Vietnam war, refers to the main nut holding the rotors on to the mast of a helicopter which is in the shape of the Christian cross. If the “Jesus nut” was to fail, the rotors would detach from the craft, and there would be little for crews to do except to pray.

[Marius] was presented with a failed Jesus nut, though thankfully from an R/C helicopter, meaning there was no loss of life. A friend needed the part replaced for their FQ777 copter, so it was time to bust out the 3D printer and get to work.

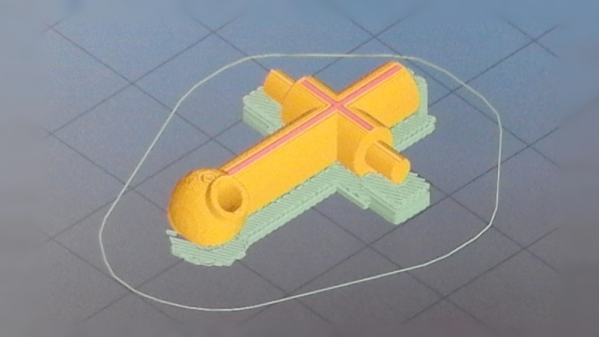
The first step was to reconstruct the broken piece so it could be measured and then modeled in CAD software with the help of calipers to determine the original dimensions. What followed will be familiar to many 3D printing enthusiasts — a case of educated trial and error, experimenting with different filaments and print settings until a usable part was produced. [Marius] notes on the part’s Thingiverse page  that they achieved the best print with an 0.2mm layer height, and printing two parts at once to allow the layers more time to cool during each pass. It was then a simple matter of tidying up the part with sandpaper and a drill bit before installing it on the vehicle.

[Marius] reports that the part was successful, being both strong enough to withstand the forces involved as well as having a fit that was just right to suit the rotor pin which needs to be able to turn freely within the Jesus nut. While they’re not always the right tool for the job, 3D printed replacement parts can sometimes surprise you. These prints that are used in repair work often don’t attract the same interest as printing cosplay armor, kinetic art, and low-poly Pokemon. But they quickly prove how transformative having a 3D printer, and the skills to use it, are. That’s why we’re running the Repairs You Can Print contest… take a few minutes to show off the really useful repairs you’ve pulled off with your 3D printer!

Play A Few Games Of Smash Brothers On The Go With A Portable Wii

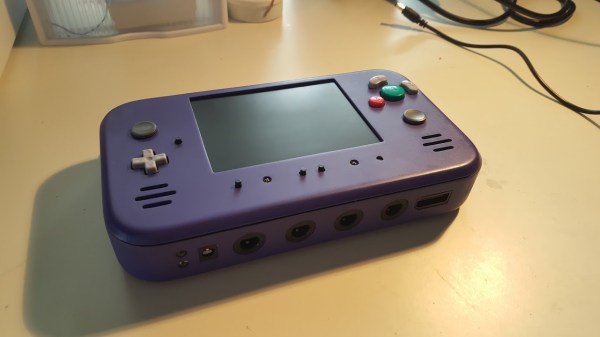
How would you approach a build that required you to hack apart a perfectly good console motherboard? With aplomb and a strong finish. [jefflongo] from [BitBuilt.net] — a forum dedicated to making consoles portable — has finished just such a task, unveiling his version of a portable Wii to the world.

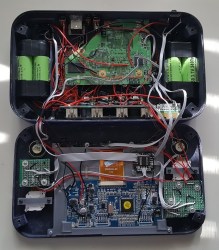
While this bears the general appearance of a portable GameCube, it’s what inside that counts. A heavily modified   Wii motherboard — to reduce size — forms this portable’s backbone, and it includes two infrared LEDs on its faceplate for Wii Remotes.  A single player can use the built-in controller, but [jefflongo] has included four GameCube controller ports for maximum multiplayer mayhem. Although he’ll likely plan on taking advantage of the built-in AV Out port to play on a TV and charge port for those extended gaming sessions, four 3400mAh batteries — with an estimated four hour battery life — should keep him satisfied on the go until he can recharge.

While the electronics display an impressive amount of work, but the final piece is a sight to behold. Check out the demo video after the break!

Continue reading “Play A Few Games Of Smash Brothers On The Go With A Portable Wii”

Disco Bulb Keeps The Party Spinning

Even if you don’t like disco, you might like the slick moves that went into this project. [W&M] built a miniature motorized mirror ball inside of a standard incandescent light bulb, and the results are something to dance about.

Short of blowing a glass bulb, building a motor, and growing the wood, this is about as scratch-built as it gets. Much of the woodworking is done on a metal lathe, and this includes the base of the mirror ball itself. As with all good thing-in-a-bottle builds, the ball is too big to go in the bulb, so [W&M] quartered it, drilled a few holes, and ran a string through the pieces so they can be carefully glued and drawn back together into a sphere. He even cut up mirror tiles and painstakingly applied them with tweezers.

This disco bulb is meant to be hung from the ceiling and wired into mains like a regular mirror ball. [M&W] stuffed the guts from a small USB wall charger into the handmade beech base to provide clean power for both the geared motor that spins the ball and the tiny LED that illuminates it. Slip into your best leisure suit (or sweat suit, we won’t judge) and hustle past the break to watch the build video.

We don’t see a lot of disco balls around here, but we did see a disco icosahedron once.

Continue reading “Disco Bulb Keeps The Party Spinning”

Arrow’s $30 FPGA Board Reviewed

We like cheap FPGA boards. It isn’t just that we’re cheap — although that’s probably true, too — but cheap boards are a good way to get people started on FPGAs and we think more people should be using FPGAs more often. One inexpensive board is the Max-1000 from Trenz and Arrow. At $29, it is practically an impulse buy. [ZipCPU] did a great write up on his experience using the board. He found that some of it was good, some was bad, and some was just plain ugly. Still, for $30, it seems like this might be a nice board for some applications or for getting started.

Billed an IoT Maker Board, the tiny board sports a Intel (formerly Altera) MAX10 device with 8,000 logic elements, a USB programming interface onboard, 8 MB of SDRAM, and both PMOD and Arduino MKR headers. The MAX10 has an analog to digital conversion block (with an analog mux for up to nine channels) and the ability to host a 32-bit soft controller onboard, too.

Continue reading “Arrow’s $30 FPGA Board Reviewed”

Amazing Mechanical Linkages And The Software To Design Them

Most of us are more bits-and-bytes than nuts-and-bolts, but we have the deepest appreciation for the combination of the two. So, apparently, does [rectorsquid]. Check out the design and flow of his rolling ball sculpture (YouTube, embedded below) to see what we mean. See how the arms hesitate just a bit as the ball is transferred? See how the upper arm gently places it on the ramp with a slight downward gesture? See how it’s done with one motor? There’s no way [rectorsquid] designed this on paper, right?

Of course he didn’t (YouTube). Instead, he wrote a simulator that lets him try out various custom linkages in real time. It’s a Windows-only application (sigh), but it’s free to use, while the video guides (more YouTube) look very comprehensive and give you a quick tour of the tool. Of special note is that [rectorsquid]’s software allows for sliding linkages, which he makes very good use of in the rolling ball sculpture shown here.

We’ve actually secretly featured [rectorsquid]’s Linkage software before, in this writeup of some amazing cosplay animatronic wings that used the program for their design. But we really don’t want you to miss out if you’re doing mechanical design and need something like this, or just want to play around.

If you’d like to study up on your nuts and bolts, check out our primer on the ubiquitous four-bar linkage, or pore through Hackaday looking for other great linkage-powered examples, like this automatic hacksaw or a pantograph PCB probe for shaky hands.

Anyone know of an open-source linkage simulator that can also output STL files for 3D printing? Or in any format that could be easily transformed into OpenSCAD? Asking for a “friend”.

Continue reading “Amazing Mechanical Linkages And The Software To Design Them”

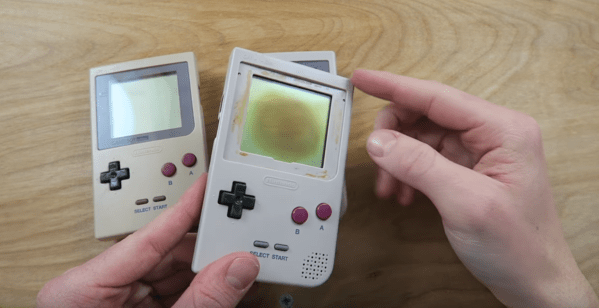
Repairing A Sunburned Game Boy Screen

The original Game Boy is a classic. Sure, it had no backlight, but there is something special about playing on that classic green screen. Unfortunately, some of these older systems are suffering a terrible fate — screen burn. Game Boy’s played best with lots of light — especially out in the sun. But that same sun did terrible things to the screen. A black splotch in the center of the LCD is the telltale sign of a burned Game Boy. You might think that screen replacement is the only option, but [The Retro Future] shows us how to repair this issue.

A reflective LCD is a layer cake made up of polarizers, two panes of glass, and a reflector. The burns often seen on Game Boy screens usually are in the polarizer and the optically clear glue which attaches the plastic polarizer to the glass. We’re guessing these burns happen when someone leaves their Game Boy out in the sun. Between the sun rays directly striking the top polarizer and the rays bounced back from the reflector at the rear of the screen, that poor polarizer doesn’t stand a chance.

Repairing the burn is a delicate operation, as one false move could crack the thin LCD glass. The first step is to carefully peel off the burned polarizer. This leaves a mess of dried glue, which can be scraped off or dissolved with alcohol. A new linear polarizer can then be placed on the front of the screen. [The Retro Future] chose not to glue the polarizer, but we’re betting some UV cure LOCA (Liquid Optically Clear Adhesive) from a cell phone screen protector would do the trick.

If you love the look of the classic Game Boy, but want to play just about any classic game, grab a Raspberry Pi zero, and build a retro Pi Boy.

Continue reading “Repairing A Sunburned Game Boy Screen”