New Depths For IMac Repair

There’s not much economic sense in fixing a decade-old desktop computer, especially when it’s the fancy type with the screen integrated into the body of the computer, and the screen is the thing that’s broken. Luckily for [JnsBn] aka [BEAN] the computer in question was still functional with a second monitor, so he decided to implement a cheap repair to get the screen working again by making it see-through.

The only part of the screen that was broken was the backlight, which is separate from the display unit itself. In order to view at least something on the screen without an expensive replacement part, he decided to remove the backlight altogether but leave the display unit installed. With a strip of LEDs around the edge, the screen was visible again in addition to the inner depths of the computer. After a coat of white Plasti Dip on the inside of the computer, it made for an interesting effect and made the computer’s display useful again.

While none of us, including the creator, recommend coating the inside of an iMac with Plasti Dip due to the risk of fire and/or other catastrophic failure, there’s not much to lose otherwise. Just don’t shove this one into the wall. Continue reading “New Depths For IMac Repair”

The High Seas Are Open Source

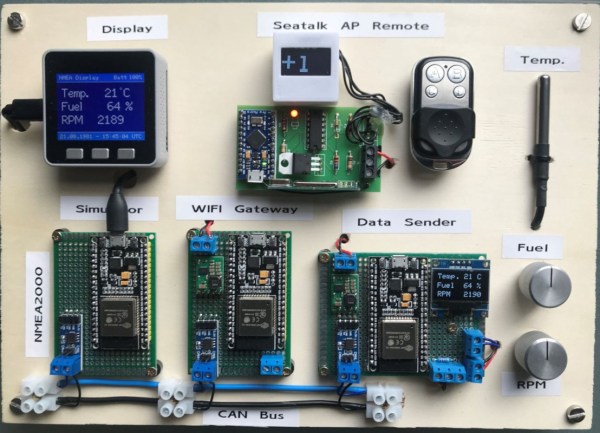
One of the biggest problems of owning an older boat (besides being a money pit – that is common to all boats regardless of age) is the lack of parts and equipment, and the lack of support for those parts if you can find them at all. Like most things, this is an area that can benefit greatly from some open source solutions, which the Open Boat Projects in Germany has been able to show. (Google Translate from German)

This group has solutions for equipment problems of all kinds for essentially any sized boat. At their most recent expo, many people were interested in open source solutions for situations where there is currently only an expensive proprietary option, such as support for various plotting devices. This isn’t the only part of this project, though. It includes many separate projects, like their solutions for autopilot and navigation. There are even complete hardware packages available, all fully documented.

Open source solutions for large, expensive things like this are often few and far between for a number of reasons. There are limited options for other modes of open source transportation too, as it seems like most large companies are not willing to give up their secrets easily. Communities like this, however, give us hope that people will have other options for repairing their vehicles without having to shell out too much money.

Thanks to [mip] for the tip!

An Open Source Ebike

In the ebike world, there are two paths. The first is a homemade kit bike with motors and controllers from China. The second is a prebuilt bike from a manufacturer like Giant, with motors and controllers from China, which will be half as fast and cost three times as much. The choice is obvious, and there are other benefits to taking the first path as well, such as using this equipment which now has an open source firmware option.

The Tong Sheng TSDZ2 drive is popular in the ebike world because it’s an affordable kit motor which has a pedal-assist mode using torque sensors, resulting in a more polished experience. In contrast, other popular kit motors tend to rely on less expensive cadence sensors which are not as smooth or intuitive. This new open source firmware for the TSDZ2 further improves on the ride by improving the motor responsiveness, improving battery efficiency, and opening up the ability to use any of a number of color displays. (More information is available on a separate Wiki.)

If you have a TSDZ2-based ebike it might be time to break out the laptop and get to work installing this firmware. If you’re behind the times and still haven’t figured out that ebikes are one of the best ways to travel, here is the proof you need.

Thanks to [coaxial] for the tip! Photo via Reddit user [PippyLongSausage].

A Turing-Complete CPU From RAM

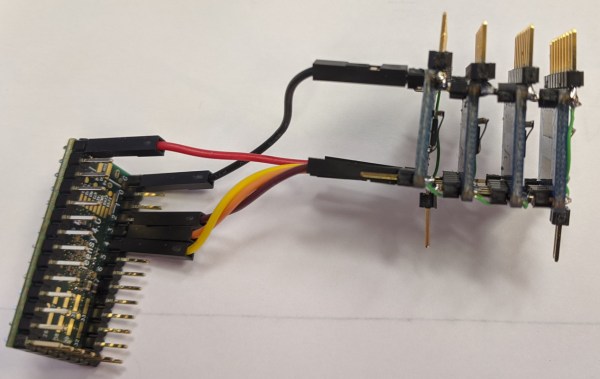
Building a general-purpose computer means that you’ll have to take a lot of use cases into consideration, and while the end product might be useful for a lot of situations, it will inherently contain a lot of inefficiencies. On the other hand, if you want your computer to do one thing and do it very well, you can optimize to extremes and still get results. This computer, built from RAM, is just such an example.

The single task in this case was to build a computer that can compute the Fibonacci sequence.  Since it only does one thing, another part of the computer that can be simplified (besides the parts list) is the instruction set. In this case, the computer uses a single instruction: byte-byte-jump. Essentially all this computer does is copy one byte to another, and then perform an unconditional jump. Doing this single task properly is enough to build every other operation from, so this was chosen for simplicity even though the science behind why this works is a little less intuitive.

Of course, a single instruction set requires a lot of clock cycles to work (around 200 for a single operation). The hardware used in this build is also interesting and although it uses a Raspberry Pi to handle some of the minutiae, it’s still mostly done entirely in RAM chips, only cost around $15, and is a fascinating illustration of some of the more interesting fundamentals of computer science. If you’re interested, you can build similar computers out of 74-series chips as well.

How Many LEDs Can You Drive?

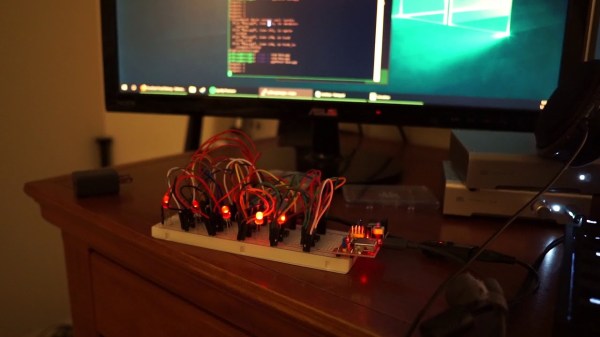
Driving more than a handful of LEDs from a microcontroller is often a feat that takes tedious wiring, tricking the processor, or a lot of extra external hardware. Charlieplexing is perhaps the most notorious of these methods, and checks two of those three boxes. This library for the Teensy 4.0 checks all three, but it can also drive a truly staggering 32,000 LEDs at one time.

The TriantaduoWS2811 library is able to drive 32 channels of LEDs from a Teensy 4.0 using only three pins and minimal processor resources. It uses the FlexIO and DMA subsystems of the i.MX RT1062, the particular ARM processor on the Teensy, to drive four external shift registers. Together, the system is able to achieve 30 frames per second on with 1,000 LEDs per channel, for a total of 32,000 LEDs. Whoah.

[Ward] aka [wramsdell] wondered what one would do with all of the horsepower of a Teensy microcontroller when he first saw its specifications, and was able to build this project to take advantage of its features. What’s surprising, though, is that it doesn’t use nearly everything the processor is capable of, so you can do other tasks at the same time as driving that giant LED display.

Hands-Free Oreo Dispenser, Now With Milk

A while back, [Emiel] aka [The Practical Engineer] created a hands-free Oreo dispenser for his shop. This was a necessary addition to his fleet of handy tools, and allowed him to multitask much more effectively by using a sander, for example, at the same time that he needed to eat a cookie. Of course, this time-saving device was missing one crucial element: milk. [Emiel] is back in this video to show off his milk-dispensing upgrade to his original Oreo dispenser.

A few ideas were considered before [Emiel] decided to build a separate unit for the milk dispenser, so as not to create a gigantic mess any time an Oreo was delivered, and also to maintain some decorum in the shop. He rebuilt the Oreo dispenser with a 3D printer and then also 3D printed the milk dispenser. The chin-activated switch inside the device turns on a small pump which squirts milk into the user’s mouth, presumably after an Oreo has been delivered.

There are a few problems with the build, but most are easily solved by replacing non-food-grade parts with plastic that is more safe for being around consumables. The only other thing we can see here is that it might be a little hard to keep things clean, both inside and out, but most Oreo-related builds like this one have at least some problem with cleanliness that isn’t impossible to keep up with.

Continue reading “Hands-Free Oreo Dispenser, Now With Milk”

USB Password Keeper Runs On Tiny Chip

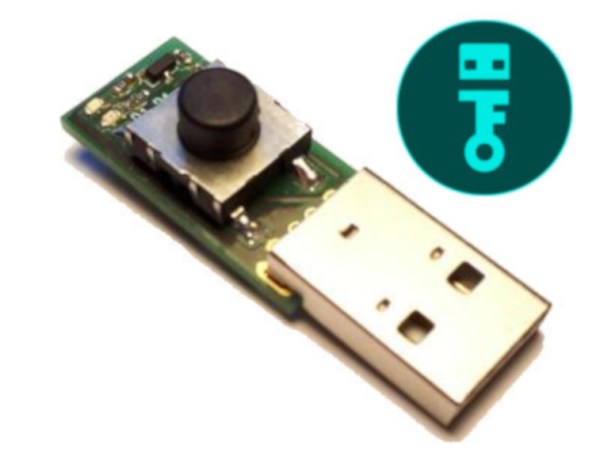
The most important rule of password use, especially when used for online logins, is to avoid reusing passwords. From there, one’s method of keeping track of multiple passwords can vary considerably. While memorization is an option in theory, in practice a lot of people make use of a password manager like Lastpass or KeePass. For those with increased security concerns, though, you may want to implement a USB password keeper like this one based on an ATtiny.

This password keeper, called “snopf”, is a USB device with an ATtiny85 which adds a layer of separation to password keeping that increases security substantially. Passwords are created by the USB device itself using a 128-bit key to generate the passwords, which are physically detached from the computer. Password requests are made by the computer to the USB device, but the user must push a button on the snopf in order to send the password to the computer. It does this by emulating a keyboard, keeping the password information off of the computer’s clipboard.

Of course, snopf isn’t perfectly secure, and the project’s creator [Hajo] goes into detail on the project’s page about some of the potential vulnerabilities. For most use cases, though, none of these are of serious concern. Upgrading your password keeper to a physical device is likely to be a huge security improvement regardless, and one was actually developed on Hackaday a few years ago.