[Maarten Tromp]’s replacement of his motorcycle’s tail light with LED equivalents is a great example of something that every hacker learns sooner or later: interfacing to and working around existing parts can turn a trivial-seeming task into a much bigger job than expected. The more one has to work within the constraints of an existing system, the more opportunities there are for roadblocks and surprise issues to stall progress, and this project is a great example of that.
 [Maarten]’s 1999 Honda ST1100 Pan European motorcycle had no aftermarket options for an LED rear light assembly, and he wasn’t too keen on just installing a generic module to replace the original. Instead, he resolved to purchase and disassemble a used factory assembly, and replace the incandescent lamps with some equivalent LEDs. Replacing bulbs with LEDs sounds easy, but doing the job right took [Maarten] almost two weeks in the end.
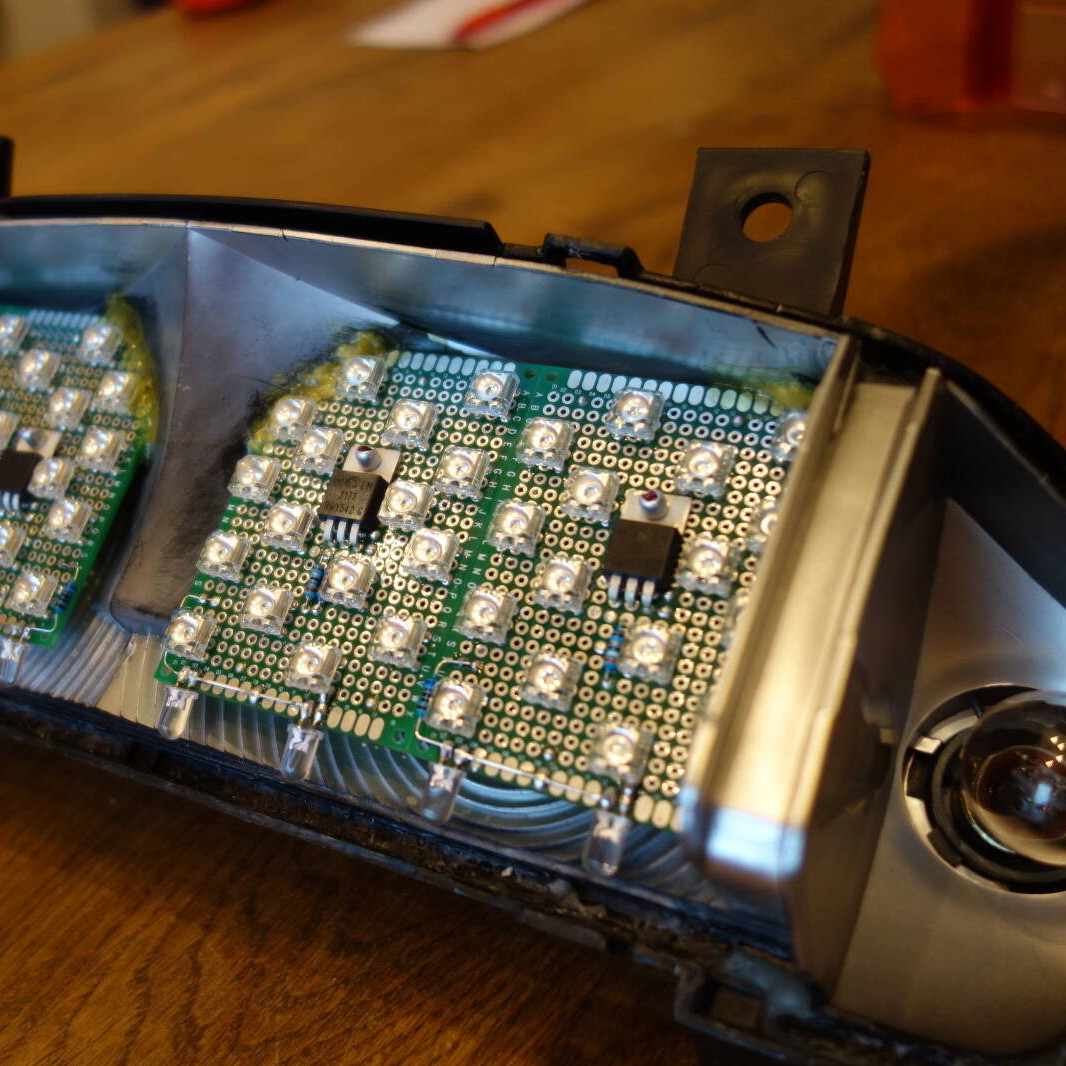
Problems started early with simple things like how to open up the light assembly itself. The unit isn’t user-serviceable and isn’t intended to be opened, and the parts are sealed shut with a waxy substance. Fortunately, heat does the trick. Another early hitch was the curved base of the light assembly, which made mounting flat perfboard or veroboard a challenge. In the end, [Maarten] settled on a triangular grid of high-brightness LEDs, driven with LM317 regulators configured as constant-current supplies, mounted on some protoboard cut to fit the unique curve of the assembly. The result accepts the wide voltage range of the motorcycle’s battery (from 10.5 V to 14.5 V) and can still function even if some individual LEDs stop working.
The project has one more example of how working around existing hardware can be a pain. [Maarten] had originally intended to swap out the turn signal lamps for LEDs as well, but there is a glitch. The motorcycle’s turn signal relay will do a fast blink pattern if burnt-out turn signal lamps are detected. Since LEDs consume considerably less current than the original bulbs, the relay will remain stuck in the fault condition. There are a few different ways around this, but it’s a problem for another day. For now, the tail light LED replacement is a success.
Working around existing hardware frequently brings unexpected challenges, but when safety systems (such as lights on a vehicle) are involved, it’s extra-important to make sure things are done right.