You Otter Be Able To Stream That Audio: Open Hardware Eclipses Chromecast Audio

When Google halted production of the Chromecast Audio at the start of 2019, there was a (now silent) outcry. Fans of the device loved the single purpose audio streaming dongle that delivered wide compatibility and drop-dead simplicity at a rock bottom $35 price. For evidence of this, look no further than your favorite auction site where they now sell for significantly more than they did new, if you can even find an active listing. What’s a prolific hacker to do about this clear case of corporate malice? Why, reinvent it of course! And thus the Otter Cast Audio V2 was born, another high quality otter themed hack from one of our favorite teams of hardware magicians [Lucy Fauth, Jana Marie Hemsing, Toble Miner, and Manawyrm].

USB-C and Ethernet, oh my!

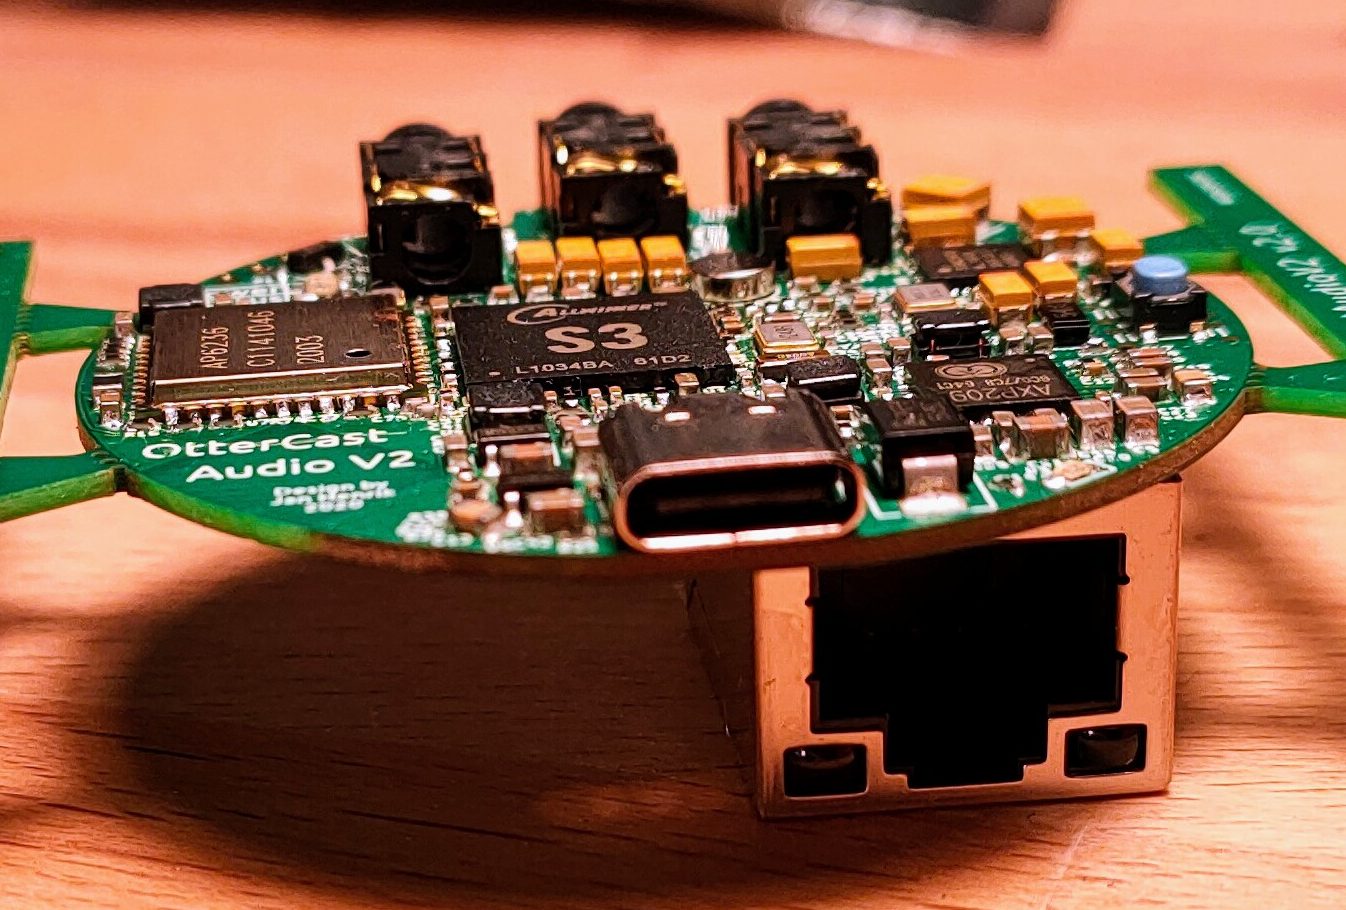
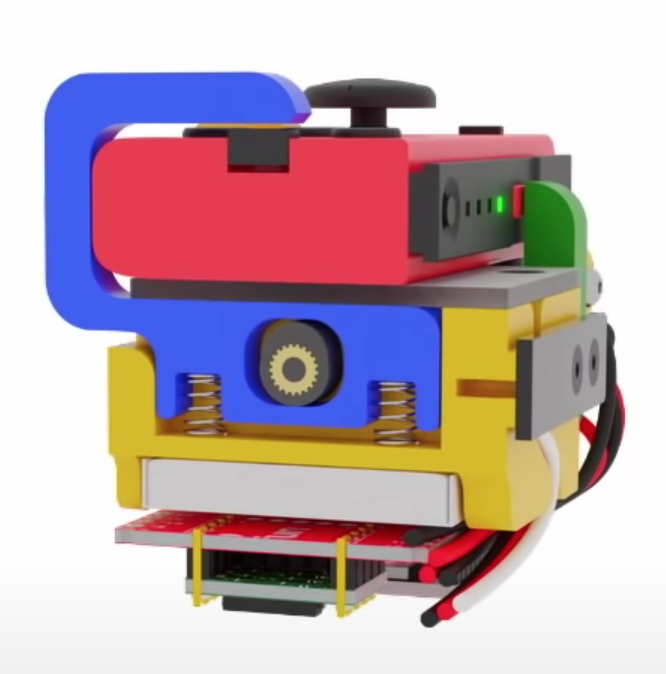
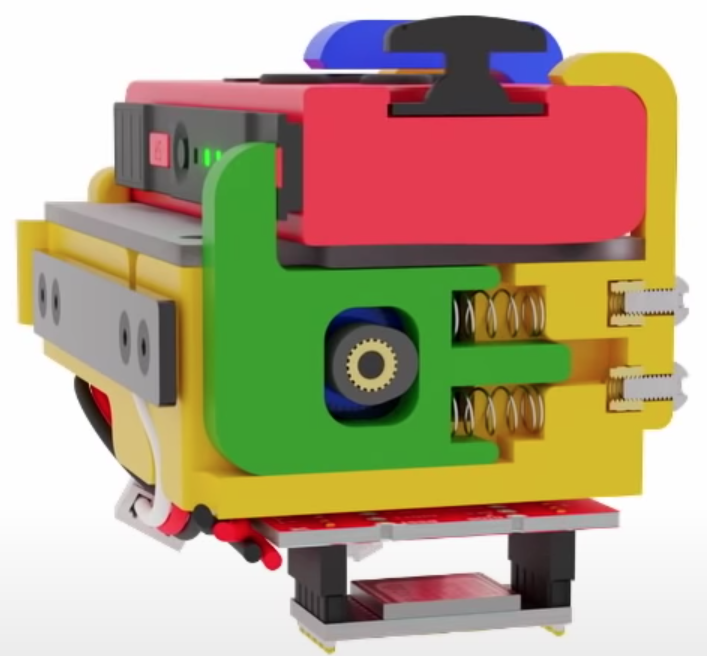
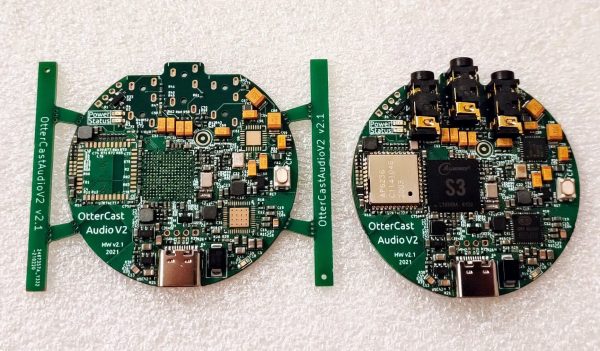
The Otter Cast Audio is a disc about the shape and size of standard Chromecast (about 50mm in diameter) and delivers a nearly complete superset of the original Chromecast Audio’s features plus the addition of a line in port to redirect audio from existing devices. Protocol support is more flexible than the original, with AirPlay, a web interface, Spotify Connect, Snapcast, and even a PulseAudio sink to get your Linux flavored audio bits flowing. Ironically the one thing the Otter Cast Audio doesn’t do is act as a target to Cast to. [Jan] notes that out of all the protocols supported here, actual Cast support was locked down enough that it was difficult to provide support for. We’re keeping our fingers crossed a solution can be found there to bring the Otter Cast Audio to complete feature parity with the original Chromecast Audio.

But this is Hackaday, so just as important as what the Otter Cast Audio does is how it does it. The OtterCast team have skipped right over shoehorning all this magic into a microcontroller and stepped right up to an Allwinner S3 SOC, a capable little Cortex A7 based machine with 128 MB of onboard DDR3 RAM. Pint sized by the bloated standards of a fully interactive desktop, but an absolutely perfect match to juggling WiFi, Bluetooth, Ethernet, and convenient support for all the protocols above. If you’re familiar with these hackers’ other work it won’t surprise you that what they produced here lives up to the typical extremely high quality bar set by such wonders as this USB-C adapter for JBC soldering iron handles and this TS-100 mainboard replacement.

It sounds like a small production run might be on order in the future, but until then production files optimized for a particularly popular Chinese manufacturer are provided, with complete BOM and placement files. It sounds like turnkey production costs from that manufacturer are a shockingly reasonable $10 (total) per unit with most components, and come to a still-reasonable $22 with the remaining self-sourced components manually installed.

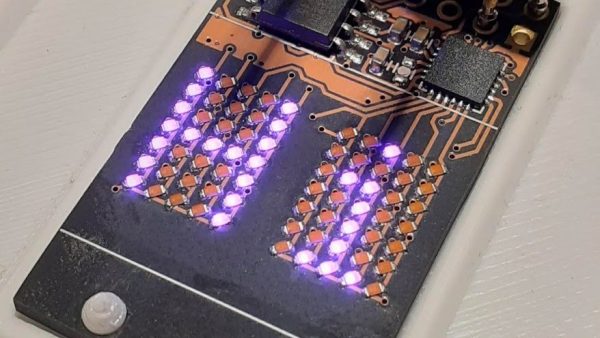
For a demo of the finished goods, check out the tweet embedded after the break.

Continue reading “You Otter Be Able To Stream That Audio: Open Hardware Eclipses Chromecast Audio”

Sounding The Humble LED

Here at Hackaday we’re no strangers to the colorful glow of LEDs. But what if there was more to appreciate beneath the surface? Back in 2011 [Windell] over at Evil Mad Scientist dug into a certain variety of LED and discovered they had a song to sing.

Over the last couple decades, you’ve likely encountered the flickering “candle flame” variety of LED. Often found embedded in small plastic candle simulacra they are shaped like typical through hole “gumdrop” style LEDs, but pack some extra magic which causes them to flicker erratically. Coupled with a warm white color temperature the effect isn’t entirely dissimilar to the flickering of a candle flame.

To the Hackaday reader (and [Windell]) the cause of the flickering may be fairly clear, there is an IC embedded in the lens of the LED. See photo at top for an example of how this might look, helpfully magnified by the lens of the LED itself. Looking through the lens the captive die is visible, as well as the bond wires connecting it to the legs and light emitting diode itself. [Windell]’s observation is that together this assembly makes for a somewhat strange electrical component; from the perspective of the circuit it appears to randomly vary the current flowing through the LED.

He includes two interesting demos. One is that by attaching the flickering LED to a BJT he can turn it into a current amplifier and successfully drive a much more powerful 1W LED with the same effect. The other is that  with the power of the amplifier the same flickering LED can drive a buzzer as well. The effect is surprisingly pleasant, though we’d hesitate to call it musical.

For a more recent example of a similar phenomenon with a very different sound, check out out [Emily Velasco]’s playback of a similarly constructed RGB color changing LED, embedded below. We’ve seen optical tools used to decode LED flickers into data streams, but not for audio playback! We have also covered some LED flicker reverse engineering that spills more of the mystery sealed up in these specialized diodes.

Continue reading “Sounding The Humble LED”

Launching An Open Source Keyboard; System76 Has Published Their Design Files

System76, a computer manufacturer known for selling machines which run Linux, recently unveiled the complete sources for their forthcoming Launch mechanical keyboard. Made with familiar tools, mass produced, and backed by a stable company it looks like the Launch will be a compelling entrant into the world of mechanical keyboards.

Back in March of 2020 System76 published a blog post about a new project they were embarking on; a mechanical keyboard with an unusual layout. At the time there was scant information available besides a summer 2021 target and little was heard until last week when they opened up access to the Launch repository. Everything should be recognizable if you’ve ever looked at the sources for a customized mechanical keyboard before, which is what gets our attention. Electrical sources are authored with KiCad and should be easy to tweak or fabricate. And mechanical components are provided in STEP files with mechanical drawings, presumably because they intend to actually manufacture these.

launch-chassis.png
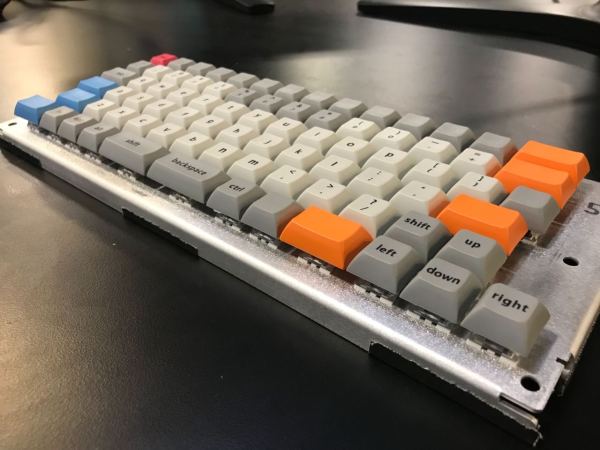
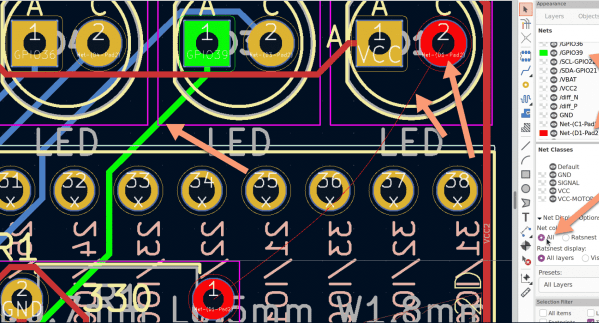
Feature wise all the usual hallmarks of a well designed keyboard are here. The Launch uses hostswap sockets to make it easy to install the usual Cherry MX compatible switch options, and includes per-key RGB backlighting courtesy of SK6805 LEDs. The ATmega32U4 runs the popular and extremely capable QMK firmware instead of something bespoke, so it should be easy to customize to the user’s desire.

System76 touts an unusual key layout, but if you’ve seen a 75% keyboard before it shouldn’t be too threatening (though we do wonder about that shrunken right shift). The most unusual feature is that it features a USB hub capable of full speed 10 gigabit USB 3.1 Gen 2 on two USB-C and two USB-A ports. It’s worth checking out the schematic to appreciate how much more complicated the hub design is than the rest of the keyboard, which is practically vestigial in comparison.

The remaining unknown is how the Launch integrates with Pop!_OS, System76’s awkwardly named remix of Ubuntu. They promise deep, compelling integration and we’re excited to see how that manifests.

This Joy-Con Grip Steers Its Way To Sweaty Victory

Here at Hackaday we’re always exited to see hacks that recycle our favorite childhood consoles into something new and interesting. In that context, it’s not so uncommon to see mods which combine new and unusual control methods with old devices in ways that their manufacturers never intended. What [Mike Choi] has built with the Labo Fit Adventure Kit is the rare hack that combines radically new control schemes with a modern console: without actually modifying any hardware.

Face button pusher in blue

In short, the Labo Fit Adventure Kit lets the player play Mario Kart on the Nintendo Switch by riding a stationary exercise bike, steering with a wheel, and squeezing that wheel to use items. The Fit Kit combines the theme of Labo, Nintendo’s excellent cardboard building kit for the Nintendo Switch with the existing Ring-Con accessory for the unrelated Nintendo game Ring Fit Adventure plus a collection of custom hardware to tie it all together. That hardware senses cadence on the stationary bike, watches for the user to squeeze the handheld wheel controller, and translates those inputs to button presses on the controller to play the game.

Shoulder button pusher in green

The most fascinating element of this project is the TAPBO module which adapts the Joy-Con controller to remote input. The module includes electronics, actuators, and a clever mechanical design to allow it to be mounted to the Ring-Con in place of an unmodified Joy-Con. Electrically the components will be familiar to regular Hackaday readers; there is a breakout board for a Teensy which also holds an XBee module to receive inputs remotely and drive a pair of servos. The entire module is described in detail starting at 4:42 in the video.

Mechanically the TAPBO relies on a pair of cam-actuated arms which translate rotational servo motion into linear action to press shoulder or face buttons. The module directly measures flex of the Ring-Con with an added flexible resistor and receives cadence information from another module embedded in the stationary bike via Zigbee. When these inputs exceed set thresholds they drive the servos to press the appropriate controller buttons to accelerate or use an item.

We’ve focused pretty heavily on the technical aspects of this project, but this significantly undersells the level of polish and easy to understand documentation [Mike] has produced. It includes a TAPBO Amiibo in customized packaging, and more. Check out the full video to get the complete scope of this project.

Continue reading “This Joy-Con Grip Steers Its Way To Sweaty Victory”

Feeling The KiCad 6 Electricity

In 2018, when KiCad Version 5 modernized the venerable 4.X series, it helped push KiCad to become the stable and productive member of the open source EDA landscape that we know today. It has supported users through board designs both simple and complex, and like a tool whose handle is worn into a perfect grip, it has become familiar and comfortable. For those KiCad users that don’t live on the bleeding edge with nightly builds it may not be obvious that the time of version 6 is nearly upon us, but as we start 2021 it rapidly approaches. Earlier this month [Peter Dalmaris] published a preview of the changes coming version 6 and we have to admit, this is shaping up to be a very substantial release.

Don’t be mistaken, this blog post may be a preview of new KiCad features but the post itself is extensive in its coverage. We haven’t spent time playing with this release yet so we can’t vouch for completeness, but with a printed length of nearly 100 pages it’s hard to imagine [Peter] left anything out! We skimmed through the post to extract a few choice morsels for reproduction here, but obviously take a look at the source if you’re as excited as we are. Continue reading “Feeling The KiCad 6 Electricity”

Brilliant Brick Prototyping

Have a rusty collection of protoboards wired together that would benefit from mechanical support? Working on putting together a robot and need to attach PCBAs without drilling holes, zipping a cable tie, or globing hot glue? Add some stud holes with [James Munns]’ Brick Mount! This isn’t the first time we’ve seen an interface between everyone’s favorite Nordic building system and circuitboards, but this implementation has the elegance we’ve come to expect from [James]’ software work.

4×8 Feather Medium protoboard

The project repository contains two things: a KiCad library with components for holes in standard patterns and sizes (1×1, 1×2, etc) and a series of protoboards made with those hole components. The protoboards feature a couple common elements; QUIIC connectors for easy chaining between them and holes in the middle or edges for easy mounting on studs. Some are intended to be carriers for Feather-format PCBAs (very convenient!) and others are primarily undifferentiated prototyping space. Of particular note is the “medium” Feather breakout seen to the left, which incorporates clever cutouts to make it easy to wires down under the board so it can be mounted flush against another board.

The thesis here is that getting custom PCBs fabricated is easier and less expensive than ever before. So easy and inexpensive that fabricating customized protoboard to use in one-off projects is cost-efficient enough to be worthwhile. Waste concerns aside this does seem like a great way to level up those temporary projects which find a more permanent home.

Discrete LEDs Make A Micro Display

Few things excite a Hackaday staff member more than a glowing LED, so it should be no surprise that combining them together into a matrix really gets us going. Make that matrix tiny, addressable, and chainable and you know it’ll be a hit at the virtual water cooler. We’ve seen [tinyledmatrix]’s work before but he’s back with the COPXIE, a pair of tiny addressable displays on one PCBA.

The sample boards seen at top are a particularly eye catching combination of OSH Park After Dark PCB and mysterious purple SMT LEDs that really explain the entire premise. Each PCBA holds two groups of discrete LEDs each arranged into a 5×7 display. There’s enough density here for a full Latin character set and simple icons and graphics, so there should be enough flexibility for all the NTP-synced desk clocks and train timetables a temporally obsessed hacker could want.

Continue reading “Discrete LEDs Make A Micro Display”