To be fair, it’s not like [Joseph] has any ideas either. He thought it would be an interesting project, and figures now that he has the technology, maybe some application will come to him. They say that if you’ve got a hammer everything looks like a nail, so maybe the next project he sends our way will be a sinusoidal fish feeder.
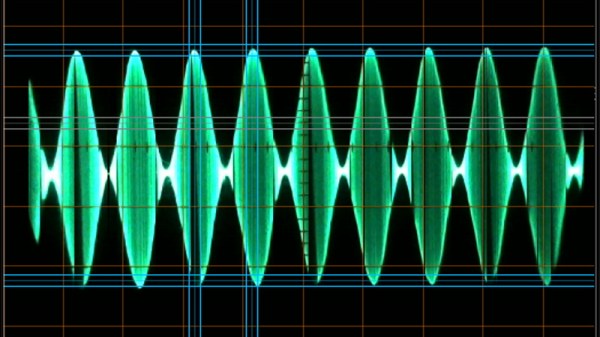
[Joseph] says doing the software side of things with Pure Data wasn’t a problem, but getting it out of the computer proved to be tricky. It turns out that your average computer sound card isn’t equipped to handle frequencies down into the millihertz range (big surprise), so they need to be coaxed out with some extra hardware. Using a simple circuit not unlike an AM demodulator, he’s able to extract the low-frequency signal from a 16 kHz carrier.
It’s hardly a secret that getting into a serious electronics habit can be detrimental to your bank account. A professional grade lab is simply unobtainable for many a tinkerer, and even mid-range hardware can set you back considerably. Which is why many folks just starting out will attempt to salvage or build as much of their equipment as possible. It might not always be pretty, but it’ll get the job done.
But this project by [Chrismettal] could end up completely reinventing the home electronic workspace. Using 3D printed frames, low-cost components, and a sprinkling of custom PCBs, this modular electronics workbench has all the bells and whistles an aspiring hardware hacker could need. As an added bonus, it looks like something that came off the International Space Station.
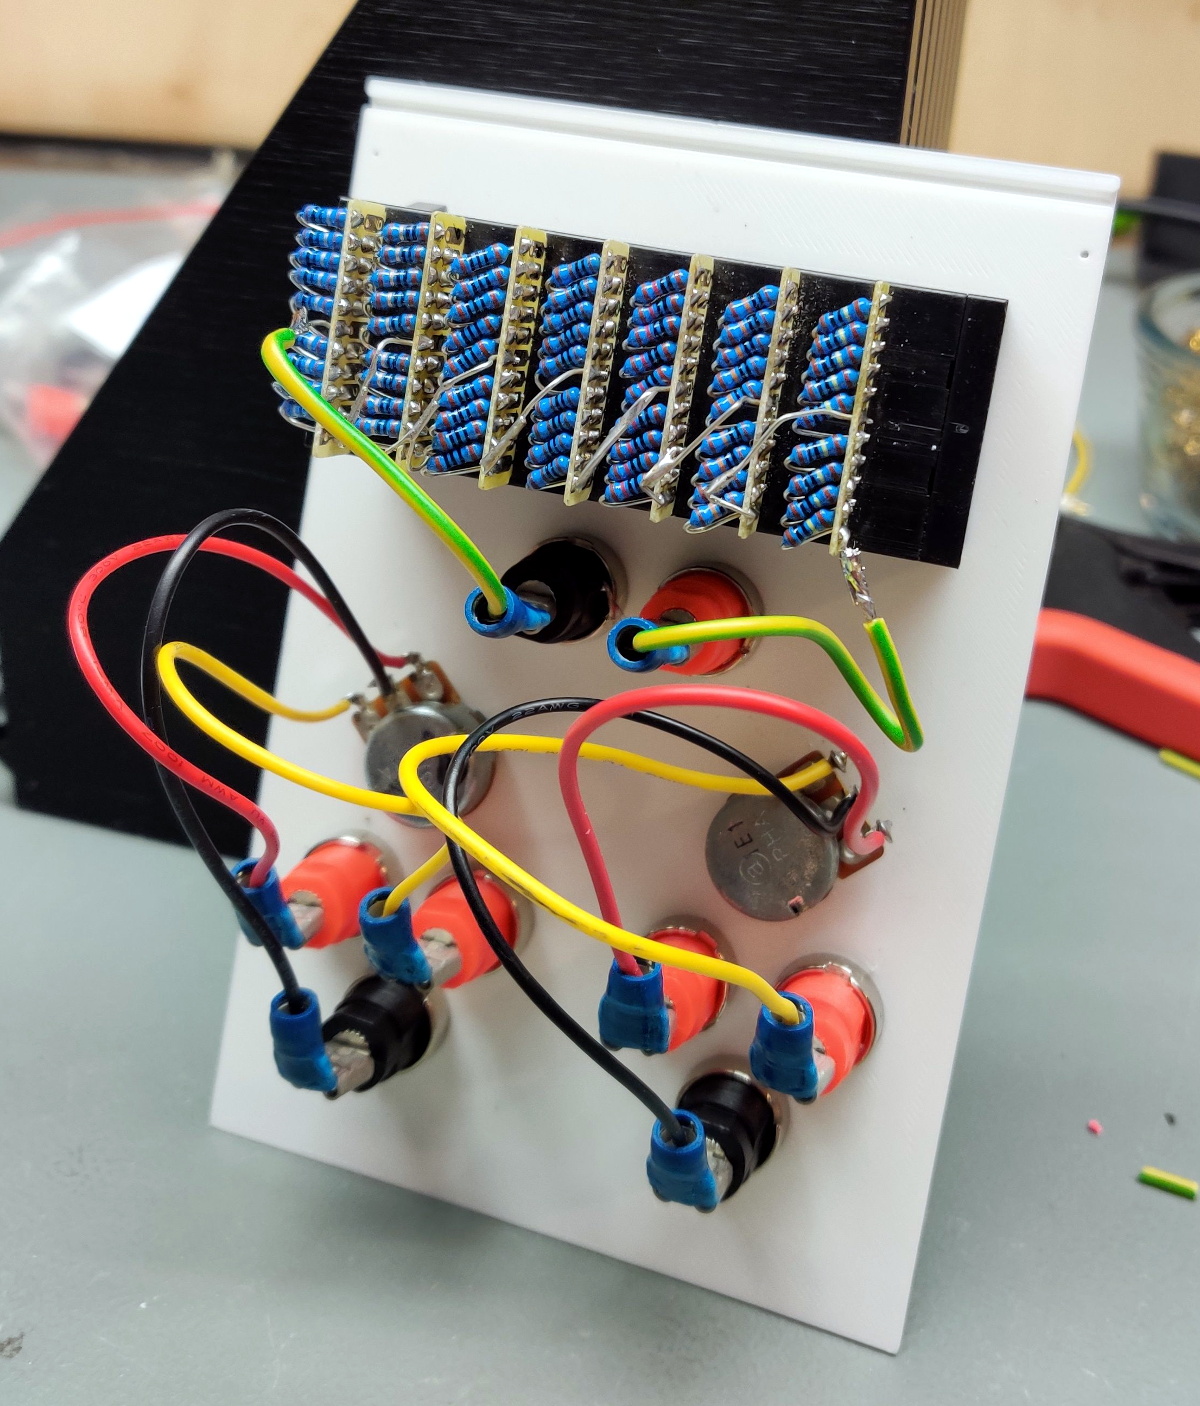
Inside the resistor substitution module.
This is one of those projects that simply can’t be done justice in a few paragraphs. If you’ve ever wanted to put together a dedicated electronics workbench but were put off by the cost of individual components, read though the fantastic documentation [Chrismettal] has prepared for the EleLab_v2. Is it all top-of-the-line hardware? No, of course not. But it’s more than suitable for the kind of work people in this community usually find themselves involved in on a weekend.
So what’s included? Naturally [Chrismettal] has created a power supply module, in both variable and fixed flavors. But there’s also a module for a resistor substitution, a component tester, and even a digital storage oscilloscope. You can mix and match the modules suit your needs, and if you want to create entirely new ones, the FreeCAD sources are available to get you started.
We’ve seen low-cost power supply modules before, and naturally we’re no strangers to cheap DSO kits. But this project wraps those devices and gadgets up into a form factor that anyone would be happy to have on their bench. We’re exceptionally interested in seeing new modules developed for the EleLab_v2, and doubt this is the last time you’ll see this impressive project grace these pages.
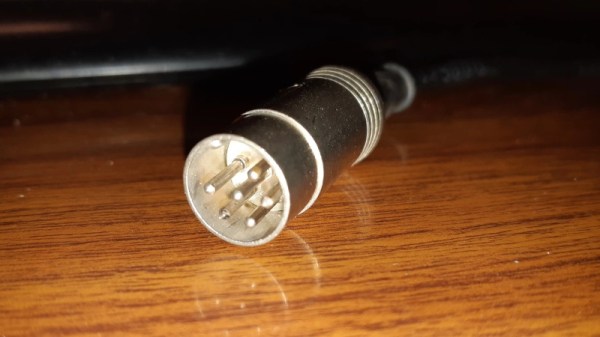
When [Charles Ouweland] found himself in need of a DIN connector that had a somewhat unusual pin arrangement, he figured he could fashion his own in less time than it would take to have a replacement shipped to him. In the end it sounds as though it took a lot longer than expected, but given the worldwide situation, we don’t doubt this bespoke connector was still put to work before its eBay counterpart would have arrived.
More importantly, the connector [Charles] produced looks fantastic. If we weren’t told otherwise, we’d have assumed the finished product was commercially produced. Although to be fair, he did have a little help there. The housing and pins themselves were pulled from a sacrificial connector; his primary contribution was the insulating block that holds the pins in their proper position.
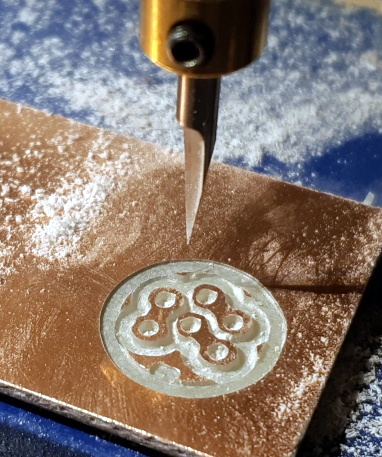
So how did he make it? He had considered using a piece of scrap material and just putting the holes in it with a drill press, but he was worried getting the aliment right. Instead, he decided to call his cheap CNC router into service. By routing his design out of copper clad PCB, he was even able to tie the appropriate pins together right in the connector.
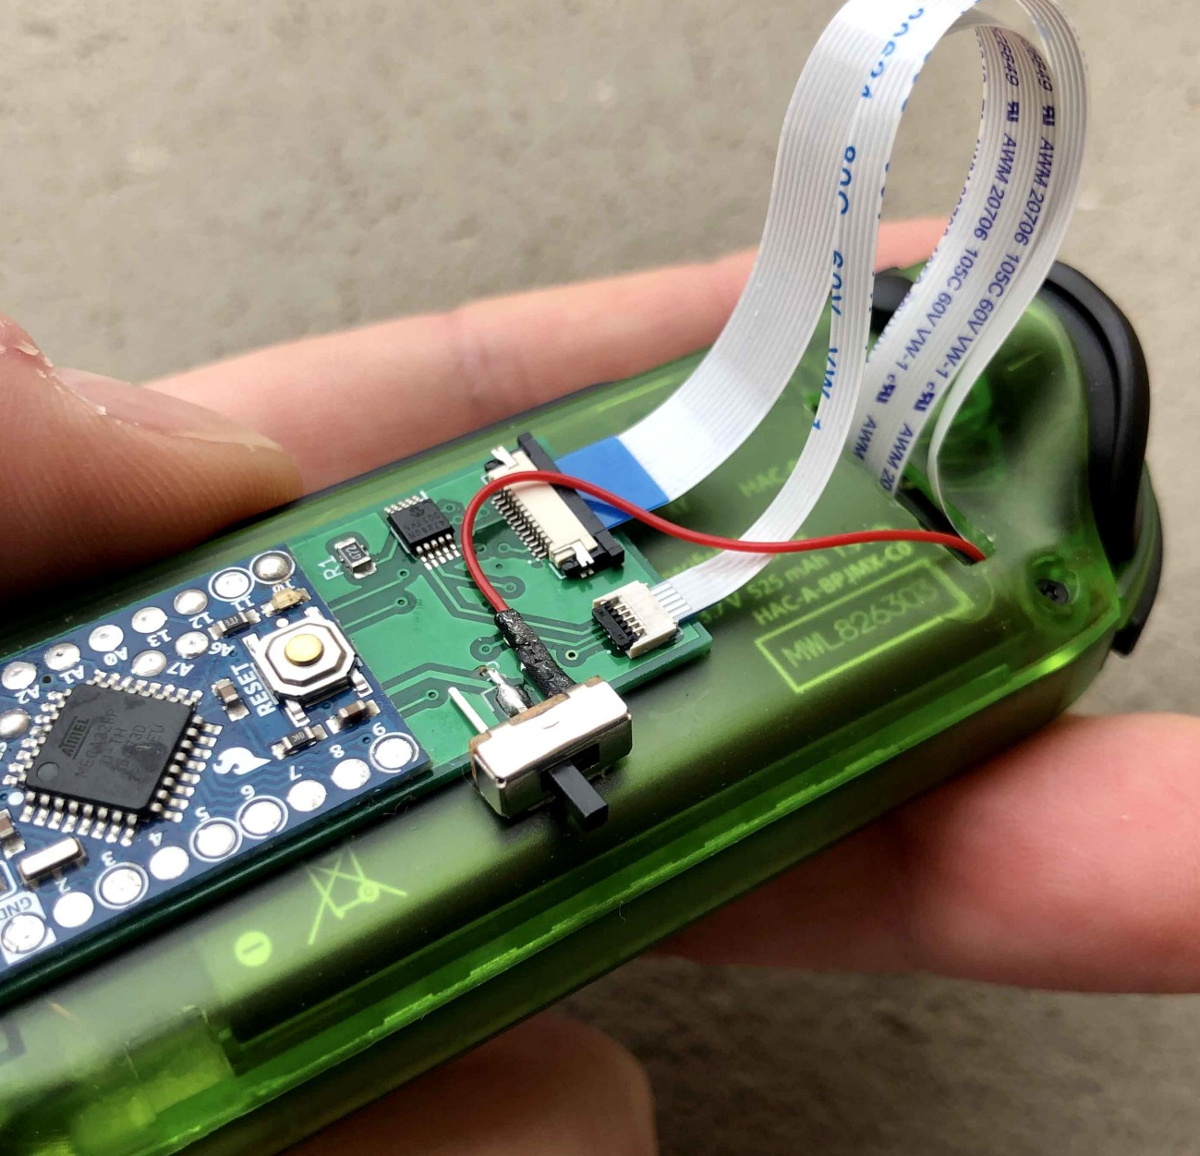
While Valve’s Steam Controller ultimately ended up being a commercial flop, most users agreed its use of touch-sensitive pads in place of traditional analog joysticks or digital directional buttons was at least a concept worth exploring. Those same touchpad aficionados will likely be very interested in this modification by [Matteo Pisani], which replaces the analog joystick on a Nintendo Switch Joy-Con with a capacitive touch sensor.
As [Matteo] explains in his detailed write-up, the initial inspiration for this project was to create a permanent solution to joystick fatigue and drifting issues. He reasoned that if he removed the physical joystick completely, there would be no way for it to fail in the future. We’re not sure how many people would have taken the concept this far, but you can’t argue with the logic.
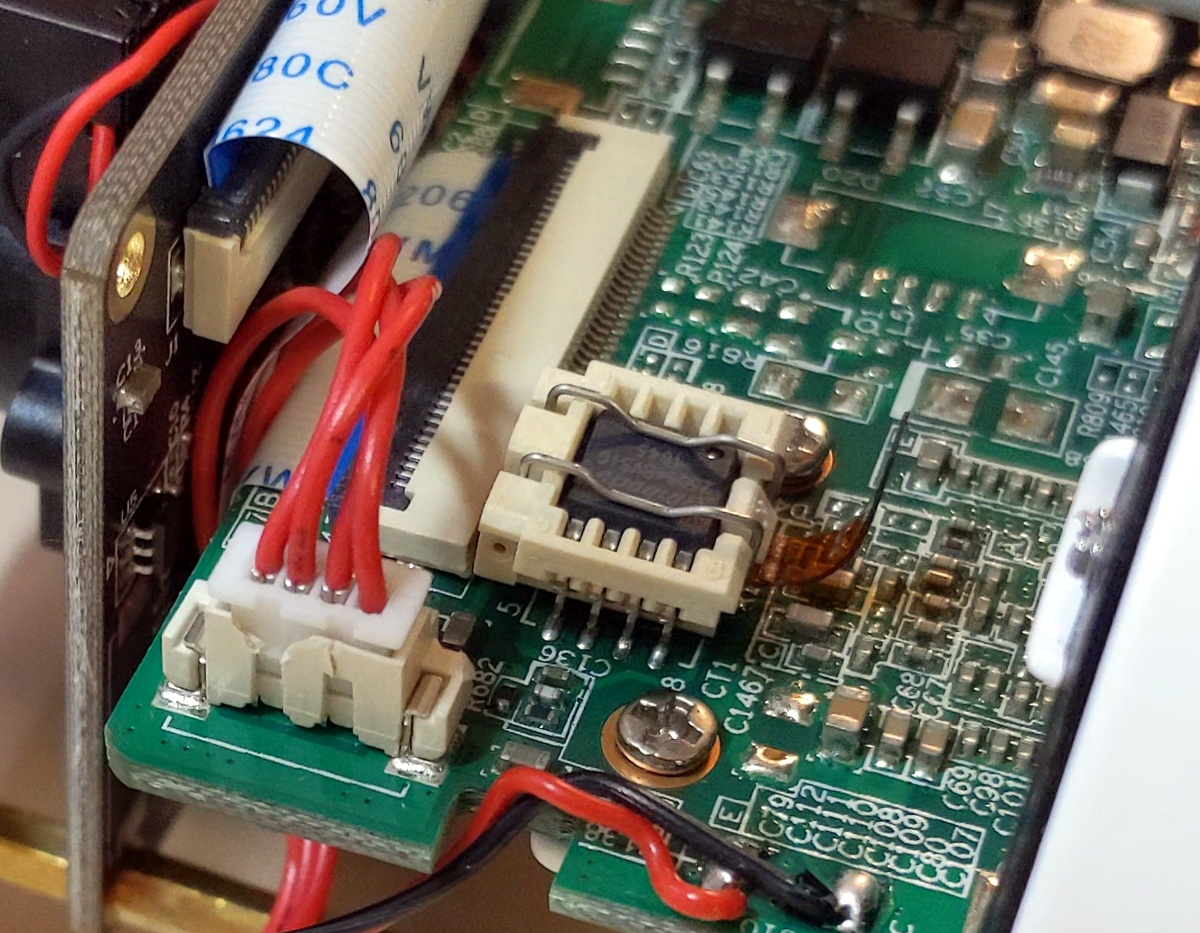
The original joystick is a fairly straightforward device, comprised of two analog potentiometers and a digital button. It’s connected to the Joy-Con’s main PCB with a 0.5 mm pitch flexible cable, so the first step for [Matteo] was to spin up a breakout for the cable in KiCad to make the development process a bit easier.
The board design eventually evolved to hold an Arduino Pro Mini, a digital potentiometer, and a connector for the circular touchpad. The Arduino communicates with both devices over I2C, and translates the high resolution digital output of the touch controller into an analog signal within the expected ranges of the original joystick. [Matteo] says he still has to implement the stick’s digital push button, but thanks to an impressive 63 levels of pressure sensitivity on the pad, that shouldn’t be a problem.
Now that he knows the concept works, the next step for [Matteo] is to clean it up a bit. He’s already working on a much smaller PCB that should be able to fit inside the Joy-Con, and we’re very interested in seeing the final product.
The MIT Media Lab’s Open Agriculture Initiative (OpenAg) promised to revolutionize urban farming with their Food Computers: essentially miniature automated gardens that could be installed in racks to maximize growing space. Each unit would be provided with a “Recipe” that allowed it to maintain the ideal environmental conditions for the species it contained, which meant that even the novice gardener to produce a bumper crop no whether they lived in the Arctic Circle or the Sahara.
With such lofty goals, success certainly wasn’t assured. But we still didn’t expect to hear that the program had to be permanently closed after a string of startling accusations came to light. From engaging in scientific dishonesty to setting off a minor ecological disaster, the story just gets worse and worse. Who could have imagined that one day we’d have to report on an open source project having direct ties to Jeffrey Epstein?
Food Computer v3.0
According to reports, MIT Media Lab Director Joichi Ito and OpenAg principal researcher Caleb Harper attempted to secure $1.5 million in funding for the program during a 2017 meeting with the disgraced financier. Epstein apparently wasn’t impressed by what he saw, and no money ever changed hands. Given the information we now have about the project, this might actually be the least surprising part of the story.
It has since come to light that the Food Computers never worked consistently, and indeed never made it past the prototype stage. This despite the fact that Harper claimed that functional units had already been deployed to refugee camps during presentation to potential investors. A scientist working with the project has even come forward with claims that staff were instructed to place plants brought from local garden centers into the prototype Food Computers prior to tours of the lab so visitors would think they had been grown in the devices.
A former researcher working on the OpenAg program, Babak Babakinejad, also went public with his concerns over the environmental impact of dumping waste water from the Food Computers. The lab had a permit to pump nitrogen-infused water into an underground disposal well, but according to Babakinejad, internal testing showed the nitrogen levels in the water would occasionally top 20 times the stated limit. After his concerns were ignored by Harper and other MIT staff, he eventually took his concerns directly to the Massachusetts Department of Environmental Protection which led to an investigation and ultimately a fine of $25K.
We first covered the Open Agriculture Initiative back in 2016, and readers expressed doubts about the concept even then. While we certainly don’t relish making an update like this about a project we’ve featured, it’s an important reminder that honesty and integrity can’t take a backseat to technical achievement.
Because of the architecture used for the Apollo missions, extended stays on the surface of the Moon weren’t possible. The spartan Lunar Module simply wasn’t large enough to support excursions of more than a few days in length, and even that would be pushing the edge of the envelope. But then the Apollo program was never intended to be anything more than a proof of concept, to demonstrate that humans could make a controlled landing on the Moon and return to Earth safely. It was always assumed that more detailed explorations would happen on later missions with more advanced equipment and spacecraft.
Now NASA hopes that’s finally going to happen in the 2020s as part of its Artemis program. These missions won’t just be sightseeing trips, the agency says they’re returning with the goal of building a sustainable infrastructure on and around our nearest celestial neighbor. With a space station in lunar orbit and a permanent outpost on the surface, personnel could be regularly shuttled between the Earth and Moon similar to how crew rotations are currently handled on the International Space Station.
Artemis lander concept
Naturally, there are quite a few technical challenges that need to be addressed before that can happen. A major one is finding ways to safely and accurately deliver multiple payloads to the lunar surface. Building a Moon outpost will be a lot harder if all of its principle modules land several kilometers away from each other, so NASA is partnering with commercial companies to develop crew and cargo vehicles that are capable of high precision landings.
But bringing them down accurately is only half the problem. The Apollo Lunar Module is by far the largest and heaviest object that humanity has ever landed on another celestial body, but it’s absolutely dwarfed by some of the vehicles and components that NASA is considering for the Artemis program. There’s a very real concern that the powerful rocket engines required to gracefully lower these massive craft to the lunar surface might kick up a dangerous cloud of high-velocity dust and debris. In extreme cases, the lander could even find itself touching down at the bottom of a freshly dug crater.
Of course, the logical solution is to build hardened landing pads around the Artemis Base Camp that can support these heavyweight vehicles. But that leads to something of a “Chicken and Egg” problem: how do you build a suitable landing pad if you can’t transport large amounts of material to the surface in the first place? There are a few different approaches being considered to solve this problem, but certainly one of the most interesting among them is the idea proposed by Masten Space Systems. Their experimental technique would allow a rocket engine to literally build its own landing pad by spraying molten aluminum as it approaches the lunar surface.
This deep dive into the Linux-powered Reolink B800 IP camera started because of a broken promise from its manufacturer. When [George Hilliard] purchased a kit that included six of the cameras and a video recorder, the website said they were capable of outputting standard RTSP video. But once he took delivery of the goods, and naturally after his return window had closed, the site was updated to say that the cameras can only function with the included recorder.
Taking that as something of challenge, [George] got to work. His first big break came when he desoldered the camera’s SPI flash chip and replaced it with a socket. That allowed him to easily take the chip out of the device for reading and flashing as he tinkered with modifying the firmware. After adding cross-compiled versions of busybox, gdb, and strace to the extracted firmware, he bundled it back up and flashed it back to the hardware.
If you think that’s the end of the story, it isn’t. In fact, it’s just the beginning. While getting root-level access to the camera’s OS would have potentially allowed for [George] to dump all the proprietary software it was running and replace it with open alternatives, he decided to take a different approach.
Instead of replacing the camera’s original software, he used his newly granted root powers to analyze it and figure out how it worked. This allowed for to sniff out some very suspect “encryption” routines built into the software, and eventually write his own server side in Rust that finally allowed him to use the cameras with his own server…albeit with a bit more work than he bargained for.
Projects like these are a fantastic look at real world reverse engineering, and a reminder that sometimes achieving your ultimate goal means taking the long way around. Even if you’re not in the market for a hacked security camera, there’s no doubt that reading the thorough write-up [George] has prepared will teach you a few things. But of course, we’d expect no less from a guy who runs Linux on his business card.