Star Chart Watch Is A Romantic Tragedy

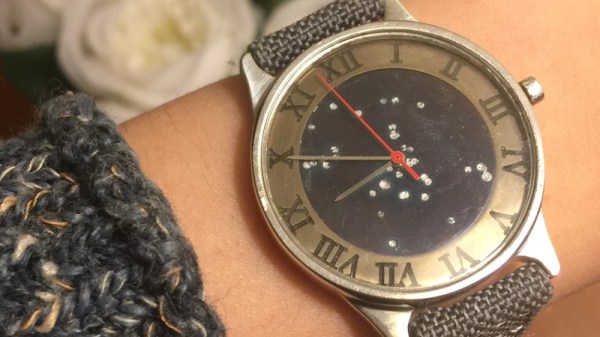
It’s becoming abundantly clear that [Colin Merkel] doesn’t know the definition of “good enough”. Not only has he recently completed his third (and most impressive) wristwatch build, but he also managed to put together one of the most ridiculously romantic gifts ever conceived. While some of us are giving our significant others a gift card to Starbucks, he made his girlfriend a watch with a chart on the face representing the position of the stars at the time and place of their first meeting.

As per his usual style, the documentation on this build is phenomenal. If paging through his gallery of build images doesn’t make you want to get a lathe and start learning metal working, nothing will. A chunk of stainless steel rod miraculously becomes a gorgeous wrist watch over the course of a few dozen images, perfectly encapsulating that old adage of “making it look easy”.
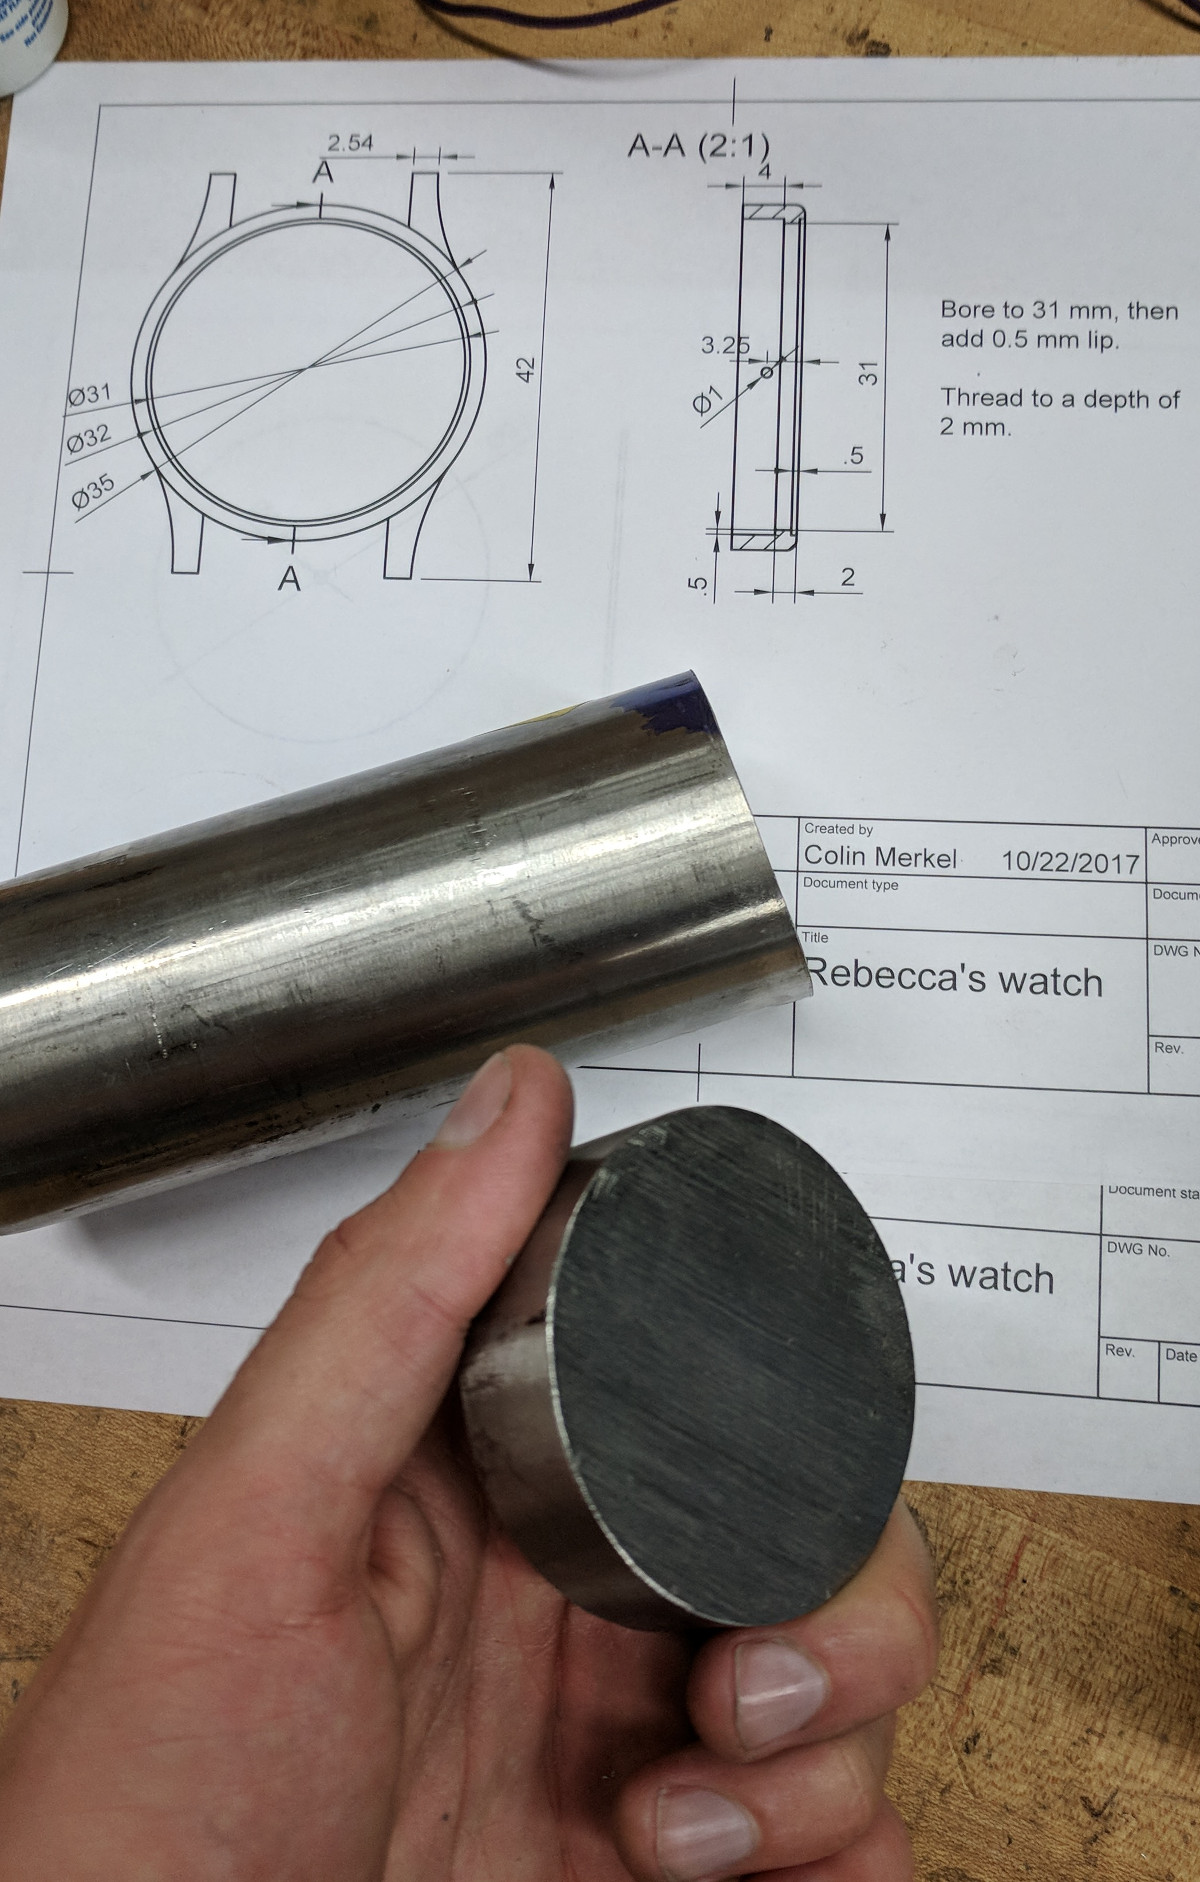
All you have to do is turn this into that. Easy.

Certainly the highlight of this build is the star chart on the face. To make it, he used PyEphem to plot the position of the brightest stars that were visible at the time and place of their first meeting. He then wrote a script to take those stars and convert their positions to G-Code the CNC could use to drill holes in the appropriate locations. The depth of the hole even corresponds to the magnitude (brightness) of each star, giving the chart a subtle 3D effect.

Unfortunately, [Colin] made a couple of mistakes during this build, to the point that he’s not exactly sure how to proceed. He mentions he might even be forced to start over from scratch. It’s hard to imagine how something that looks this good could ever end up being a failure, but the world of watch making is unkind.

To start with, he used 304 stainless instead of 303. This made machining the case much more difficult, and from his very first cut he realized it was going to be a problem. While it was an annoyance he mentions a couple times during the build log, he was at least was able to work through it.

The real problem came at the end, when he put the watch together. He originally made his designs assuming a front glass which was 0.5 mm thick, but in actuality used a piece that is 0.8 mm thick. This slight difference is just enough to cause the seconds hand to rub up on the glass, putting drag on the movement. The end result is that the battery dies extremely quickly, effectively rendering the watch useless.

We can’t imagine the heartbreak [Colin] felt when he realized what happened; we felt bad just reading about it. But given his track record, we have no doubt he’ll get the issue sorted out. It would be a shame to start over completely, but there’s some consolation in knowing it’s part of the learning process: you don’t become a master of your craft without making a couple mistakes along the way.

The predecessor to this watch was covered here at Hackaday last year, and made quite an impression. It’s interesting to see the improvements made between the two, and we’re certainly excited to see his next build.

You Got A 3D Printer, Now What?

Given the incredibly low prices on some of the models currently on the market, it’s more than likely a number of Hackaday readers have come out of the holiday season with a shiny new desktop 3D printer. It’s even possible some of you have already made the realization that 3D printing is a bit harder than you imagined. Sure the newer generation of 3D printers make it easier than ever, but it’s still not the same “click and forget” experience of printing on paper, for instance.

In light of this, I thought it might be nice to start off the new year with some advice for those who’ve suddenly found themselves lost in a forest of PLA. Some of this information may seem obvious to those of us who’ve spent years huddled over a print bed, but as with many technical pursuits, we tend to take for granted the knowledge gained from experience. For my own part, the challenges I faced years ago with my first wooden 3D printer were wholly different than what I imagined. I assumed that the real challenge would be getting the machine assembled and running, but the time it took to build the machine was nothing in comparison to the hours and hours of trial and error it took before I gained the confidence to really utilize the technology.

Of course, everyone’s experience is bound to be different, and we’d love to hear about yours in the comments. Grand successes, crushing defeats, and everything in between. It’s all part of the learning process, and all valuable information for those who are just starting out.

Continue reading “You Got A 3D Printer, Now What?”

PostMarketOS Saves Old Smartphones

Modern smartphones, even the budget models, are extremely impressive pieces of technology. Powerful ARM processors, plenty of RAM, and an incredible number of sensors and radios are packed into a device that in some cases are literally given away for free when you sign up for a service plan. Unfortunately manufacturers are not obligated to keep up with software updates, and while the hardware may be willing to keep on fighting, the user is often pushed to upgrade due to perennially outdated software. Even if you aren’t the kind of person to be put off by using a phone that doesn’t have the latest and greatest OS, the lack of software security updates pose a clear threat in a world where mobile devices are increasingly targeted by attackers.

But what if the operating system on your phone worked more like the on one your computer? That’s the dream of postmarketOS, a Linux distribution created by [Oliver Smith] that is designed to be installed on outdated (mostly Android) smartphones and tablets. He’s recently made a comprehensive blog post about the state of the project a little over 6 months since it started, and we have to say things are looking very impressive so far.

One of the key goals of postmarketOS is to avoid the fragmented nature of previous attempts at replacing Android with a community-developed operated system. By avoiding binary blobs and focusing on getting the mainline Linux kernel running on as much as the hardware as possible, there’s no need to make different forks and releases for each supported device. By unifying the OS as much as far as it can be, an upstream update can be pushed to all devices running postmarketOS regardless of their make and model, just like with traditional Linux distributions.

The blog post shows two things very clearly: that the community is extremely excited and dedicated to the prospect of running what is essentially desktop Linux on old smartphones and tablets, and that postmarketOS still has a long way to go. In these early days, many devices aren’t what could be considered “daily drivers” by most standards. In fact, the blog post mentions that they’ve decided to abandon the term “supported” when talking about devices, and make no claims beyond the fact that they will boot.

Still, incredible progress is being made on everything from mainline kernel development to getting standard Linux desktops such as Gnome, MATE and XFCE4 running. Work has also been done on the backend process of compiling and packaging up components of the operating system itself, promising to speed up development times even for those who don’t have a beefy machine they can dedicate to compiling. The blog post ends with a helpful list of things the reader can do to help support postmarketOS, ranging from making your own t-shirts to porting to new hardware.

At Hackaday we’ve seen our fair share of hackers and makers re-purposing old smartphones and tablets, keeping them out of the landfills they would almost certainly end up in otherwise. A project that aims to make it even easier to hack these cheap and incredibly useful devices is music to our ears.

PCB Production On The Sienci Mill One

A complete start to finish electronics prototyping workshop is nirvana for many of us: being able to go from design on the computer to real hardware without having to get up from your rolling chair. The falling prices of 3D printers have helped make at least part of this a reality: $200 USD is enough to get you a printer that can churn out decent looking enclosures. But there’s more to producing your own hardware than creating slick looking project boxes; at some point you’ll need to put some electronics in there.

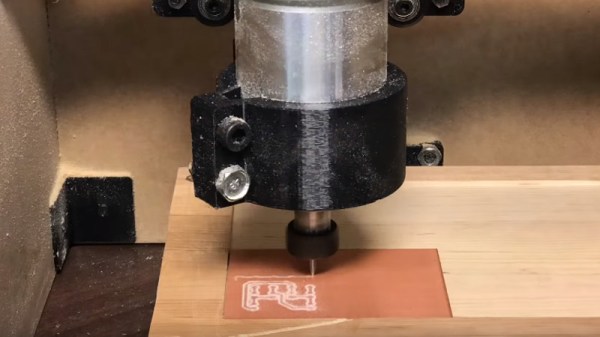
For [Chuck Hellebuyck] at least, the last piece of the puzzle has just fallen into place. He’s recently put up a YouTube video describing how he converted his $399 Sienci Mill One into a capable PCB mill. With a 3D printer and this new PCB mill, he’s happy to say he can now go from concept to production all on the same workbench.

The Sienci Mill One is a solid enough mill in its own right but did need some modification to attain the accuracy necessary for cutting at a depth of only .9 mm. First, a block of wood was cut to the same size as the original plastic bed of the Sienci, and then the mill itself was used to drill holes through the wood block and plastic bed. The wood was attached to the bed using a nut and bolt in each corner, being sure to torque it down enough that the head of the bolt is pulled down flush with the surface of the wood.

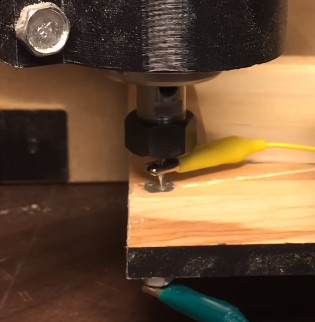
Pulling the head of the bolts flush wasn’t just to keep the surface free of any snags, [Chuck] uses them in conjunction with a probe in the mill’s chuck as a simple way of adjusting the Z height. With a continuity meter attached between the two, he could lower the probe down until they were touching just enough to make a circuit.

Click through the break for the rest of the story!

Continue reading “PCB Production On The Sienci Mill One”

Automatic Dust Collection For The Whole Shop

If you’ve got a woodworking area, or even if you’ve just got something that really churns out dust like a belt sander or table saw, there’s an excellent chance you hate sawdust with a passion. It gets all over your clothes, jams up everything mechanical, and as a fun little bonus can be explosive if not handled properly. Thankfully newer tools tend to come with their own dust collection bags (back in the old days, you weren’t really a man unless you were coughing up wood fibers), but if you’ve got a half a dozen tools with half a dozen different dust bags you’ve got to empty, that can get pretty annoying.

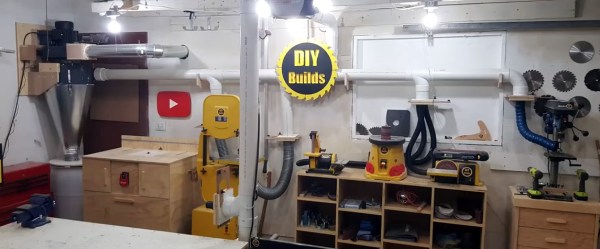
Especially if you take woodworking as seriously as [Brad Wright] does. Over on his YouTube channel [DIY Builds], he quickly runs through the construction of a whole-shop dust collection system with some very neat features. Not everyone needs a system this intricate, but the tips and tricks he shows off during the build are great and can certainly be adapted to less grandiose setups.

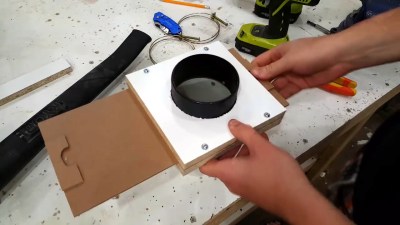
Dust collection connector with closeable gate
One of the scratch-built gates.

[Brad] goes into a bit more detail in this gallery, revealing that the heart of the build is a Harbor Freight dust collection system that he modified into a cyclone separator. Big chunks fall down into the 55 gallon bucket, and what’s left gets blown out of the shop via a louvered vent through an exterior wall. An intricate system of 4 inch PVC pipe is then used to connect up each individual machine’s dust collection port. Even individual hand sanders get into the act via a three way manifold. His table saw lacked a dust port, so he enclosed the motor with a piece of plywood and made his own.

One of the most interesting aspects of the build is the scratch-built blast gates. These are essentially valves which open and close the different sections of the PVC where they mate to the individual stations. This prevents the dust collection system from wasting suction by trying to pull from all the stations at once when only one is in use at any given time. [Brad] even wired up the blast gates with switches that will turn the dust collection system on when the gate is open, and off when it’s closed.

This isn’t the first time we’ve covered the lengths people will go to rid their shop of dust. Cyclone dust separators are an especially popular build, using everything from sheet metal to 3D printed parts.

Continue reading “Automatic Dust Collection For The Whole Shop”

Imaging The Neighborhood With Solar Panels

Like many people who have a solar power setup at home, [Jeroen Boeye] was curious to see just how much energy his panels were putting out. But unlike most people, it just so happens that he’s a data scientist with a deep passion for programming and a flair for visualizations. In his latest blog post, [Jeroen] details how his efforts to explain some anomalous data ended with the discovery that his solar array was effectively acting as an extremely low-resolution camera.

It all started when he noticed that in some months, the energy produced by his panels was not following the expected curve. Generally speaking, the energy output of stationary solar panels should follow a clear bell curve: increasing output until the sun is in the ideal position, and then decreasing output as the sun moves away. Naturally cloud cover can impact this, but cloud cover should come and go, not show up repeatedly in the data.

Expected versus actual power output.

[Jeroen] eventually came to realize that the dips in power generation were due to two large trees in his yard. This gave him the idea of seeing if he could turn his solar panels into a rudimentary camera. In theory, if he compared the actual versus expected output of his panels at any given time, the results could be used as “pixels” in an image.

He started by creating a model of the ideal energy output of his panels throughout the year, taking into account not only obvious variables such as the changing elevation of the sun, but also energy losses through atmospheric dispersion. This model was then compared with the actual power output of his solar panels, and periods of low efficiency were plotted as darker dots to represent an obstruction. Finally, the plotted data was placed over a panoramic image taken from the perspective of the solar panels. Sure enough, the periods of low panel efficiency lined up with the trees and buildings that are in view of the panels.

We’ve seen plenty of solar hacks, but this one has to be something of a first. Usually people are more worried about maximizing efficiency or tracking the sun with them.

Two Factor Authentication With The ESP8266

Google Authenticator is a particularly popular smartphone application that can be used as a token for many two factor authentication (2FA) systems by generating a time-based one time password (referred to as TOTP). With Google Authenticator, the combination of your user name and password along with the single-use code generated by the application allows you to securely authenticate yourself in a way that would be difficult for an attacker to replicate.

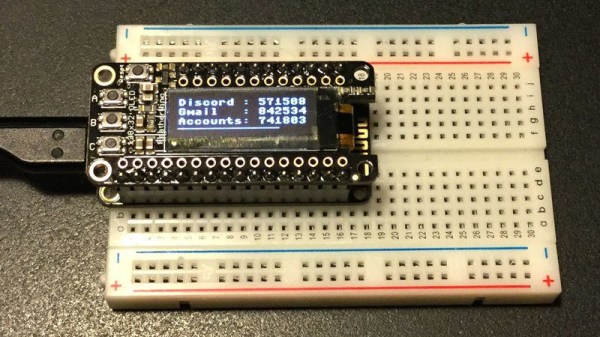
That sounds great, but what if you don’t have a smartphone? That’s the situation that [Lady Ada] recently found herself in, and rather than going the easy route and buying a hardware 2FA token that’s compatible with Google Authenticator, she decided to build one herself based on the ESP8266. With the hardware and source documented on her site, the makings of an open source Google Authenticator hardware token are available for anyone who’s interested.

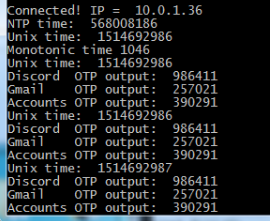
Generated codes can also be viewed via serial.

For the hardware, all you need is the ESP8266 and a display. Naturally [Lady Ada] uses her own particular spin on both devices which you can purchase if you want to create an identical device, but the concept will work the same on the generic hardware you’ve probably already got in the parts bin. Software wise, the code is written in CircuitPython, a derivative of MicroPython, which aims to make microcontroller development easier. If you haven’t tried MicroPython before, grab an ESP and give this a roll.

Conceptually, TOTP is relatively simple. You just need to know what time it is, and run an SHA1 hash. The time part is simple enough, as the ESP8266 can connect to the network and get the current time from NTP. The calculation of the TOTP is handled by the Python code once you’ve provided it with the “secret” pulled from the Google Authenticator application. It’s worth noting here that this means your 2FA secrets will be held in clear-text on the ESP8266’s flash, so try not to use this to secure any nuclear launch systems or anything, OK? Then again, if you ever lose it the beauty of 2-factor is you can invalidate the secret and generate a new one.

We’ve covered the ins and outs of 2FA applications before here at Hackaday if you’d like to know more about the concept, in addition to previous efforts to develop a hardware token for Google Authenticator.