The original circuit simulation software, called the Simulation Program with Integrated Circuit Emphasis, or SPICE as it is more commonly known, was originally developed at the University of Califorina Berkeley in the 1970s with an open-source license. That’s the reason for the vast versions of SPICE available now decades after the original was released, not all of which are as open or free as we might like. Qucs is a GPL circuit simulator. And if you want the GUI option, you might want to try out QucsStudio, which uses Qucs under the hood, and is free to use, but binary-only.
(Editor’s note: the author was confused between the GPL open-source Qucs and the closed-source, binary-only QucsStudio. We’ve cleaned that up.)
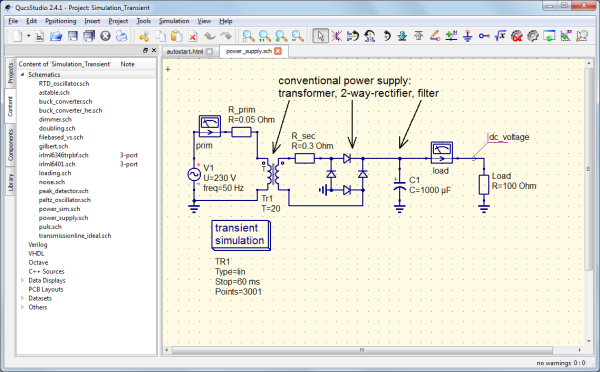
QucsStudio supports a wide range of circuit components and models much in the same fashion as other more popular SPICE programs, including semiconductor devices, passive components, and digital logic gates. Qucs also utilizes SPICE-based simulation, which can model various types of circuit behavior, such as DC, AC, transient, and small-signal analysis.
Unfortunately there are only Windows versions available, and although some might have some success running it under WINE. There are plenty of other options for those of us running non-Windows operating systems though. Here’s a review of 30 of them.
Thanks to [Electroagenda] for the tip!