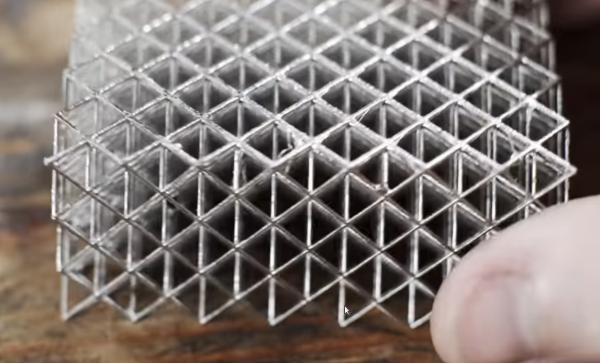
This GCode Post-Processor Squeezes Lines Into Arcs

When the slicer software for a 3D printer model files into GCode, it’s essentially creating a sequential list of connected line segments, organized by layer. But when the features of the original model are dense, or when the model is representing small curves, slicers end up creating a proliferation of teeny segments to represent this information.

This is just the nature of the beast; lots of detail translates into lots of teeny segments. Unfortunately, some printers actually struggle to print these models at the desired speeds, not because of some mechanical limitation, but because the processor cannot recalculate the velocities of these segments fast enough. The result is that some printers simply stutter or slow down the print, resulting in print times that are much higher than they should be.

Enter Arc Welder, a GCode compression tool written by [FormerLurker] that scrutinizes GCode files, hunts for these tiny segments, and attempts to replace contiguous clusters of them with a smaller number of arcs. The result is that the number of GCode commands needed to represent the model drop dramatically as connected clusters of segment commands become single arc commands.

“Now wait”, you might say, “isn’t an arc an approximation of these line segments?” And yes–you’re right! But here lies the magic behind Arc Welder. The program is written such that arcs only replace segments if (1) an arc can completely intersect all the segment-to-segment intersections and (2) the error in distance between segment and arc representation is within a certain threshold. These constraints act such that the resulting post-processing is true to the original to a very high degree of detail.

A concise description of Arc Welder’s main algorithm as pulled from the docs

This whole program operates under the assumption that your 3D printer’s onboard motion controller accepts arc commands, specifically G2 and G3. A few years ago, this would’ve been uncommon since, technically, 3D printing and STL file only requires moving in straight line segments. But with more folks jumping on the bandwagon to use these motion control boards for other non-printing applications, we’re starting to see arc implementations on boards running Marlin, Smoothieware, and the Duet flavor of RepRap Firmware.

For the curious, this program is kindly both well documented on operating principles and open source. And if [FormerLurker] seems like a familiar name before–you’d be right–as they’re also the mind behind Octolapse, the 3D printing timelapse tool that’s a hobbyist crowd favorite. Finally, if you give Arc Welder a spin, why not show us what you get in the comments?

Thanks for the tip [ImpC]!

Big Workshop Clock Is 3D Printing Done Right

Time is something uniquely important to humans, and they remain the only creatures on the planet to build devices to regularly track its progress. [Ivan Miranda] is one such creature, and built a giant 7-segment clock for his workshop that really ties the room together.

The clock is a testament to [Ivan]’s design skills in the 3D printed space. Taking advantage of his large format printer, each segment consists of a front panel, large single-piece diffuser, LED carrier, and backing plate. There are plenty of nice touches, from the interlocking ridges between each digit, to integral printed arrows on the inside that guide installation of the LED strips. Fit and finish approaches the level of a commercial product, a reward for [Ivan]’s years of practice in the field.

Electronically, an ESP8266 runs the show, synchronizing the time over its in-built WiFi connection. Each segment contains 9 WS2812B LEDs, wired up in a single long strip that’s addressed by the microcontroller. This means that the segments can be lit up to any color of the rainbow, though [Ivan] is a man who best appreciates the look of classic red.

[Ivan]’s long been a proponent of big 3D-printed builds — his tank-tracked electric skateboard is a particularly good example. Video after the break.

Continue reading “Big Workshop Clock Is 3D Printing Done Right”

Quality Control, Done Anywhere

Modern society has brought us all kinds of wonders, including rapid intercontinental travel, easy information access, and decreased costs for most consumer goods thanks to numerous supply chains. When those supply chains break down as a result of a natural disaster or other emergency, however, the disaster’s effects can be compounded without access to necessary supplies. That’s the focus of Field Ready, a nonprofit that sets up small-scale manufacturing in places without access to supply chains, or whose access has been recently disrupted.

As part of this year’s Hackaday Prize, a each of our four nonprofit partners outline specific needs that became the targets of a design and build challenge. Field Ready was one of those nonprofits, and for the challenge they focused on quality control for their distributed manufacturing system. We took a look at Field Ready back in June to explore some of the unique challenges associated with their work, which included customers potentially not knowing that a product they procured came from Field Ready in the first place, leading to very little feedback on the performance of the products and nowhere to turn when replacements are needed.

The challenge was met by a dream team whose members each received a $6,000 microgrant to work full time on the project. The’ve just made their report on an easier way of tracking all of the products produced, and identifying them even for those not in the organization. As a result, Field Ready has a much improved manufacturing and supply process which allows them to gather more data and get better feedback from users of their equipment. Join us after the break for a closer look at the system and to watch the team’s presentation video.

Continue reading “Quality Control, Done Anywhere”

Portable Printer Is A Top Notch High School Project

When we think 3D printers, we most commonly think of the fused-deposition modelling type that squirts molten plastic out of a hot nozzle. Typically, these are tabletop units designed to be set up and used in a workshop environment. [BingoFishy] dared to think outside the box however, and whipped up a compact, portable 3D printer for working out on the road.

The printer is almost entirely self-contained, running an OctoPrint controller with built-in hotspot which allows print files to be sent to the unit over a smartphone. The motion platform is built out of DVD drive stepper motors and rails, with dual motors used on the Z-axis to ensure there’s enough torque to move smoothly. Power is courtesy of 26650 cells, in a 2S3P configuration, which provides 3 hours of runtime. While this might not sound like much, for a compact printer with a small build volume, it’s a useful period of time to work with.

While such a build will never replace a solid desktop unit with a large build volume, it nevertheless could come in handy for producing small parts out in the field. We can imagine a college robotics team toting one of these to a regional contest, where it could prove invaluable for whipping up some bushings after something breaks unexpectedly. The finish of the project is great, too, though we’ve seen great results from less-polished builds in the past as well. Video after the break.

Continue reading “Portable Printer Is A Top Notch High School Project”

Sunshine In A Bag

Ultraviolet (UV) curing lamps are crucial if you have a resin 3D printer or work with UV adhesives. Some folks line an old Amazon shipping box with foil and drop a spotlight somewhere inside. Other folks toss their work under the all-natural light source, Sol. Both options have portability and reliability problems, but [AudreyObscura] has it covered with a reflective mat lined with UV strip lights. This HackadayPrize2020 finalist exemplifies the ideal that good ideas are often simple, and this has a remarkably short bill of materials.

Foil bubble insulation is the medium because it provides structure and reflectivity, but it doesn’t cooperate with the LED strip’s adhesive. [AudreyObscura] demonstrates that masking tape as an interfacing layer makes everyone play nicely. A fine example of an experienced maker, their design covers bundling wires and insulating connections to keep everything tidy and isolated. With different arrangements, this can form a tunnel lit from above, a chimney lit from the walls, or you can drape it over some scaffolding.

If you need something a little less portable for your own shop you might consider a mirror-filled chamber. One nice touch to add is a turntable to help make sure the entire part is cured without any missing areas.

Continue reading “Sunshine In A Bag”

This DIY Drill Press Is Very Well Executed

Plenty of projects we see here could easily be purchased in some form or other. Robot arms, home automation, drones, and even some software can all be had with a quick internet search, to be sure. But there’s no fun in simply buying something when it can be built instead. The same goes for tools as well, and this homemade drill press from [ericinventor] shows that it’s not only possible to build your own tools rather than buy them, but often it’s cheaper as well.

This mini drill press has every feature we could think of needing in a tool like this. It uses off-the-shelf components including the motor and linear bearing carriage (which was actually salvaged from the Z-axis of a CNC machine). The chassis was built from stock aluminum and bolted together, making sure to keep everything square so that the drill press is as precise as possible. The movement is controlled from a set of 3D printed gears which are turned by hand.

The drill press is capable of drilling holes in most materials, including metal, and although small it would be great for precision work. [ericinventor] notes that it’s not necessary to use a separate motor, and that it’s possible to use this build with a Dremel tool if one is already available to you. Either way, it’s a handy tool to have around the shop, and with only a few modifications it might be usable as a mill as well.

Continue reading “This DIY Drill Press Is Very Well Executed”

Open-Source Robotic Arm For All Purposes

A set of helping hands is a nice tool to have around the shop, especially if soldering or gluing small components is a common task. What we all really want, though, is a robotic arm. Sure, it could help us set up glue or solder but it can do virtually any other task it is assigned as well. A general-purpose tool like this might be out of reach of most of us, unless we have a 3D printer to make this open-source robotic arm at home.

The KAUDA Robotic Arm from [Giovanni Lerda] is a five-axis arm with a gripping tool and has a completely open-source set of schematics so it can be printed on any 3D printer. The robot arm uses three stepper motors and two servo motors, and is based on the Arduino MEGA 2560 for control. The electrical schematics are also open-source, so getting this one up and running is just an issue of printing, wiring, and implementing some software. To that end there are software examples available, and they can easily be modified to fit one’s robotic needs.

A project like this could be helpful for any number of other projects, or also just as a lesson in robotics for yourself or even in a classroom, since many schools now have their own 3D printers. With everything being open-source, this is a much simpler endeavor now than other projects we’ve seen that attempted to get robotic arms running again.

Continue reading “Open-Source Robotic Arm For All Purposes”