If you’re really interested in aircraft and flying, there are many ways to explore that interest. There are models of a wide range of sizes and complexities that are powered and remote-controlled, and even some small lightweight aircraft that can get you airborne yourself for a minimum of expense. If you’re lucky enough to have your own proper airplane, though, and you’re really into open source projects, you can also replace your airplane’s avionics kit with your own open source one.
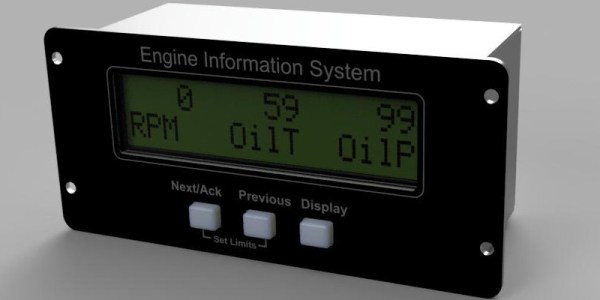
Avionics are the electronics that control and monitor the aircraft, and they’re a significant part of the aircraft’s ability to fly properly. This avionics package from [j-omega] (who can also be found on hackaday.io) will fit onto a small aircraft engine and monitor things like oil temperature, RPM, coolant temperature, and a wide array of other features of the engine. It’s based on an ATmega microcontroller, and has open-source schematics for the entire project and instructions for building it yourself. Right now it doesn’t seem like the firmware is available on the GitHub page yet, but will hopefully be posted soon for anyone who’s interested in an open-source avionics package like this.
The project page does mention that this is experimental as well, so it might not be advised to use in your own personal aircraft without some proper testing first. That being said, if you’ve heard that warning and have decided just to stay on the ground, it’s possible to have a great experience without getting in a real airplane at all.