New Drivers For Ancient Webcam

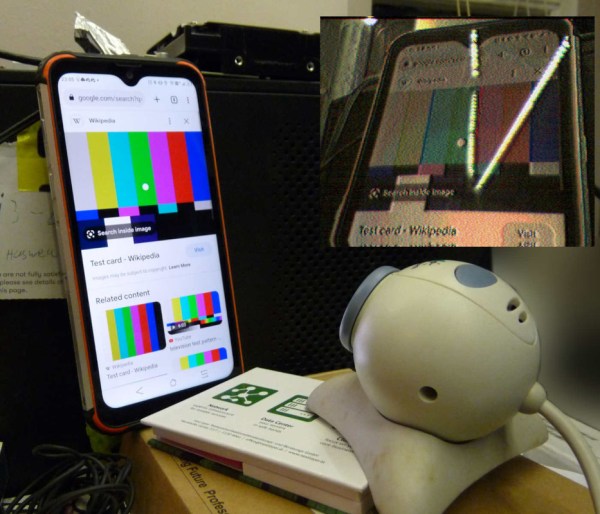
For those of us who are a little older, the 90s seem like they were just a few years ago. The younger folks might think that the 90s were ancient history though, and they might be right as we’ve been hearing more bands like Pearl Jam and The Offspring playing on the classic rock stations lately. Another example of how long ago the 90s were is taking a look at the technological progress that has happened since then through the lens of things like this webcam from 1999, presuming you load up this custom user space driver from [benjojo].

Thankfully the driver for this infamous webcam didn’t need to be built completely from scratch. There’s a legacy driver available for Windows XP which showed that the camera still physically worked, and there’s also a driver for Linux which was used as a foundation to start working from. From there a USB interface was set up which allowed communication to the device. Not a simple task, but apparently much easier than the next steps which involve actually interpreting the information coming from the webcam. This is where a background in digital signal processing is handy to have. First, the resolution and packet size were sorted out which led to a somewhat recognizable image. From there a single monochrome image was pieced together, and then after deconstructing a Bayer filter and adding color, the webcam is back to its former 90s glory.

[benjojo] has hosted all of the code for this project on a GitHub page for anyone who still has one of these webcams sitting around in the junk drawer. The resolution and color fidelity are about what we’d expect for a 25-year-old device that predates Skype, Facebook, Wikipedia, and Firefox. And, while there are still some things that need to be tweaked such as the colors, white balance, and exposure, once that is sorted out the 90s and early 00s nostalgia is free to flood in.

Low-Cost Display Saved By RP2040

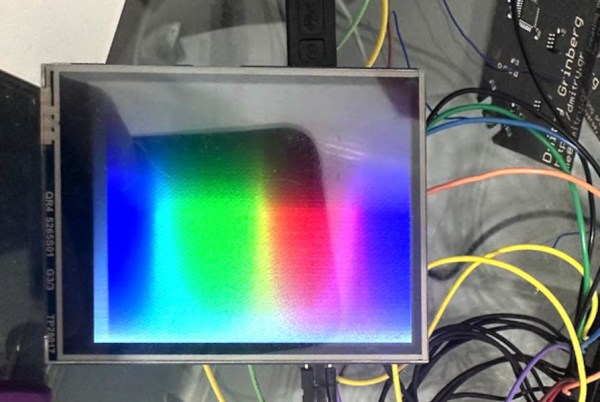
Anyone looking for components for electronics projects, especially robotics, microcontrollers, and IoT devices, has likely heard of Waveshare. They are additionally well-known suppliers of low-cost displays with a wide range of resolutions, sizes, and capabilities, but as [Dmitry Grinberg] found, they’re not all winners. He thought the price on this 2.8-inch display might outweigh its poor design and lack of documentation, and documented his process of bringing it up to a much higher standard with a custom driver for it.

The display is a 320×240 full-color LCD which also has a touchscreen function, but out-of-the-box only provides documentation for sending data to it manually. This makes it slow and, as [Dmitry] puts it, “pure insanity”. His ultimate solution after much poking and prodding was to bit-bang an SPI bus using GPIO on an RP2040 but even this wasn’t as straightforward as it should have been because there are a bunch of other peripherals, like an SD card, which share the bus. Additionally, an interrupt is needed to handle the touchscreen since its default touch system is borderline useless as well, but after everything was neatly stitched together he has a much faster and more versatile driver for this display and is able to fully take advantage of its low price.

For anyone else attracted to the low price of these displays, at least the grunt work is done now if a usable driver is needed to get them up and running. And, if you were curious as to what [Dmitry] is going to use this for, he’s been slowly building up a PalmOS port on hardware he’s assembling himself, and this screen is the perfect size and supports a touch interface. We’ll keep up with that project as it progresses, and for some of [Dmitry]’s other wizardry with esoteric displays make sure to see what he’s done with some inexpensive e-ink displays as well.

New Possibilities From Fading Lighting Technology

Like the incandescent bulb before it, the compact fluorescent (CFL) bulb is rapidly fading into obscurity as there are fewer and fewer reasons to use them over their LED successors. But there are plenty of things to do with some of the more interesting circuitry that made these relatively efficient light bulbs work, and [mircemk] is here to show us some of them.

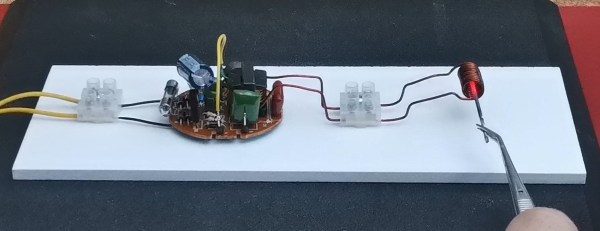
Fluorescent bulbs require a high voltage to work properly, and while this was easy enough for large ceiling installations, it was a while until this hardware could be placed inside a bulb-sized package. When removed, the high voltage driver from the CFL is used in this case to drive a small inductive heating coil circuit, which can then be used to rapidly heat metals and other objects. After some testing, [mircemk] found that the electronics on the CFL circuit board were able to easily handle the electrical load of its new task.

When old technology fades away, there are often a lot of interesting use cases just waiting to be found. [mircemk] reports that he was able to find these light bulbs at an extremely low price due to low demand caused by LEDs, so anyone needing a high voltage driver board for something like a small Tesla coil might want to look at a CFL first.

Collaborative Effort Gets Laser Galvos Talking G-Code

Everyone should know by now that we love to follow up on projects when they make progress. It’s great to be able to celebrate accomplishments and see how a project has changed over time. But it’s especially great to highlight a project that not only progresses, but also gives back a little to the community.

That’s what we’re seeing with [Les Wright]’s continuing work with a second-hand laser engraver. It was only a few weeks ago that we featured his initial experiments with the eBay find, a powerful CO2 laser originally used for industrial marking applications. It originally looked like [Les] was going to have to settle for a nice teardown and harvesting a few parts, but the eleven-year-old tube and the marking head’s galvanometers actually turned out to be working just fine.

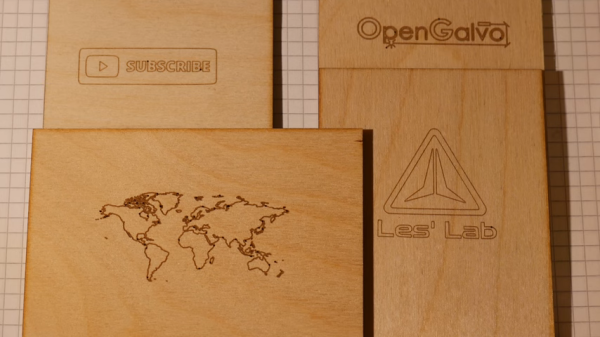
The current work, which is also featured in the video below, mainly concerns those galvos, specifically getting them working with G-code to turn the unit into a bit of an ad hoc laser engraver. Luckily, he stumbled upon the OPAL Open Galvo project on GitHub, which can turn G-code into the XY2-100 protocol used by his laser. While [Les] has nothing but praise for the software side of OPAL, he saw a hardware hole he could fill, and contributed his design for a PCB that hosts the Teensy the code runs on as well as the buffer and line driver needed to run the galvos and laser. The video shows the whole thing in use with simple designs on wood and acrylic, as well as interesting results on glass.

Of course, these were only tests — we’re sure [Les] would address the obvious safety concerns in a more complete engraver. But for now, we’ll just applaud the collaboration shown here and wait for more updates.

Continue reading “Collaborative Effort Gets Laser Galvos Talking G-Code”

Metal Detector Gets Help From Smartphone

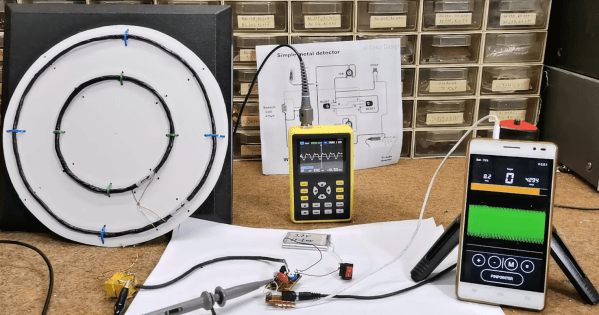
[mircemk] is quite a wizard when it comes to using coils of wires in projects, especially when their application is within easy-to-build metal detectors. There are all kinds of ways to send signals through coiled wire to detect metal objects in the ground, and today [mircemk] is demonstrating a new method he is experimenting with which uses a smartphone to detect the frequency changes generated by the metal detector.

Like other metal detectors, this one uses two coils of wire with an oscillator circuit and some transistors. The unique part of this build, though, is how the detector alerts the user to a piece of metal. Normally there would be an audible alert as the frequencies of the circuit change when in the presence of metal, but this one uses a smartphone to analyze the frequency information instead. The circuit is fed directly into the headphone jack on the smartphone and can be calibrated and used from within an Android app.

Not only can this build detect metal, but it can discriminate between different types of metal. [mircemk] notes that since this was just for experimentation, it needs to be calibrated often and isn’t as sensitive as others he’s built in the past. Of course this build also presumes that your phone still has a headphone jack, but we won’t dig up that can of worms for this feature. Instead, we’ll point out that [mircemk] has shown off other builds that don’t require any external hardware to uncover buried treasure.

Continue reading “Metal Detector Gets Help From Smartphone”

Universal TFT Display Backpack Helps Small Displays Shine

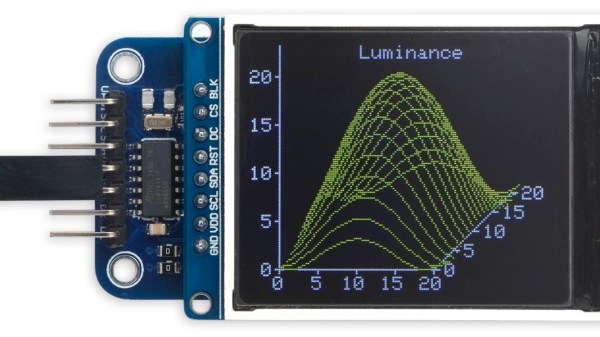
TFT technology might be ancient news for monitors and TVs, but it’s alive and well when it comes to hobbyist electronics and embedded devices. They’ve now become even easier to integrate, thanks to the Universal TFT Display Backpack design by [David Johnson-Davies].

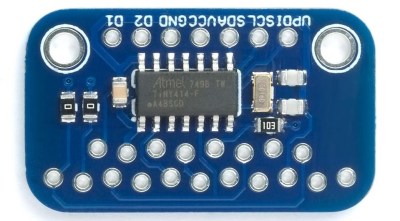
Breakout board, compatible with pinouts of most small TFT displays.

Such displays are affordable and easy to obtain, and [David] noticed that many seemed to have a lot in common when it came to pinouts and hookup info. The result is his breakout board design, a small and easy-to-assemble PCB breakout board that can accommodate the pinouts of a wide variety of TFT displays available from your favorite retailers or overseas sellers.

The board has a few quality-of-life features such as an optional connection for a backlight, and a staggered pin pattern so that different TFT boards can be pushed in to make a solid connection without soldering. That’s very handy for testing and evaluating different displays.

Interested? Head on over to the GitHub repository for the project, and while you’re at it, check out [David]’s Tiny TFT Graphics Library 2 which is a natural complement to the display backpack. [David] sure knows his stuff when it comes to cleverly optimized display work; we loved his solution for writing to OLED displays without needing a RAM buffer.

Scanner Snooping Uncovers Focus Farce

From his comments about the noisy image and limited controls, we’re going to go out on a limb and assume [Andrew Jeddeloh] isn’t a huge fan of using his Epson V550 for scanning film. But is it really irredeemable? That’s what he set out to determine in a recent series of posts on his blog, and from what we can tell, it’s not looking good for the old Epson.

The first post attempts to quantify the optical capabilities of the scanner by determining its modulation transfer function (MTF), point spread function (PSF), and comparing its horizontal and vertical resolution. As you might expect, the nuances of these measurements are a bit beyond the average user. The short version of his analysis is that the scanner’s slide frame does indeed seem to be holding objects at the proper “sweet spot” for this particular image sensor; meaning that contrary to the advice he’d seen online, there’s nothing to be gained by purchasing custom film or slide holders.

MTF versus height of film from bed.

While investigating the optical properties of the scanner, [Andrew] became curious about the automatic focus options offered by the VueScan software he was using. The images produced appeared to be identical regardless of what option he selected, and he began to suspect the feature wasn’t actually doing anything. To confirm his theory, he wrote a shim program that would sit between the proprietary VueScan program and the V550 driver and log all of the data passing between them.

After tweaking various options and comparing the captured data streams, [Andrew] determined that enabling automatic focus in VueScan doesn’t do anything. At least, not with his scanner. He did notice a few extra bytes getting sent to the driver depending on which focus options were selected, but the response from the scanner didn’t change. He thinks the program likely has some kind of generic framework for enabling these kind of features on supported hardware, and it’s just mistakenly showing the autofocus options for a scanner that doesn’t support it.

If there’s some film you want to digitize, but you’re saddled with a scanner like the V550, you could always do it with a camera instead. You could even put together a passable film scanner with LEGO.