Tiny Function Generator On The ATtiny85, Complete With OLED

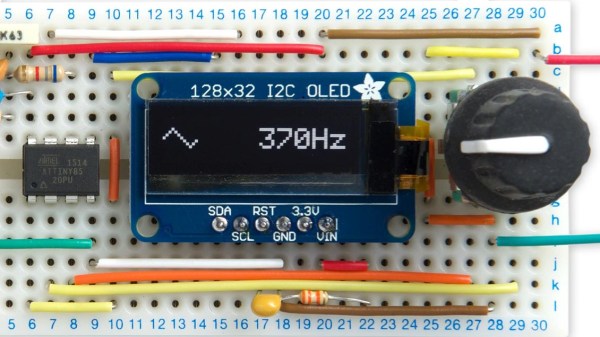
It’s easy to have a soft spot for “mini” yet perfectly functional versions of electronic workbench tools, like [David Johnson-Davies]’s Tiny Function Generator which uses an ATtiny85 to generate different waveforms at up to 5 kHz. It’s complete with a small OLED display to show the waveform and frequency selected. One of the reasons projects like this are great is not only because they tend to show off some software, but because they are great examples of the kind of fantastic possibilities that are open to anyone who wants to develop an idea. For example, it wasn’t all that long ago that OLEDs were exotic beasts. Today, they’re available off the shelf with simple interfaces and sample code.

The Tiny Function Generator uses a method called DDS (Direct Digital Synthesis) on an ATtiny85 microcontroller, which [David] wrote up in an earlier post of his about waveform generation on an ATtiny85. With a few extra components like a rotary encoder and OLED display, the Tiny Function Generator fits on a small breadboard. He goes into detail regarding the waveform generation as well as making big text on the small OLED and reading the rotary encoder reliably. His schematic and source code are both available from his site.

Small but functional microcontroller-based electronic equipment are nifty projects, and other examples include the xprotolab and the AVR-based Transistor Tester (which as a project has evolved into a general purpose part identifier.)
Reading 16 Rotary Encoders At The Same Time

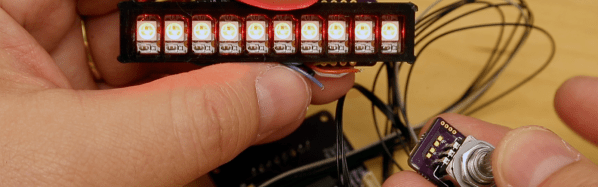
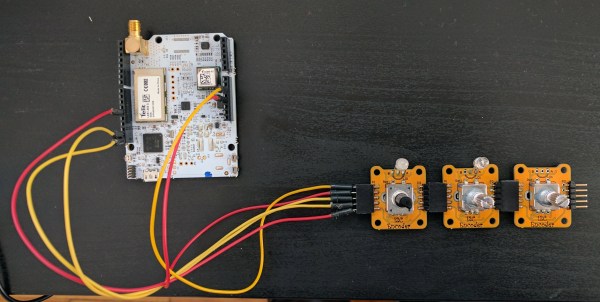
We’re digging these daisy-chainable encoders built by [fattore.saimon]. Each module consists of a rotary encoder attached to a PCB with a PIC16F15386 on the back. As we’ve covered in the past, the Microchip released their feature-rich PIC16 microprocessor just this year, and it’s great to see them start to crop up in projects. With 4 address jumpers on the back of each PCB, [fattore.saimon] is able to connect up to 16 of the encoders on the bus. The modules also have male and female plugs so he can connect them physically as well, to simplify wiring. Each module also has a PWMable bicolor LED for keeping track of each encoder’s setting.

If you’re interested in making your own you can buy the PCBs from Tindie or download the project files from the creator’s GitHub, including an Arduino library.

We love encoders here on Hackaday — building DIY encoders, as well as using them in projects like this precision cutting jig. And definitely read our colleague [Al]’s great piece on encoders.

Ultrasonic Array Gets Range Data Fast And Cheap

How’s your parallel parking? It’s a scenario that many drivers dread to the point of avoidance. But this 360° ultrasonic sensor will put even the most skilled driver to shame, at least those who pilot tiny remote-controlled cars.

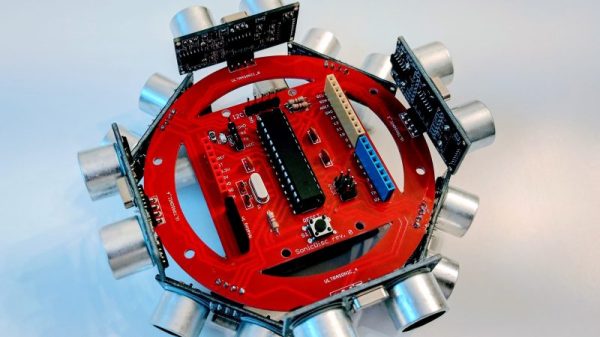
Watch the video below a few times and you’ll see that within the limits of the test system, [Dimitris Platis]’ “SonicDisc” sensor does a pretty good job of nailing the parallel parking problem, a driving skill so rare that car companies have spent millions developing vehicles that do it for you. The essential task is good spatial relations, and that’s where SonicDisc comes in. A circular array of eight HC-SR04 ultrasonic sensors hitched to an ATmega328P, the SonicDisc takes advantage of interrupts to make reading the eight sensors as fast as possible. The array can take a complete set of readings every 10 milliseconds, which is fast enough to allow for averaging successive readings to filter out some of the noise that gets returned. Talking to the car’s microcontroller over I2C, the sensor provides a wealth of ranging data that lets the car quickly complete a parallel parking maneuver. And as a bonus, SonicDisc is both open source and cheap to build — about $10 a copy.

Rather use light to get your range data? There are some pretty cheap LIDAR units on the market these days.

Continue reading “Ultrasonic Array Gets Range Data Fast And Cheap” →

Hackaday Prize Entry: MappyDot, A Micro Smart LiDAR Sensor

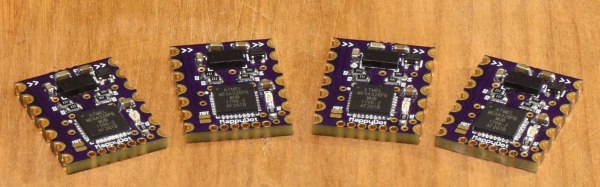
[Blecky]’s entry to the Hackaday Prize is MappyDot, a tiny board less than a square inch in size that holds a VL53L0X time-of-flight distance sensor and can measure distances of up to 2 meters.

MappyDot is more than just a breakout board; the ATMega328PB microcontroller on each PCB provides filtering, an easy to use  I2C interface, and automatically handles up to 112 boards connected in a bus. The idea is that one or a few MappyDots can be used by themselves, but managing a large number is just as easy. By dotting a device with multiple MappyDots pointing in different directions, a device could combine the readings to gain a LiDAR-like understanding of its physical environment. Its big numbers of MappyDots [Blecky] is going for, too: he just received a few panels of bare PCBs that he’ll soon be laboriously populating. The good news is, there aren’t that many components on each board.

It’s great to see open sourced projects and tools in which it is clear some thought has gone into making them flexible and easy to use. This means they are easier to incorporate into other work and helps make them a great contestant for the Hackaday Prize.

A Beverage Cooler That Comes To You!

Feel like taking a long walk, but can’t be bothered with carrying your drinks? Have no fear, this  “Follow Me” Cooler Bot is here!

Really just a mobile platform with a cooler on top, the robot connects to smartphone via Bluetooth, following it using GPS. Making the platform involves a little woodworking skill, and an aluminium hub with a 3D-printed hub adapter connects the motors to a pair 6″ rubber wheels with a swivel caster mounted at the rear. A pocket in the platform’s base houses the electronics.

The Arduino Uno — via an L298n motor driver — controls two 12V DC, brushed and geared motors mounted with 3D printed brackets, while a Parallax PAM-7Q GPS Module in conjunction with an HMC 5883L compass help the robot keep its bearing. A duo of batteries power the motors and the electronics separately to prevent  any malfunctions.

Continue reading “A Beverage Cooler That Comes To You!” →

Hackaday Prize Entry: MakerNet

One of the biggest trends in whatever market ‘Maker’ stuff belongs to is the Legofication of electronics. Building electronics is hard, if you haven’t noticed. Anything that turns transmission lines, current loops, and RF wizardry into something a five-year-old can use has obvious applications to education. For his Hackaday Prize entry, [Jeremy Gilbert] is building a fast, intuitive, modular way to explore electronics. It’s easier to use than the 100-in-1 Radio Shack spring clip kits, and you can actually make useful projects with this system.

MakerNet is [Jeremy]’s solution to the problem of complicated electronics, Arduinos connected to breadboards with DuPont cables, and apparently, to actual electronic Lego sets. The core of this system is built around the Atmel SAM D21 microcontroller, an ARM Cortex-M0+ chip that has more than enough processing power for anything deserving of the ‘maker’ label. This mainboard connects to devices through what is basically an I2C bus. Each module in the system has an in and out header. A small SAM D11 (available for $1 USD) on each module handles all the communications.

Right now, [Jeremy] is experimenting with a dozen or so modules including a captouch board, an LED matrix, OLED display, rotary encoders, and lots of blinky LEDs. It’s just a prototype, but that’s exactly what we’re looking for at this stage of the Hackaday Prize. After looking at the video [Jeremy] produced (below), there’s a lot of promise here.

Continue reading “Hackaday Prize Entry: MakerNet” →

Wireless Nunchuck R/C Remote!

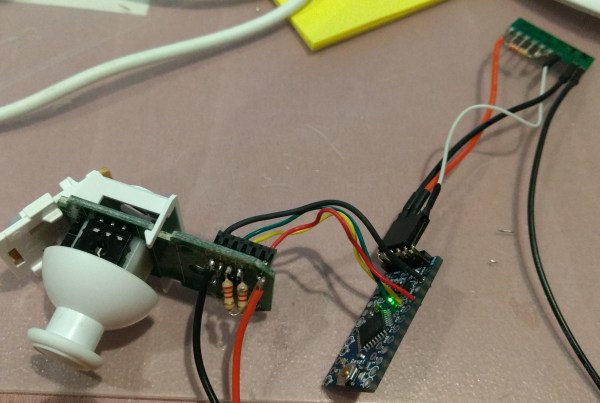
[Dan], admirably rose to the occasion when his son wanted a new toy. Being a dedicated father — and instead of buying something new — he took the opportunity to abscond to his workbench to convert a Wiimote Nunchuck into a fully wireless controller for his son’s old r/c car — itself, gutted and rebuilt some years earlier.

Unpacking the nunchuck and corralling the I2C wires was simply done. From there, he combined a bit of code, an Arduino pro mini, and two 1K Ohm resistors to make use of an Aurel RTX-MID transceiver that had been lying around. Waste not, want not.

A TI Stellaris Launchpad is the smarts of the car itself, in concordance with a TB6612FNG motor controller. The two Solarbotics GM9 motors with some 3D printed gears give the car some much needed gusto.

Continue reading “Wireless Nunchuck R/C Remote!” →