Hackaday guide to Lathes

Buying Machine Tools: Foreign Or Domestic, New Or Used?

The last time we discussed machine tools, we talked about how to choose the size of the new metalworking lathe that your wallet is itching to pour itself into. The next big decision to make is “new or used?” If you’re in North America, this question has a lot of overlap with the classic question “Import or American?”. The answer boils down to what your needs are, and what you want to get out of this machine.

If you are new to machining, and want to learn the skills, I recommend starting with an Asian import machine. If you’re careful which one you select, you’ll end up with a very reasonably priced lathe that can do precise work right out of the crate. If your interest is in learning how these tools work, and in doing a restoration project, an old American machine is a great choice. Let’s look at these two routes in more detail.

Continue reading “Buying Machine Tools: Foreign Or Domestic, New Or Used?”

Building A Tricorder Prop Worthy Of Mr Spock

We’ve all been there. You want to assemble a proper Star Trek: The Original Series landing party prop set, but the TOS tricorders you can find on the market are little more than overpriced toys. Imagine the embarrassment of beaming down to Cestus III with a plastic tricorder. The Metrons wouldn’t have even bothered with the trial by combat with such a sorry showing.

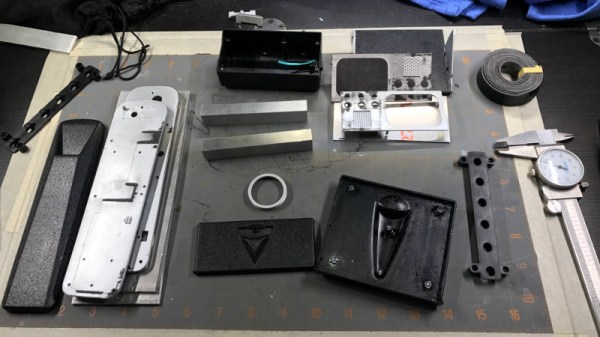
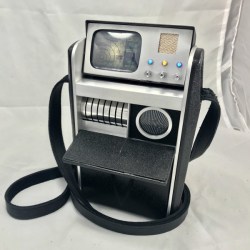
Unhappy with the state of Star Trek props, [Dean O] decided to take matters into his own hands. He purchased a TOS tricorder from Diamond Select Toys and set out to modify it into something a bit closer to Starfleet standards. Anything painted metallic silver on the toy was replaced with a machined aluminum duplicate, adding some much needed heft. He even spruced up the controls and display.

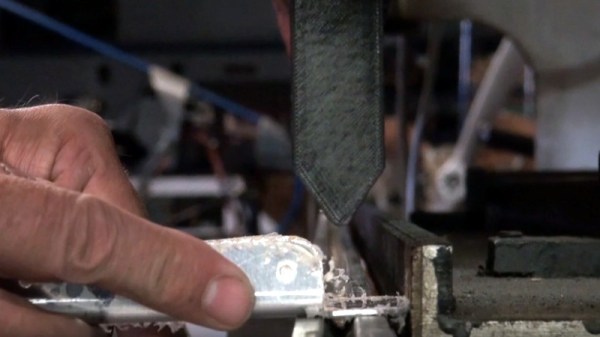
To start, [Dean] stripped the tricorder down, separating all of the silver plastic parts and finding aluminum stock that was close enough to the desired dimensions. This ended up being .125″ plate for the sides, and .500″ bars for the horizontal dividers. To make the side panels he placed the original plastic parts over the aluminum, marked the mounting holes with a punch, and used the belt sander to shape them.

[Dean] then put in a more screen accurate Moire disc, and went as far as to get real watch crowns for the buttons (just like the prop used in the show). In a particularly bold move, he even drilled out the center of watch crowns to install plastic light pipes for LED illumination.

Last year we saw a build that crammed a Raspberry Pi into the same Diamond Select tricorder toy to excellent effect. Now somebody just needs to combine both projects and they’ll have the slickest tricorder in the Alpha Quadrant.

The Fine Art Of Acid Etching Brass

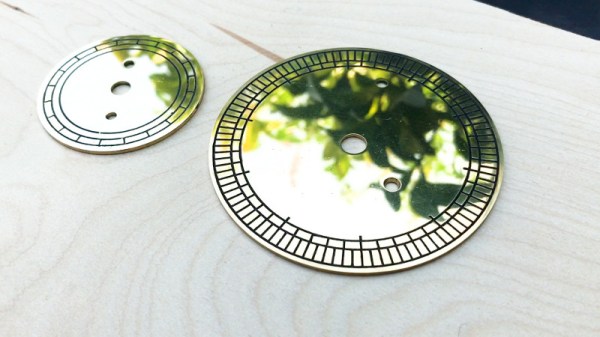
If you were building a recreation of the James Watt micrometer, where would you start? If you’re [rasp], the answer would be: “Spend a year trying to find the best way to make etched brass discs.” Luckily for us, he’s ready to share that information with the rest of the world. While it’s rather unlikely anyone else is working on this specific project, the methods he details for getting museum-quality results on brass are absolutely fascinating.

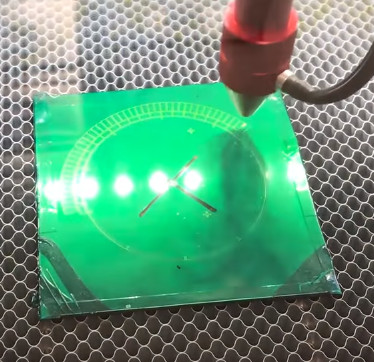
The process starts with sanding down the bare brass and applying a layer of clear packing tape to the metal. [rasp] then covers the piece with LaserTape, which is a special tape designed to make laser-cut masks for sandblasting. But the masking principle works just as well for painting or chemical etching.

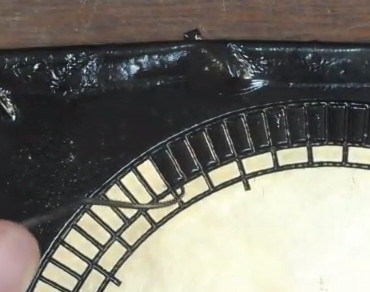
With the LaserTape in place, the piece is then put into the laser and the mask is cut out. Once cut, there’s the tedious task of peeling off all the cut pieces of tape, which [rasp] does with a dental pick. Once the pieces are pulled off, the brass is ready for its acid bath.

Anyone who’s etched their own PCB with ferric chloride will recognize these next steps. The piece is put into the acid bath and agitated every 10 minutes or so. It’s interesting to note that [rasp] places the piece in the bath upside-down, using little 3D printed “feet” to suspend the brass sheet off the bottom of the container. This allows the debris from the etching process to fall down and away from the piece. After about an hour out in the sun, the piece is pulled out of the bath and carefully washed off.

Once clean off, the piece is sprayed with black spray paint to darken up the etched areas. The moment of truth comes when the paint has dried and the layers of tape are carefully peeled back to reveal the etching. [rasp] then wet sands the piece with 1000 and 2000 grit paper, and a final pass with polishing compound brighten up the surface to a mirror-like shine. It’s quite a bit of manual labor, but the end result really is spectacular.

In the video after the break, [rasp] breaks down the entire process, including the additional machine work required to turn these brass plates into functional components of the final machine. As an added bonus, he even includes a lot of his failed attempts in an effort to keep others from making the same mistakes. Something we love to see here at Hackaday.

The process used here is similar to the snazzy brass name plates we showed earlier in the year, and has even been done without a laser using photoresist.

[via /r/DIY]

Continue reading “The Fine Art Of Acid Etching Brass”

3D-Printed Punch And Die Stand Up To Steel

When you think of machine tooling, what comes to mind might be an endmill made of tungsten carbide or a punch and die made of high-speed steel. But surely there’s no room in the machine tool world for 3D-printed plastic tools, especially for the demanding needs of punching parts from sheet metal.

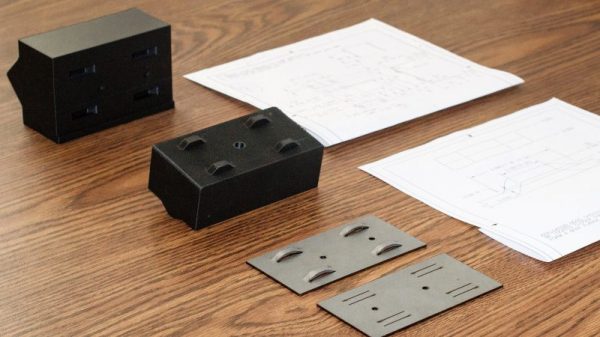
As it turns out, it is possible to make a 3D-printed punch and die set that will stand up to repeated use in a press brake. [Phil Vickery] decided to push the tooling envelope to test this, and came away pleasantly surprised by the results. In fairness, the die he used ended up being more of a composite between the carbon-fiber nylon filament and some embedded metal to reinforce stress points in the die block. It looks like the punch is just plastic, though, and both were printed on a Markforged Mark 2, a printer specifically designed for high-strength parts. The punch and die set were strong enough to form 14-gauge sheet steel in a press brake, which is pretty impressive. The tool wasn’t used to cut the metal; the blanks were precut with a laser before heading to the press. But still, having any 3D-printed tool stand up to metal opens up possibilities for rapid prototyping and short production runs.

No matter what material you make your tooling out of, there’s a lot to know about bending metal. Check out the basics in our guide to the art and science of bending metal.

Continue reading “3D-Printed Punch And Die Stand Up To Steel”

Aluminum No Match For 3D Printed Press Brake Dies

If you’re looking for a get-rich-quick scheme, you can scratch “Doing small-scale manufacturing of ultralight aircraft” off your list right now. Turns out there’s no money in it. At least, not enough money that you can outsource production of all the parts. Not even enough to setup a huge shop full of customized machining tools when you realize you have to make the stuff yourself. No, this sounds like one of those “labors of love” we always hear so much about.

So how does one do in-house manufacturing of aircraft with a bare minimum of tools? Well, since you’re reading this on Hackaday you can probably guess that you’ve got to come up with something a bit unorthodox. When [Brian Carpenter] of Rainbow Aviation needed a very specific die to bend a component for their aircraft, he decided to try designing and 3D printing one himself.

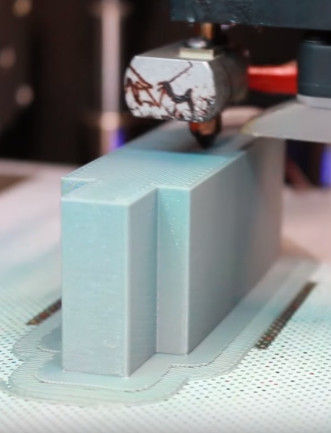
Printing a die on the Zortrax M200

He reasoned that since he had made quick and dirty dies out of wood in the past, that a 3D printed one should work for at least a few bends before falling apart. He even planned to use JB Weld to fill in the parts of the printed die which he assumed would start cracking and breaking off after he put it through a few cycles. But even after bending hundreds of parts, wear on the dies appears to be nearly non-existent. As an added bonus, the printed plastic dies don’t mar the aluminum pieces they are bending like the steel dies do.

So what’s the secret to printing a die that can bend hundreds of pieces of aluminum on a 20 ton brake without wearing down? As it turns out…not a whole lot. [Brian] attributes the success of this experiment to designing the die with sufficiently accurate tolerances and having so high of an infill that it may as well be solid plastic.

In fact, the 3D printed die worked out so well that they’ve now expanded the idea to a cheap Harbor Freight brake. Before this tool was going more or less unused as it didn’t have features they needed for the production of their parts, namely a radius die or backstop. But by 3D printing these components [Brian] was able to put the tool back to work.

We’ve previously covered the art and science of bending sheet metal, as well as a homebuilt brake that let’s you do it on a budget even Rainbow Aviation would scoff at. So what are you waiting for? Go build an airplane.

Thanks to [Oahupilot] for the tip.

Continue reading “Aluminum No Match For 3D Printed Press Brake Dies”

Bolt-Together Belt Grinder For The No-Weld Shop

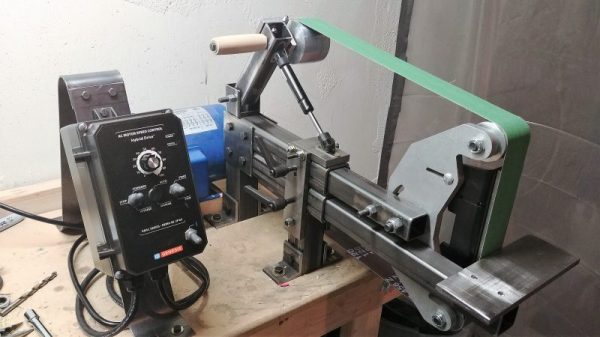
Belt grinding offers a lot of advantages for the metalworker, and since belt grinders are pretty simple machines, shop-built tools are not an uncommon project. A bolt-together belt grinder makes this tool even more accessible to the home gamer.

With no access to a welder but with a basic milling machine and an ample scrap bin at his disposal,  [IJustLikeMakingThings] had to get creative and modify some of the welding-required belt grinder designs he found online to be bolt-up builds.  The key to a cool running belt grinder is for the belt to be as long as possible, and the 2″x72″ belt seems to be the sweet spot, at least here in the States. Machined drive and idler wheels with the crown needed for proper belt tracking were sourced online, as was the D-bracket for holding the two guide wheels. But the rest of the parts were fabricated with simple tools and bolted together. [IJustLikeMakingThings] provides a lot of detail in his write-up, and it shouldn’t be too hard to build a belt grinder just like this one.

Looking for other belt grinder plans to compare notes? Here’s a grinder with an even simpler design, but with welding required.

Sharpening Drills Bits The Hard Way

Drill bits are so cheap that when one is too chowdered up to keep working, we generally just toss it out. So you might expect a video on sharpening drill bits to be somewhat irrelevant, but [This Old Tony] makes it work.

The reason this video is worth watching is not just that you get to learn how to sharpen your bits, although that’s an essential metalworker’s skill. Where [This Old Tony]’s video shines is by explaining why a drill bit is shaped the way it is, which he does by fabricating a rudimentary twist drill bit from scratch. Seeing how the flutes and the web are formed and how all the different angles interact to cut material and transport the swarf away is fascinating. And as a bonus, knowing what the angles do allows you to customize a grind for a special job.

[This Old Tony] may be just a guy messing around in his shop, but he’s got a wealth of machine shop knowledge and we always look forward to seeing what he’s working on, whether it’s a homemade fly cutter or a full-blown CNC machine.

Continue reading “Sharpening Drills Bits The Hard Way”