Powder Your Prints For Baby-Smoothness

Layer lines are a dead giveaway to non-normies that a thing was 3D printed. There are things you can do to smooth them — sanding, chemical smoothing, and fillers come to mind. Although this technique technically uses all three, it starts with something very simple.

In the video after the break, [DaveRig] gets right to the point: baby powder and resin mixed together make a fine smoothing agent when cured. Having read about it online, he decided to give it a try.

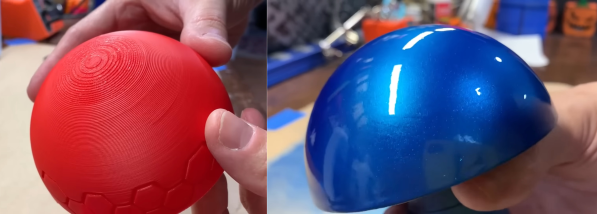
Starting with a half sphere that had admittedly pretty big layer lines, [DaveRig] mixed up enough resin and baby powder to make the consistency of milk or cream. Then he put five coats on, curing and sanding with 120 in between each one.

Then it’s on to standard post-processing stuff. You know, wipe it down with alcohol, sand it a little more, wet sand, and then it’s on to the airbrush and clear-coat. The end result looks to be as smooth as your average bowling ball, as you can see in the main photo.

What’s your favorite post-processing method? Have you tried annealing them in salt?

Continue reading “Powder Your Prints For Baby-Smoothness”

Cheap Deburring Tool Is Game Changer For 3D Printing

3D printing’s real value is that you can whip up objects in all kinds of whacky geometries with a minimum of fuss. However, there’s almost always some post-processing to do. Like many manufactured plastic objects, there are burrs, strings, and rough edges to deal with. Fussing around with a knife to remove them is a poor way to go. As explained by [Adrian Kingsley-Hughes] on ZDNet, a deburring tool is the cheap and easy solution to the problem.

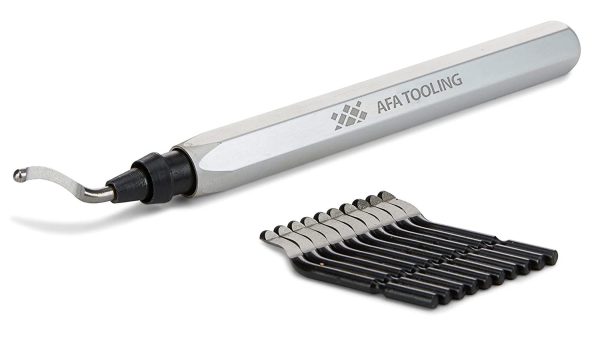
If you haven’t used one before, a deburring tool simply consists of a curved metal blade that swivels relative to its straight handle. You can drag the curved blade over the edge of a metal, wooden, or plastic object, and it neatly pulls away the burrs. There’s minimal risk of injury, unlike when pulling a regular blade towards yourself. The curved, swiveling blade is much less liable to slip or jump, and if it does, it’s far less likely to cut you.

For plastic use, just about any old deburring tool will do. They last a long time with minimal maintenance. They will wear out faster when used on metals, but you can get replacement blades cheap if you happen to need them. It’s a tool every workshop should have, particularly given they generally cost less than $20.

Given the ugly edges and rafts we’re always having to remove from our 3D prints, it’s almost egregious that printers don’t come with them bundled in the box. They’re just a bit obscure when it comes to tools; this may in fact be the first time Hackaday’s ever covered one. If you’ve got your own quality-of-life hacks for 3D printing, sound off below, or share them on the tipsline! We have able staff waiting for your email.

Original Controller Ports In Custom Case Means Retro Gaming In Style

Some careful measuring and a little extra effort can be all that separates what looks like a hack job from a slick end product, and that is apparent in [Eric Sorensen]’s classy retrogaming rig, complete with ports for original console controllers.

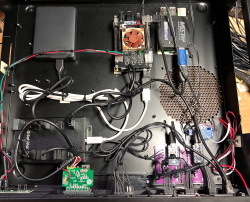
Neatly housing these components in a case makes all the difference.

[Eric] likes his vintage gaming, and was terrifically pleased with MiSTer, an open-source project that recreates various classic computers, game consoles and arcade machines using modern FPGA-based hardware. Of course, what makes retro gaming even better is using a platform’s genuine original controllers, which just takes a little extra hardware and wiring.

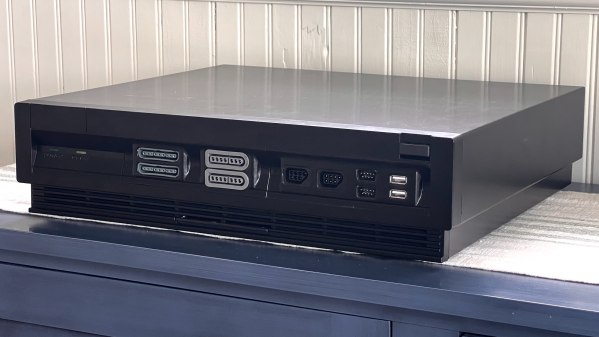
But [Eric] found that all the required accessories and peripherals started to look awfully cluttered. He solved this issue by packing everything carefully into a specialty PC case called the Checkmate A1500 Plus, which gives off a strong 80s design vibe. As a bonus, the front panels are all removable and that’s where [Eric] decided to house the custom controller ports.

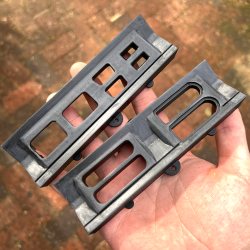
First [Eric] carefully measured each controller connector to create CAD models, then designed matching front panels to house the connectors and 3D printed them. Once that was done, post-processing the panels was a long process of apply Bondo, sand, paint, and repeat as needed. The results looks fantastic, and this project is a prime example of how aesthetics and finish can matter.

Find yourself in a similar situation? [Tom Nardi] has shown us all that 3D prints don’t have to look 3D-printed, and careful application of paint and primer can really put the ‘pro’ in prototyping.

With A Little Heat, Printed Parts Handle Vacuum Duty

We don’t have to tell the average Hackaday reader that desktop 3D printing has been transformative for our community, but what might not be as obvious is the impact the technology has had on the scientific community. As explained in Thermal Post-Processing of 3D Printed Polypropylene Parts for
Vacuum Systems
by [Pierce Mayville], [Aliaksei Petsiuk], and [Joshua Pearce]
, the use of printed plastic parts, especially when based on open source designs, can lead to huge cost reductions in the production of scientific hardware.

More specifically, the authors wanted to examine the use of 3D printing components to be used in a vacuum. Parts produced with filament-based printers tend to be porous, and as such, are not suitable for fittings or adapters which need to be pumped down to below one atmosphere. The paper goes on to explain that there are coatings that can be used to seal the printed parts, but that they can outgas at negative pressures.

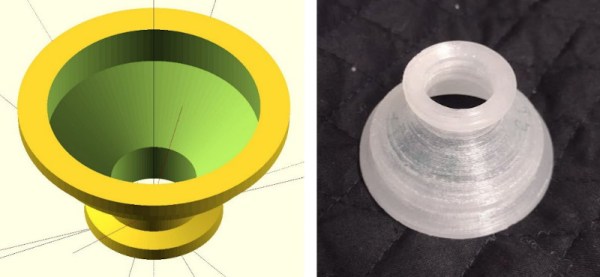
The solution proposed by the team is exceptionally simple: after printing their desired parts in polypropylene on a Lulzbot Taz 6, they simply hit them with a standard consumer heat gun. With the temperature set at ~400 °C, it took a little under a minute for the surface of take on a glossy appearance — the result reminds us of an ABS print smoothed with acetone vapor.

As the part is heated, the surface texture visibly changes. The smoothed parts performed far better in vacuum testing.

In addition to the heat treatment, the team also experimented with increasing degrees of infill overlap in the slicer settings. The end result is that parts printed with a high overlap and then heat treated were able to reliably handle pressures as low as 0.4 mTorr. While the paper admits that manually cooking your printed parts with a heat gun isn’t exactly the ideal solution for producing vacuum-capable components, it’s certainly a promising start and deserves further study.

Give 3D Printed Plastic A Well-Worn Metal Look

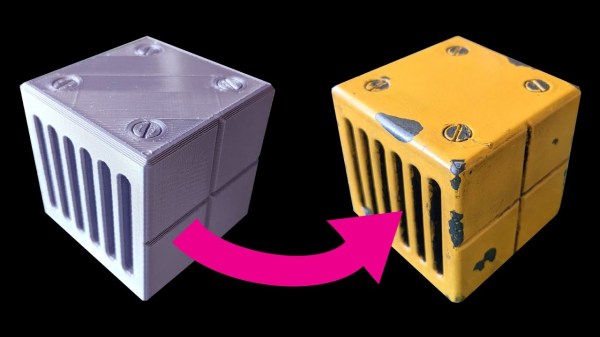
Affordable 3D printers let us turn ideas into physical reality without a big expensive workshop, but with their power came some disadvantages. The nature of FDM printers impart layer lines and nozzle ridges in the parts they produce. They can be minimized with optimized print settings, but never eliminated. [Emily Velasco] loves the power of 3D printing but not how the parts look. So she put in the effort to make 3D-printed plastic look like distressed metal and showed us how she did it. (Video also embedded after the break.)

This video is a follow-up to her Pet Eye project in response to feedback on Twitter. She had mentioned that the  salvaged metal box for Pet Eye wasn’t quite big enough to hold everything, so she had to extend its internal volume with a 3D print box on the back. It fit in so well that the offhand comment surprised many people who wanted to know more about how it was done. So she designed a demonstration cube covered with mechanical characteristics, and gave us this walkthrough of its transformation.

Continue reading “Give 3D Printed Plastic A Well-Worn Metal Look”

Take This 3D-Print Post-Processing Method With A Grain Of Salt

There’s a lot of folklore around post-processing of prints from FDM printers. Proponents swear by their methods, which are generally intended to either strengthen the part or to improve its appearance, or both. But do they actually work?

Knowing that a collection of anecdotes is no substitute for actual data, [Stefan] from CNC Kitchen has again performed some valuable experiments, this time testing the strength of parts that have been annealed in salt. This was a follow-up to his recent experiments with baking prints after entombing them in plaster, which yielded mixed results in terms of strength gains. Viewers commented that common salt makes a good medium for annealing prints, so he set about finding the right kind of salt. It turns out that the finer the grain, the better — powdery salt packs tighter and leaves little space for the softened plastic to flow — but that powdery salt is not easier to find. He ended up making his own by pulverizing table salt in a blender. He also had to play around with temperatures and times until coming up with a good process.

The results are impressive. PETG, ABS, and two varieties of PLA prints tested with force applied perpendicular to the print layers all showed marked increase in strength after breaking, to the point of nearly matching the strength of parts printed with the layers parallel to the stress. As with the plaster, parts were printed at 100% infill; a Benchy printed at 20% was notably unseaworthy after annealing. Surface finish on the annealed parts is an interesting combination of pitting with white residue — not unattractive but still a bit weird.

Salt annealing might be a bit cumbersome, but it’s a neat method to add to all the other post-processing tricks that people have come up with for their 3D prints. Continue reading “Take This 3D-Print Post-Processing Method With A Grain Of Salt”

Making An Ultrasonic Cutter For Post-processing Tiny 3D Prints

An ultrasonic knife is a blade that vibrates a tiny amount at a high frequency, giving the knife edge minor superpowers. It gets used much like any other blade, but it becomes far easier to cut through troublesome materials like rubber or hard plastics. I was always curious about them, and recently made my own by modifying another tool. It turns out that an ultrasonic scaling tool intended for dental use can fairly easily be turned into a nimble little ultrasonic cutter for fine detail work.

Cheap ultrasonic scaler. The blue disk is for adjusting power. Foot switch not shown.

I originally started thinking about an ultrasonic knife to make removing supports from SLA 3D prints easier. SLA resin prints are made from a smooth, hard plastic and can sometimes require a veritable forest of supports. These supports are normally removed with flush cutters, or torn off if one doesn’t care about appearances, but sometimes the density of supports makes this process awkward, especially on small objects.

I imagined that an ultrasonic blade would make short work of these pesky supports, and for the most part, I was right! It won’t effortlessly cut through a forest of support bases like a hot knife through butter, but it certainly makes it easier to remove tricky supports from the model itself. Specifically, it excels at slicing through fine areas while preserving delicate features. Continue reading “Making An Ultrasonic Cutter For Post-processing Tiny 3D Prints”