a very slapdash x-ray machine on a table

Building An X-Ray Machine

While we typically encourage hackers to make their own tools or machines when practical, x-ray machines don’t usually make that list. Despite the risk of radiation, [William Osman] has done just that and built a homemade x-ray machine. After receiving an eye-watering medical bill, [William] resolves to make his own x-ray machine in the hopes of avoiding future bills. Thanks to his insurance, the total owed was smaller but still ridiculous to those who live in single-payer health care countries, but it got William thinking. What if he could make an x-ray machine to do cheap x-rays?

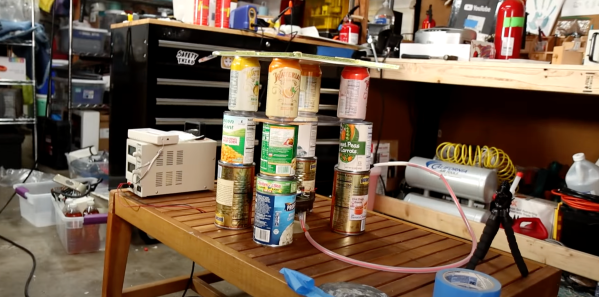
Armed with a cheap high voltage DC power supply he acquired from an online auction house, he started to power up his x-ray vacuum tube. A smaller power supply energizes the cathode and forms an electron beam. Then the high voltage (30-150kv) is applied as a tube voltage, accelerating the electrons into x-rays. Safety measures are taken somewhat haphazardly with Geiger counters and lead sheets. With a finger bone cast in ballistic shell [William] made his first x-ray with a long exposure on a DSLR. The next items to go in the x-ray “chamber” were a phone and a hand. The results were actually pretty decent and you can clearly see the bones.

We’ve seen homemade X-Ray machines here at Hackaday before, but not one that is constructed perhaps so haphazardly — his approach makes this obvious: don’t try this at home. Video after the break.

Continue reading “Building An X-Ray Machine”

Overdriving Vacuum Tubes And Releasing The Magic Light Within

We’ve all seen electronic components that have been coaxed into releasing their small amount of Magic Smoke, which of course is what makes the thing work in the first place. But back in the old times, parts were made of glass and metal and were much tougher — you could do almost anything to them and they wouldn’t release the Magic Smoke. It was very boring.

Unless you knew the secret of “red plating”, of course, which [David Lovett] explores in the video below. We’ve been following [David]’s work with vacuum tubes, the aforementioned essentially smokeless components that he’s putting to use to build a simple one-bit microprocessor. His circuits tend to drive tubes rather gently, but in a fun twist, he let his destructive side out for a bit and really pushed a few tubes to see what happens. And what happens is pretty dramatic — when enough electrons stream from the cathode to the anode, their collective kinetic energy heats the plate up to a cherry-red, hence the term “red plating”.

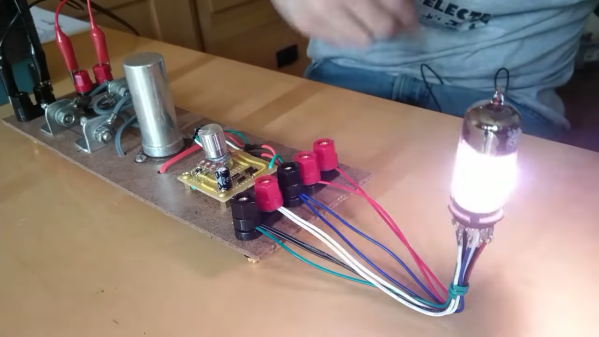
[David] selected a number of victims for his torture chamber, not all of which cooperated despite the roughly 195 volts applied to the plate. Some of the tubes, though, cooperated in spades, quickly taking on a very unhealthy glow. One tube, a 6BZ7 dual triode, really put on a show, with something getting so hot inside the tube as to warp and short together, leading to some impressive pyrotechnics. Think of it as releasing the Magic Light instead of the Magic Smoke.

Having seen how X-ray tubes work, we can’t help but wonder if [David] was getting a little bit more than he bargained for when he made this snuff film. Probably not — the energies involved with medical X-ray tubes are much higher than this — but still, it might be interesting to see what kinds of unintended emissions red-plating generates.

Continue reading “Overdriving Vacuum Tubes And Releasing The Magic Light Within”

The First New Vacuum Tube Computer Design For Well Over Half A Century

In a few museums around the world, there lies the special experience of seeing some of the earliest computers. These room-filling monsters have multiple racks of vacuum tubes that are kept working by the dedication and care of their volunteer maintainers. A visit to the primordial vacuum tube computer, Colossus at Bletchley Park, UK, led [Mike] on the path towards designing an entirely new one. He thinks it’s the first to see the light of day in over five decades. ENA, the Electron tube New Automatic Computer, is the result.

It uses 550 Soviet 6N3P double triodes, and its 8-bit Von Neumann architecture is constructed from the tubes wired up as 5-input NOR gates. ROM is a diode matrix, and RAM comes courtesy of reed relays. The whole thing is assembled as eleven PCBs on a wall-mounted frame, with a console that holds the piece de resistance, a display made from an array of LEDs. A Pong game is in development, meanwhile the machine makes an impressive room heater.

If you’d like to see some more vacuum tube computational goodness, we saw Colossus at the National Museum of Computing, back in 1996.

Restoring A Vintage Tube Tester To Its Former Glory

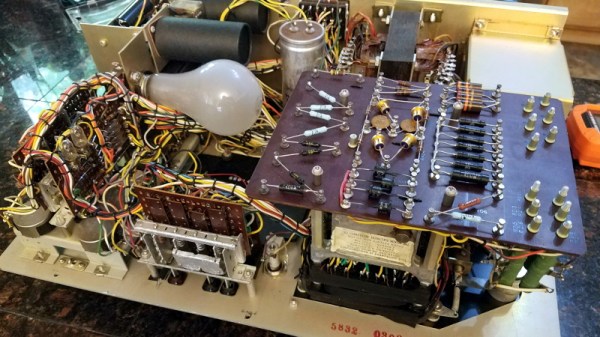
It can be difficult for modern eyes to make much sense of electronics from the 1960s or earlier. Between the point-to-point soldering, oddball components, and the familiar looking passives blown up to comical proportions like rejected props from “Honey, I Shrunk the Kids”, even experienced hardware hackers may find themselves struggling to understand what a circuit is doing. But that didn’t stop [Cat0Charmer] from taking the time to lovingly restore this Hickok Cardmatic KS-15874-L2 tube tester.

The good news was that the machine had nearly all of its original parts, down to the Hickok branded tubes in the power supply. Unfortunately it looks like a few heavy handed repairs were attempted over the years, with a nest of new wires and components intermixed with what [Cat0Charmer] actually wanted to keep. The before and after shots of individual sections of the machine are particularly enlightening, though again, don’t feel to bad if you still can’t make heads or tails of the cleaned up version.

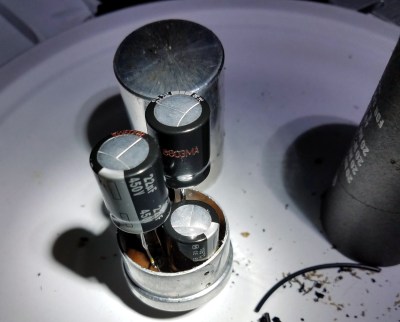
Hiding new capacitors inside of the old ones.

As you’d expect for a machine of this age, many of the original components were way out of spec. Naturally the capacitors were shot, but even the carbon composition resistors were worthless after all these years; with some measuring 60% away from their original tolerances.

We particularly liked how [Cat0Charmer] hollowed out the old capacitors and installed the new modern ones inside of them, preserving the tester’s vintage look. This trick wasn’t always feasible, but where it was applied, it definitely looks better than seeing a modern capacitor adrift in a sea of 60’s hardware.

After undoing ham-fisted repairs, replacing the dud components, and installing some new old stock tubes, the tester sprung to life with renewed vigor. The previously inoperable internal neon lamps, used by the tester’s voltage regulation system, shone brightly thanks to all the ancillary repairs and changes that went on around them. With a DIY calibration cell built from the schematics in an old Navy manual, [Cat0Charmer] got the tester dialed in and ready for the next phase of its long and storied career.

We love seeing old hardware get restored. It not only keeps useful equipment out of the scrap heap, but because blending new and old technology invariably leads to the kind of innovative problem solving this community is built on.

Should Have Used A Vacuum Tube 555

“You should have used a 555” has become a bit of a meme around these parts lately, and for good reason. There seems to be little that these ubiquitous chips can’t be used for, and in a world where code often substitutes for hardware, it’s easy to point to instances where one could have just used a simple timer chip instead.

Definitely not in the meme category, though, is this overkill vacuum tube 555 timer. It comes to us via [David Lovett], aka [Usagi Electric], who has lately caught the “hollow state” electronics bug and has been experimenting with all sorts of vacuum tube recreations of circuits we’re far more used to seeing rendered in silicon than glass. The urge to replicate the venerable 555 in nothing but vacuum tubes is understandable, as it uses little more than a pair of comparators and a flip-flop, circuits [David] has already built vacuum tube versions of. The only part left was the discharge transistor; a pentode was enlisted to stand in for that vital function, making the circuit complete.

To physically implement the design, [David] built a large PCB to hold the 18 vacuum tubes and the handful of resistors and capacitors needed. Mounted on eight outsized leads made from sheet steel, the circuit pays homage to the original 8-pin DIP form of the 555. The video below shows the design and build process as well as testing of all the common modes of operation for the timer chip.

You can check out more of our coverage of [David]’s vacuum tube adventures, which started with his reverse-engineering of an old IBM logic module. And while he did a great job explaining the inner workings of the 555, you might want to take a deeper dive into how the venerable chip came to be.

Continue reading “Should Have Used A Vacuum Tube 555”

Retrotechtacular: Philips Factory Tour, Circa 1930s

If you’ve got a half-hour or so to spare, you could do worse than this video trip through a Philips factory in the 1930s.

The film is presented without narration, but from the Dutch title cards and the fact that it’s Philips, we gather that this factory of gigantic proportions was somewhere in the Netherlands. In any case, it looks like something right out of [Fritz Lang]’s Metropolis and turned the rawest of materials into finished consumer products.

Much of the film focuses on the making of vacuum tubes; the sheer physicality of the job is what really stands out here. The upper body strength that the glassblowers had to have boggles the mind. Check out the chops — and the soon-to-be very unfashionable mustache — on the glassblower at the 12:00 mark. And it wasn’t just the gents who had mad skills — the fine motor control needed for the delicate assembly of the innards of the tubes, which seems to be mostly staffed by women, is just as impressive. We were also surprised by the amount these manual crafts were assisted by automated systems.

Especially interesting is the section where they build the luidspreker. Without narration or captions, it’s a little hard to tell what’s going on, but it appears that they used an enormous press to form chips of Bakelite into sleek covers for the speakers, which themselves are super-chunky affairs made from scratch in the factory. We’re also treated to assembly of the radios, packaging of finished products, and a group of dockworkers who clearly didn’t read the “Fragile” labels pasted on the boxes.

One can’t help but wonder if these people had the slightest inkling of what was about to sweep over them and the rest of the world. And if they did, would they even begin to comprehend how much the very products that they were making would contribute to both the slaughter of the coming war as well as to the sparing of so many lives? Likely not, but the film is still an interesting glimpse into the creation of an industry, one that relied very much on craftsmanship to get it started.

Continue reading “Retrotechtacular: Philips Factory Tour, Circa 1930s”

Meet The Magic Eye Vacuum Tube

Vacuum tubes ruled electronics for several decades and while you might think of them as simple devices analogous to a transistor or FET, there were many special types. We’re all familiar with nixie tubes that act as numeric displays, and there are other specialty tubes that work as a photomultiplier, to detect radiation, or even generate microwaves. But one of the most peculiar and distinctive specialty tubes has an intriguing name: a magic eye tube. When viewed from the top, you see a visual indication that rotates around a central point, the out ring glowing while the inner is dark, like an iris and pupil.

By [Quark48] – CC BY-SA 2.0

These tubes date back to the RCA 6E5 in 1935. At the time, test equipment that used needles was expensive to make, so there was always a push to replace them with something cheaper.  They were something like a stunted cathode ray tube. In fact, the inventor, Allen DuMont, was well known for innovations in television. An anode held a coating that would glow when hit with electrons — usually green, but sometimes other colors. Later tubes would show a stripe going up and down the tube instead of a circle, but you still call them magic eyes.

The indicator part of this virtual meter took the form of a shadow. Based on the applied signal, the shadow would be larger or smaller. Many tubes also contained a triode which would drive the tube from a signal.

There’s a great web site full of information on these venerable tubes and it has examples of these tubes appearing in plenty of things. They frequently appeared in service equipment, radios, and tape recorders. They even appeared in pro audio equipment like the Binson Echorec echo-delay unit.

Continue reading “Meet The Magic Eye Vacuum Tube”