Apollo Guidance Computer Saved From The Scrap Yard

NASA needed a small and lightweight computer to send humans on their journey to the Moon and back, but computers of the day were made out of discrete components that were heavy, large, complicated, and unreliable. None of which are good qualities for spaceflight. The agency’s decision to ultimately trust the success of the Apollo program on the newly developed integrated circuit was an important milestone in computer history.

Given the enormity of the task at hand and the monumental effort it took, it’s surprising to learn that there aren’t very many left in existence. But perhaps not as surprising as the fact that somebody apparently threw one of them in the trash. A former NASA contractor happened to notice one of these historic Apollo Guidance Computers (AGC) at an electronics recycling facility, and thankfully was able to save it from getting scrapped.

The AGC was actually discovered in 1976, but it was decided to get the computer working again in time for the recent 50th anniversary of the Moon landing. A group of computer scientists in California were able to not only get the computer up and running, but integrate it into a realistic simulator that gives players an authentic look at what it took to land on the Moon in 1969.

Restoring a computer of this age and rarity is no easy feat. There aren’t exactly spare parts floating around for it, and the team had to go to great effort to repair some faults on the device. Since we covered the beginning stages of the restoration last year, the entire process has been extensively documented in a series of videos on YouTube. So while it’s unlikely you’ll find an AGC in your local recycling center, at least you’ll know what to do with it if you do.

Continue reading “Apollo Guidance Computer Saved From The Scrap Yard”

Simulate Climate With An Arduino

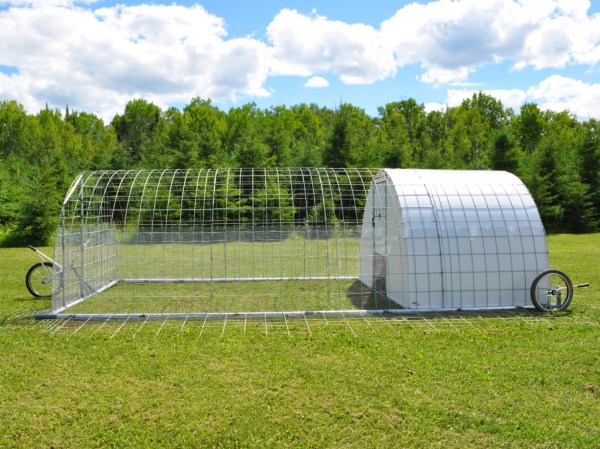
Greenhouses create an artificial climate specifically suited to the plants you want to grow. It’s done by monitoring conditions like temperature and humidity, and making changes using things like vents, fans, irrigation, and lighting fixtures to boost temperature. But how do you know when it’s time to up the humidity, or vent some of the heat building up inside? The easy way is to use the Arduino-powered Norman climate simulator from [934Virginia] which leverages data from different locations or times of year based on NOAA weather data to mimic a particular growing environment.

Norman relies on a simple input of data about the target location, working from coordinates and specified date ranges to return minimum/maximum values for temperature and humidity weather conditions. It makes extensive use of the Dusk2Dawn library, and models other atmospheric conditions using mathematical modeling methods in order to make relatively accurate estimates of the target climate. There are some simulations on the project’s Plotly page which show what this data looks like.

This data is used by [934Virginia’s] Arduino library to compare the difference between your target climate and actual sensor readings in your greenhouse. From there you can make manual changes to the environment, or if you’re luck and already have an Arduino-based greenhouse automation system the climate adjustments can be done automatically. The project is named after Norman Borlaug, a famous soil scientist and someone worth reading about.

Editor’s Note: This article has been rewritten from the original to correct factual errors. The original article incorrectly focused on replicating a climate without the use of sensors. This project does require sensors to compare actual greenhouse conditions to historic climate conditions calculated by the library. We apologize to [934Virginia] for this and thank them for writing in to point out the errors.

Images courtesy of Wikimedia Commons.

Creative Limitation And The Super Nintendo Sound Chips

The Super Nintendo recently experienced a surge in popularity, either from a combination of nostalgic 30-somethings recreating their childhoods, or because Nintendo released a “classic” version of this nearly-perfect video game system. Or a combination of both. But what made the system worthy of being remembered at all? With only 16 bits and graphics that look ancient by modern standards, gameplay is similarly limited. This video from [Nerdwriter1] goes into depth on a single part of the console – the sound chips – and uses them to illustrate a small part of what makes this console still worth playing even now.

The SNES processed sound with two chips, a processing core and a DSP. They only had a capacity of 64 kb, meaning that all of a game’s sounds and music had to fit in this tiny space. This might seem impossible if you’ve ever played enduring classics like Donkey Kong Country, a game known for its impressive musical score. This is where the concept of creative limitation comes in. The theory says that creativity can flourish if given a set of boundaries. In this case it was a small amount of memory, and within that tiny space the composer at Rare who made this game a work of art was able to develop a musical masterpiece within strict limitations.

Even though this video only discusses the sound abilities of the SNES, which are still being put to good use, it’s a good illustration of what made this system so much fun. Even though it was limited, game developers (and composers) were able to work within its limitations to create some amazingly fun games that seem to have withstood the test of time fairly well. Not all of the games were winners, but the ones that were still get some playtime from us even now.

Continue reading “Creative Limitation And The Super Nintendo Sound Chips”

Run Your Own Phone To Bring The Dreamcast Back Online

Playing a video game online is almost second nature now. So much so that almost all multiplayer video games have ditched their split-screen multiplayer modes because they assume you’d rather just be alone at your house than hanging out with your friends. This wasn’t always the case though. In the early days of online multiplayer, systems had to rely on dial-up internet before broadband was readily available (and still had split screen if you didn’t even have that). Almost no one uses dial up anymore though, so if you still like playing your old Dreamcast you’re going to have to do some work to get it online again.

Luckily for all of us there’s a Raspberry Pi image to do almost anything now. This project from [Kazade] uses one to mimic a dial-up connection for a Dreamcast so you can connect with other people still playing Quake 20 years later. It’s essentially a network bridge, but you will need some extra hardware because phone lines use a high voltage line that you’ll have to make (or buy) a solution for. Once all the hardware is set up and working, you’ll need to make a few software configuration changes, but it’s a very straightforward project.

Granted, there have been ways of playing Dreamcast games online before, but this new method really streamlines the process and makes it as simple as possible. The Dreamcast was a great system, and there’s an argument to be made that the only reason it wasn’t more popular was that it was just slightly too far ahead of its time.

Thanks to [Rusty] for the tip!

Four Years Of Learning ESP8266 Development Went Into This Guide

The ESP8266 is a great processor for a lot of projects needing a small microcontroller and Wi-Fi, all for a reasonable price and in some pretty small form factors. [Simon] used one to build a garage door opener. This project isn’t really about his garage door opener based on a cheap WiFi-enabled chip, though. It’s about the four year process he went through to learn how to develop on these chips, and luckily he wrote a guide that anyone can use so that we don’t make the same mistakes he did.

The guide starts by suggesting which specific products are the easiest to use, and then moves on to some “best practices” for using these devices (with which we can’t argue much), before going through some example code. The most valuable parts of this guide especially for anyone starting out with these chips are the section which details how to get the web server up and running, and the best practices for developing HTML code for the tiny device (hint: develop somewhere else).

[Simon] also makes extensive use of the Chrome developers tools when building the HTML for the ESP. This is a handy trick even outside of ESP8266 development which might be useful for other tasks as well. Even though most of the guide won’t be new to anyone with experience with these boards, there are a few gems within it like this one that might help in other unrelated projects. It’s a good read and goes into a lot of detail about more than just the ESP chips. If you just want to open your garage door, though, you have lots of options.

Put A Smoke Detector To Some Use

While we’re certainly not denying that smoke detectors are useful, there’s a certain kind of tragedy to the fact that most of them will never realize their true purpose of detecting smoke, and alerting us to a dangerous fire. On the other hand, [Ben] really unlocks the potential hidden deep in every smoke detector with his latest project which uses the smoke-detecting parts of a smoke detector to turn on the exhaust fan over his stove.

The project didn’t start with the noble aim of realizing the hidden and underutilized quiescent nature of a smoke alarm, though. He wanted his range exhaust fan to turn on automatically when it was needed during his (and his family’s) cooking activities. The particular range has four speeds so he wired up four relays to each of the switches in the range and programmed a Particle Photon to turn them on based on readings from an MQ-2 gas-detecting sensor.

The sensor didn’t work as well as he had hoped. It was overly sensitive to some gasses like LPG which would turn the range on full blast any time he used his cooking spray. Meanwhile, it would drift and not work properly during normal cooking. He tried disabling it and using only a temperature sensor, which didn’t work well either. Finally, he got the idea to tear apart a smoke detector and use its sensor’s analog output to inform the microcontroller of the current need for an exhaust fan. Now that that’s done, [Ben] might want to add some additional safety features to his stovetop too.

Etch-A-Selfie

Taking a selfie before the modern smartphone era was a true endeavor. Flip phones didn’t have forward-facing cameras, and if you want to go really far back to the days of film cameras, you needed to set a timer on your camera and hope, or get a physical remote shutter. You could also try and create a self portrait on an Etch a Sketch, too, but this would take a lot of time and artistic skill. Luckily in the modern world, we can bring some of this old technology into the future and add a robot to create interesting retro selfies – without needing to be an artist.

The device from [im-pro] attaches two servos to the Etch a Sketch knobs. This isn’t really a new idea in itself, but the device also includes a front-facing camera, taking advantage of particularly inexpensive ESP32 Camera modules. Combining the camera features with [Bart Dring]’s ESP32 Grbl port is a winner. Check the code in [im-pro]’s GitHub.

Once the picture is taken, the ESP32 at the heart of the build handles the image processing and then drawing the image on the Etch a Sketch. The robot needs a black and white image to draw, and an algorithm for doing it without “lifting” the drawing tool, and these tasks stretch the capabilities of such a small processor. It takes some time to work, but in the end the results speak for themselves.

The final project is definitely worth looking for, if not for the interesting ESP32-controlled robot than for the image processing algorithim implementation. The ESP32 is a truly versatile platform, though, and is useful for building almost anything.

Continue reading “Etch-A-Selfie”