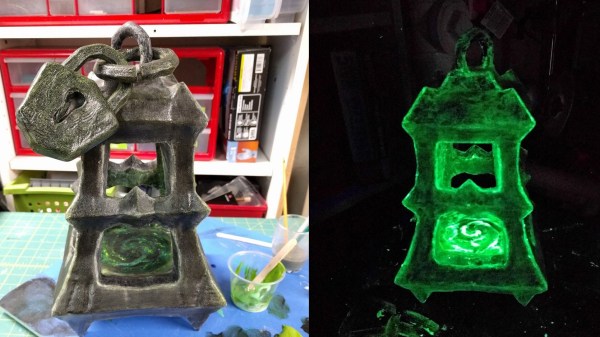
[cyborgworkshop]’s youngest sister is a fan of a character in a popular video game (Thresh from League of Legends) who wields an iconic lantern with a mystical green glow. He resolved to make a replica of that lantern. Perhaps as a gift for the cherished family member? Certainly not! [cyborgworkshop]’s goal was the simple joy of having something “to lord over her.” Ah, ain’t siblings grand?
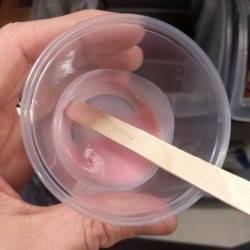
There were some interesting things learned in the process of making the ghostly green lamp. The first part of the build log is all about post-processing the lantern model, which was 3D printed at a chunky 0.48 mm layer height, but the rest is about getting the ghostly green glow to come out the way it did. [cyborgworkshop] used both glow in the dark paint and glow in the dark powder to really make the object pop, but the process involved some trial and error. Originally he mixed the glow powder into some clear varnish, and despite the mixture turning pink for some mysterious reason, a small sample spot appeared to turn out fine. However, after applying to the lantern and waiting, the varnish remained goopy and the glow powder settled out of the mixture. He ended up having to remove it as best he could and tried a heavy application of the glow paint instead. This ended up being a real blessing in disguise, because the combination resulted in a gritty stone-like texture that glowed brightly! As [cyborgworkshop] observes, sometimes mistakes end up being the highlight of a piece.
After more glow powder for highlighting, the finishing touches were a thin black wash to mute the powder’s whiteness, and a clear coat. The result looks great and a short video is embedded below. Oh, and if anyone has an idea why glow powder would turn pink when mixed into varnish, let us know in the comments!
Continue reading “Lamp’s Ghostly Glow Benefits From Happy Mistake”