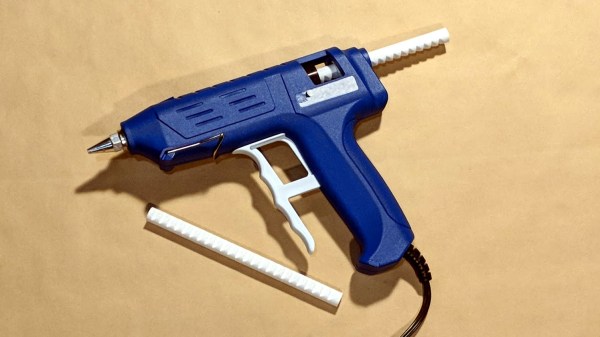
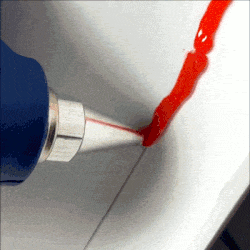
When is a hot glue stick not a hot glue stick? When it’s PLA, of course! A glue gun that dispenses molten PLA instead of hot glue turned out to be a handy tool for joining 3D-printed objects together, once I had figured out how to print my own “glue” sticks out of PLA. The result is a bit like a plus-sized 3D-printing pen, but much simpler and capable of much heavier extrusion. But it wasn’t quite as simple as shoving scrap PLA into a hot glue gun and mashing the trigger; a few glitches needed to be ironed out.
Why Use a Glue Gun for PLA?
 Some solutions come from no more than looking at two dissimilar things while in the right mindset, and realizing they can be mashed together. In this case I had recently segmented a large, hollow, 3D model into smaller 3D-printer-sized pieces and printed them all out, but found myself with a problem. I now had a large number of curved, thin-walled pieces that needed to be connected flush with one another. These were essentially butt joints on all sides — the weakest kind of joint — offering very little surface for gluing. On top of it all, the curved surfaces meant clamping was impractical, and any movement of the pieces while gluing would result in other pieces not lining up.
An advantage was that only the outside of my hollow model was a presentation surface; the inside could be ugly. A hot glue gun is worth considering for a job like this. The idea would be to hold two pieces with the presentation sides lined up properly with each other, then anchor the seams together by applying melted glue on the inside (non-presentation) side of the joint. Let the hot glue cool and harden, and repeat. It’s a workable process, but I felt that hot glue just wasn’t the right thing to use in this case. Hot glue can be slow to cool completely, and will always have a bit of flexibility to it. I wanted to work fast, and I wanted the joints to be hard and stiff. What I really wanted was melted PLA instead of glue, but I had no way to do it. Friction welding the 3D-printed pieces was a possibility but I doubted how maneuverable my rotary tool would be in awkward orientations. I was considering ordering a 3D-printing pen to use as a small PLA spot welder when I laid eyes on my cheap desktop glue gun.
Continue reading “3D Printering: Printing Sticks For A PLA Hot Glue Gun”
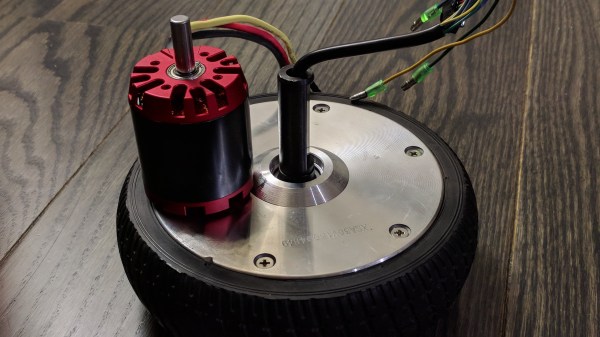
 [madcowswe] starts by pointing out that the entire premise of ODrive (an open-source brushless motor driver board) is to make use of inexpensive brushless motors in industrial-type applications. This usually means using hobby electric aircraft motors, but robotic applications sometimes need more torque than those motors can provide. Adding a gearbox is one option, but there is another: so-called “hoverboard” motors are common and
 A delightful version of a clever one-dimensional game has been made by [Critters] which he calls
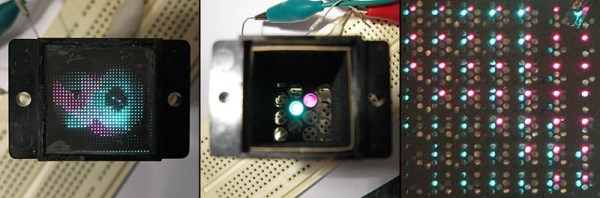
 Ever heard of a sphericular display? [AnubisTTP] laid hands on

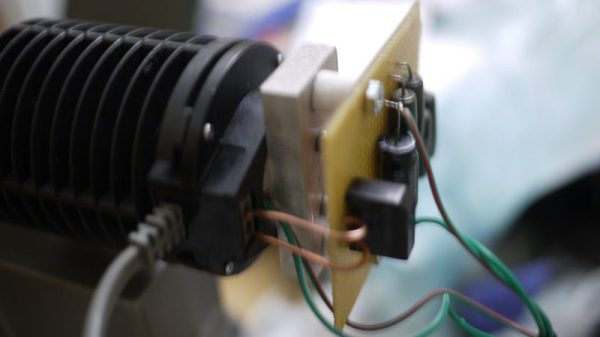
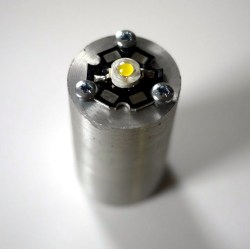 [Amen] obtained a microscope whose light source was an incandescent bulb, but the light from it seemed awfully dim even at its brightest setting. Rather than hunt down a replacement, he decided to


