Hackaday Prize Entry: Octo, The Robotic Walker

Walkers like the Strandbeest are favorites due in part to their smooth design and fluid motion, but [Leandro] is going a slightly different way with Octo, an octopodal platform for exploring rough terrain. Octo is based on the Klann linkage which was developed in 1994 and intended to act as an alternative to wheels because of its ability to deal with rough terrain. [Leandro] made a small proof of concept out of soldered brass and liked the results. The next version will be larger, made out of aluminum and steel, and capable of carrying a payload.

The Strandbeest and Octo have a lot in common but differ in a few significant ways. Jansen’s linkage (which the Strandbeest uses) uses eight links per leg and requires relatively flat terrain. The Klann linkage used by Octo needs only six links per leg, and has the ability to deal with rougher ground.

[Leandro] didn’t just cut some parts out from a file found online; the brass proof of concept was drawn up based on an animation of a Klann linkage. For the next version, [Leandro] used a simulator to determine an optimal linkage design, aiming for one with a gait that wasn’t too flat, and maximized vertical rise of the leg to aid in clearing obstacles.

We’ve seen the Klann linkage before in a LEGO Spider-bot. We’re delighted to see [Leandro]’s Octo in the ring for the Wheels, wings, and walkers category of The Hackaday Prize.

Hackaday Prize Entry: DIY 6-Axis Micro Manipulator

[David Brown]’s entry for The Hackaday Prize is a design for a tool that normally exists only as an expensive piece of industrial equipment; out of the reach of normal experimenters, in other words. That tool is a 6-axis micro manipulator and is essentially a small robotic actuator that is capable of very small, very precise movements. It uses 3D printed parts and low-cost components.

SLS Nylon Actuator Frame. Motor anchors to top right, moves the central pivot up and down to deflect the endpoints.

The manipulator consists of six identical actuators, each consisting of a single piece of SLS 3D printed nylon with a custom PCB to control a motor and read positional feedback. The motor moves the central pivot point of the 3D printed assembly, which in turn deflects the entire piece by a small amount. By anchoring one point and attaching the other, a small amount of highly controllable movement can be achieved. Six actuators in total form a Gough-Stewart Platform for moving the toolhead.

Interestingly, this 6-Axis Micro Manipulator is a sort of side project. [David] is interested in creating his own digital UV exposer, which requires using UV laser diodes with fiber optic pig tails attached. In an industrial setting these are created by empirically determining the optimal position of a fiber optic with regards to the laser diode by manipulating it with a micro manipulator, then holding it steady while it is cemented in place. Seeing a distinct lack of micro manipulators in anything outside of lab or industrial settings, and recognizing that there would be applications outside of his own needs, [David] resolved to build one.

Getting Data Off Proprietary Glucometers Gets A Little Easier

Glucometers (which measure glucose levels in blood) are medical devices familiar to diabetics, and notorious for being proprietary. Gentoo Linux developer [Flameeyes] has some good news about his open source tool to read and export data from a growing variety of glucometers. For [Flameeyes], the process started four years ago when he needed to send his glucometer readings to his doctor and ended up writing his own tool. Previously it was for Linux only, but now has Windows support.

Glucometers use a variety of different data interfaces, and even similar glucometers from the same manufacturer can use different protocols. Getting the data is one thing, but more is needed. [Flameeyes] admits that the tool is still crude in many ways, lacking useful features such as HTML output. Visualization and analysis are missing as well. If you’re interested in seeing if you can help, head over to the GitHub repository for glucomerutils. Also needed are details on protocols used by different devices; [Flameeyes] has only been able to reverse-engineer the protocols of meters he owns.

Speaking of glucometers, there is a project for a Universal Glucometer which aims to be able to use test strips from any manufacturer without needing to purchase a different meter.

Thanks for the tip, [Stuart]!

Hackaday Prize Entry: 3D Printed Linear Actuator Does 2kg+

The rabbit hole of features and clever hacks in [chiprobot]’s NEMA17 3D Printed Linear Actuator is pretty deep. Not only can it lift 2kg+ of mass easily, it is mostly 3D printed, and uses commonplace hardware like a NEMA 17 stepper motor and a RAMPS board for motion control.

The main 3D printed leadscrew uses a plug-and-socket design so that the assembly can be extended easily to any length desired without needing to print the leadscrew as a single piece. The tip of the actuator even integrates a force sensor made from conductive foam, which changes resistance as it is compressed, allowing the actuator some degree of feedback. The force sensor is made from a 3M foam earplug which has been saturated with a conductive ink. [chiprobot] doesn’t go into many details about his specific method, but using conductive foam as a force sensor is a fairly well-known and effective hack. To top it all off, [chiprobot] added a web GUI served over WiFi with an ESP32. Watch the whole thing in action in the video embedded below.

Continue reading “Hackaday Prize Entry: 3D Printed Linear Actuator Does 2kg+”

Cardboard And Paper Gun Shows Off Clever Construction

This project by [blackfish] shows off a cardboard lookalike of an MP5 that loads from a working magazine, has a functional charging handle, and flings paper projectiles with at least enough accuracy to plink some red party cups. It was made entirely from corrugated cardboard, paper, rubber bands, and toothpicks.

In the video (embedded below) you can see some clever construction techniques. For example, using a cyanoacrylate adhesive to saturate areas of wood, cardboard, or paper to give them added strength and rigidity. The video is well-edited and worth a watch to see the whole process; [blackfish] even uses a peeled piece of cardboard — exposing the corrugated part — as a set of detents (6:56) to retain the magazine.

Continue reading “Cardboard And Paper Gun Shows Off Clever Construction”

Hackaday Prize Entry: Automated Wildlife Recognition

Trail and wildlife cameras are commonly available nowadays, but the Wild Eye project aims to go beyond simply taking digital snapshots of critters. [Brenda Armour] uses a Raspberry Pi to not only take photos of wildlife who wander into the camera’s field of view, but to also automatically identify and categorize the animals seen using a visual recognition API from IBM via the Node-RED infrastructure. The result is a system that captures an image when motion is detected, sends the image to the visual recognition API, and attempts to identify any wildlife based on the returned data.

The visual recognition isn’t flawless, but a recent proof of concept shows promising results with crows, a cat, and a dog having been successfully identified. Perhaps when the project is ready to move deeper into the woods, elements from these solar-powered networked birdhouses (which also use the Raspberry Pi) could help cut some cords.

Drop-in Controller For EBay K40 Laser Engraver Gets Results

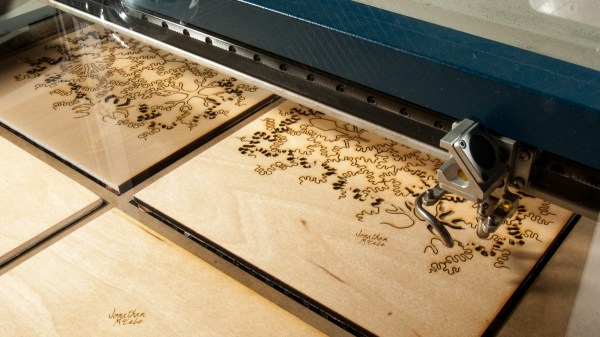
[Paul de Groot] wrote in to let us know about a drop-in controller replacement he designed for those economical K40 laser engravers that are everywhere on eBay. With the replacement controller, greatly improved engraving results are possible along with a simplified toolchain. Trade in the proprietary software and that clunky security dongle for Inkscape and a couple of plugins! [Paul] felt that the work he accomplished was too good to keep to himself, and is considering a small production run.

Laser engravers are in many ways not particularly complex devices; a motion controller moves the head in x and y, and the laser is turned on or off when needed. But of course, the devil is in the details and there can be a surprising amount of stuff between having a design on your screen and getting it cut or engraved in the machine. Designing in Inkscape, exporting to DXF, importing the DXF to proprietary software (which requires a USB security dongle to run), cleaning up any DXF import glitches, then finally cutting the job isn’t unusual. And engraving an image with varying shades and complex dithering? The hardware may be capable, but the stock software and controller? Not so much. It’s easy to see why projects to replace the proprietary controllers and software with open-source solutions have grown.

Cheap laser engravers may come with proprietary controllers and software, but they don’t need to stay that way. Other efforts we have seen in this area include LaserWeb, which provides a browser-based interface to a variety of open-source motion controllers like Grbl or Smoothieware. And if you’re considering a laser engraver, take a few minutes to learn from the mistakes of other people.