Restoring A Dead Commodore 128DCR

Another day, another retro computer lovingly restored to like-new condition by [Drygol]. This time, the subject of his attention is a Commodore 128DCR that earned every bit of the “For Parts, Not Working” condition it was listed under. From a spider infestation to a cracked power supply PCB, this computer was in quite a state. But in the end he got the three decade old machine back in working condition and even managed to teach it a few new tricks along the way.

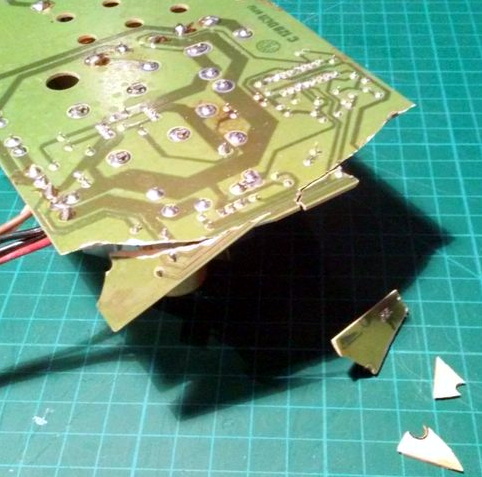
Obviously the shattered PSU was the most pressing issue with the Commodore. Interestingly, the machine still had its warranty seal in place on the back, so whatever happened to this PSU seems to have occurred without human intervention.

Rather than just replacing the PSU, [Drygol] first pieced the board back together with the help of cyanoacrylate glue, and then coated the top with an epoxy resin to give it some mechanical strength. On the back side the traces were either repaired or replaced entirely with jumper wires where the damage was too severe.

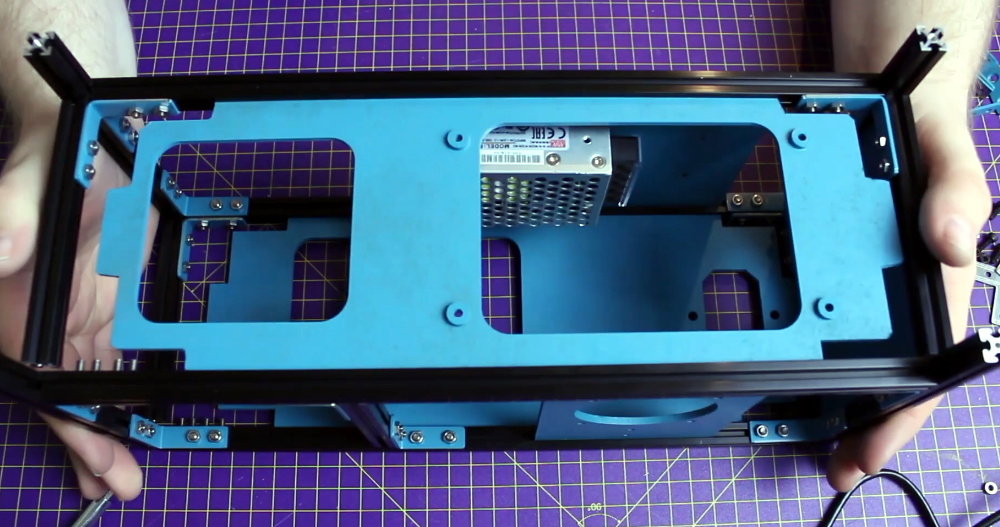
With the PSU repaired and tested, he moved on to cleaning the computer’s main board and whitening all the plastic external components. Even the individual keycaps took a bath to get them looking like new again. This put the computer in about as close to like-new condition as it could get.

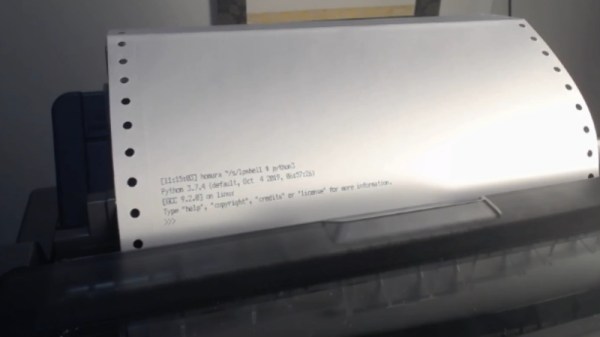
But why stop there? He next installed the JiffyDOS modification to improve system performance, and wired in an adapter that lets the computer output a crisp 80 columns over S-Video. It’s safe to say this particular Commodore is in better shape now than it was when it rolled off the assembly line.

While an impressive enough final result, this is still fairly tame for [Drygol]. If you want to see a real challenge, take a look at the insane amount of work that went into recreating this smashed Atari 800XL case.

Line Printer Does Its Best Teletype Impression

Back in the early days of computing, user terminals utilized line printers for output. Naturally this took an incredible amount of paper, but it came with the advantage of creating a hard copy of everything you did. Plus it was easy to annotate the terminal output with nothing more exotic than a ballpoint pen. But once CRT displays became more common, these paper terminals (also known as teleprinters, or teletypes) quickly fell out of style.

A fan of nostalgic hacks, [Drew DeVault] recently tried to recreate the old-school teletype experience with (somewhat) more modern hardware. He picked up an Epson LX-350 line printer, and with a relatively small amount of custom code, he was able to create a fairly close approximation of what it would have been like to use one of these terminals. He’s published all the source code, so if you’ve got an old line printer and a Linux box, you too can learn what it was like to measure your work day in reams of paper.

This is made possible by the fact that the modern Linux virtual terminal is simply a userspace emulation of those physical terminals of yore. [Drew] just need to write some code that would essentially spawn a shell on the Linux USB line printer device, plus sprinkle in some quality of life improvements such as using Epson’s proprietary ANSI escape sequences to feed the paper out far enough so the user can see what it says before pulling it back in to write the next interactive line.

Of course, the experience isn’t perfect as the printer naturally doesn’t have a keyboard attached to it. If you’re looking for something a bit more authentic, you could always convert an old electric typewriter into a modern-ish teletype.

Electric Dreams Help Cows Survive The Desert Of The Real

Pictures of a cow wearing a pair of comically oversized virtual reality goggles recently spread like wildfire over social media, and even the major news outlets eventually picked it up. Why not? Nobody wants to read about geopolitical turmoil over the holidays, and this story was precisely the sort of lighthearted “news” people would, if you can forgive the pun, gobble up.

But since you’re reading Hackaday, these images probably left you with more questions than answers. Who made the hardware, what software is it running, and of course, why does a cow need VR? Unfortunately, the answers to the more technical questions aren’t exactly forthcoming. Even tracking the story back to the official press release from the Ministry of Agriculture and Food of the Moscow Region doesn’t tell us much more than we can gather from the image itself.

But it does at least explain why somebody went through the trouble of making a custom bovine VR rig: calm cows produce more milk. These VR goggles, should they pass their testing and actually be adopted by the Russian dairy industry, will be the newest addition to a list of cow-calming hardware devices that farmers have been using for decades to get the most out of their herds.

Continue reading “Electric Dreams Help Cows Survive The Desert Of The Real”

The Open Makers Cube: Have Hack, Will Travel

Don’t bother denying it, we know your workbench is a mess. A tangled pile of wires, tools, and half-completed projects is standard decor for any hardware hacker. In fact, if you’ve got a spotless work area, we might even be a bit skeptical about your credentials in this field. But that’s not to say we wouldn’t be interested in some way of keeping the electronic detritus in check, perhaps something like the Open Makers Cube created by [technoez].

This all-in-one hardware hacking station uses DIN rails and 3D-printed mounting hardware to allow the user to attach a wide array of tools, gadgets, and boards to the outside surface where they’re easily accessible. The OpenSCAD design includes mounts for the usual suspects like the Raspberry Pi, Arduino Uno, and general purpose breadboards. Of course, your own custom mounts are just a few lines of code away.

The Cube also includes a lighted magnifying glass on a flexible arm so you can zoom in on what you’re working on, a simple “helping hands” attachment, and provisions for internal USB power. It even features angled feet so the front side of the cube is held at a more comfortable viewing angle. All of which is held together by a lightweight and portable frame built from square aluminum tubing.

We can understand if you’ve got some doubts about the idea of mounting all of your tools and projects to the side of a jaunty little cube. But even if the jury is still out on the mobile workspace concept, one thing is for sure: the Open Makers Cube is easily one of the best documented projects we’ve seen in recent memory. Thanks to NopSCADlib, [technoez] was able to generate an exploded view and Bill of Materials for each sub-assembly of the project. If you’ve ever needed proof that NopSCADlib was worth checking out, this is it.

Vintage Plotter Gets Bluetooth Upgrade

Recently [iot4c] stumbled upon this gorgeous Robotron Reiss plotter from 1989, brand-new and still in its original box. Built before the fall of the Berlin Wall in East Germany, it would be a crime to allow such a piece of computing history to go unused. But how to hook it up to a modern system? Bad enough that it uses some rather unusual connectors, but it’s about to be 2020, who wants to use wires anymore? What this piece of Cold War hardware needed was an infusion of Bluetooth.

While the physical ports on the back of the Robotron certainly look rather suspect, it turns out that electrically they’re just RS-232. In practice, this means converting it over was fairly straightforward. With a Bolutek BK3231 Bluetooth module and an RS-232 to UART converter, [iot4c] was able to create a wireless adapter that works transparently on the plotter by simply connecting it to the RX and TX pins.

A small DC buck converter was necessary to provide 3.3 V for the Bluetooth adapter, but even still, there was plenty of room inside the plotter’s case to fit everything in neatly. From the outside, you’d have no idea that the hardware had ever been modified at all.

But, like always, there was a catch. While Windows had no trouble connecting to the Bluetooth device and assigning it a COM port, the 512 byte buffer on the plotter would get overwhelmed when it started receiving commands. So [iot4c] wrote a little script in Node.js that breaks the commands down into more manageable chunks and sends them off to the plotter every 0.1 seconds. With this script in place the Robotron moved under its own power for the first time in ~30 years by parsing a HP-GL file generated by Inkscape.

If you’re interested in a plotter of your own but don’t have a vintage one sitting around, never fear. We’ve seen an influx of DIY plotters recently, ranging from builds that use popsicle sticks and clothespins to customizable 3D printed workhorses.

Winter Is Coming, This Clock Will Let You Know When

For Game of Thrones fans, it’s an awkward time. The show has ended its run on HBO (not without a certain level of controversy), the planned prequel is still years away, and who knows when George R. R. Martin will actually get around to writing the final books in the series. Fans have no choice but to entertain themselves while waiting for further tales of adventure from Westeros, which is how we get things like this motorized clock from [Techarge].

Inspired by the now iconic opening sequence from the HBO series, elements of the 3D printed model spin around while the theme song is played courtesy of a DFPlayer Mini MP3 player module and small 2 watt speaker. The audio hardware, motor, and four digit LED display module in the front are all connected to an Arduino with a custom PCB shield, giving the inside of the clock a very clean and professional appearance.

Around the back side [Techarge] has two small push buttons to set the hour and minutes, and a large toggle to control the music and movement. As of right now it needs to be switched on and off manually, but a future enhancement could see it kick on hourly.  We’d also like to see an RTC module added to the PCB, or better yet, switch over to the ESP8266 and just pull the time down from NTP.

Who knows? By the time you’ve built one of these clocks for yourself, and the hand-made Iron Throne phone charger stand to go with it, maybe ol’ George will have slipped out a new book. But don’t count on it.

Building A Faux Retro Portable Computer

The modern laptop has its origins in the mid to late 1980s, when shrinking computer hardware and improvements to battery technology finally made mobile computing practical. But before the now iconic clamshell form factor became the standard, there was a market for so-called “portable” computers. These machines often resembled pieces of luggage with keyboards attached, and even at their peak, they were nowhere near as practical as today’s ultra-thin notebook computers. But for the more nostalgic among us, these vintage portables do have a special sort of charm about them.

Looking to recapture some of that magic with modern components, [davedarko] has started working on his own Raspberry Pi portable computer. Just like those machines of yore, his build is designed to be a self-contained computing experience that you can lug around, but not exactly something you’d be popping open on the train. Its extruded aluminum frame holds the display, power supply, and audio hardware, with plenty of room to spare for additional hardware should he decide to pack in a couple hard drives or something more exotic.

The skeletal frame has plenty of room for activities.

We particularly like the 3D printed hinge and lock mechanism he designed that holds the keyboard closed against the front of the frame. Sufficiently old experienced readers will recall this particular feature being a defining characteristic of portables such as the Osborne 1 and Compaq Portable, and it’s great to see it included here. All it needs now is a leather handle on the side to complete the look.

[davedarko] still has some work ahead of him, as ultimately he’d like to completely enclose his computer’s frame with laser cut panels. But the build is certainly progressing nicely, and frankly, it’s already at the point where we’d have no problem pulling it out at the next hackerspace meetup. Between builds like this and the growing collection of cyberdecks we’ve covered recently, it looks as though 1980s design aesthetic is alive and well within the hacker community.

Continue reading “Building A Faux Retro Portable Computer”