Prusa Unveils Their Own Line Of PLA Filament

There’s little debate that the Original Prusa i3 MK3 by Prusa Research is just about the best desktop 3D printer you can buy, at least in its price bracket. It consistently rates among the highest machines in terms of print quality and consistency, and offers cutting edge features thanks to its open source iterative development. Unless you’re trying to come in under a specific budget, you really can’t go wrong with a Prusa machine.

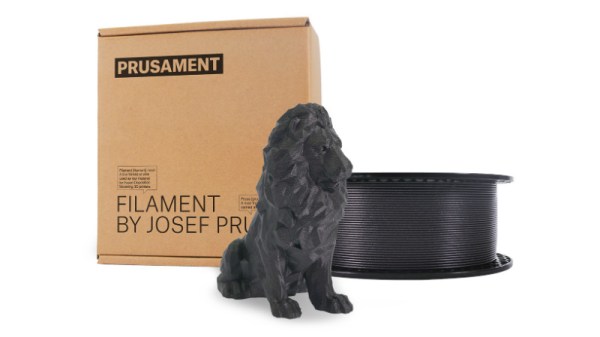
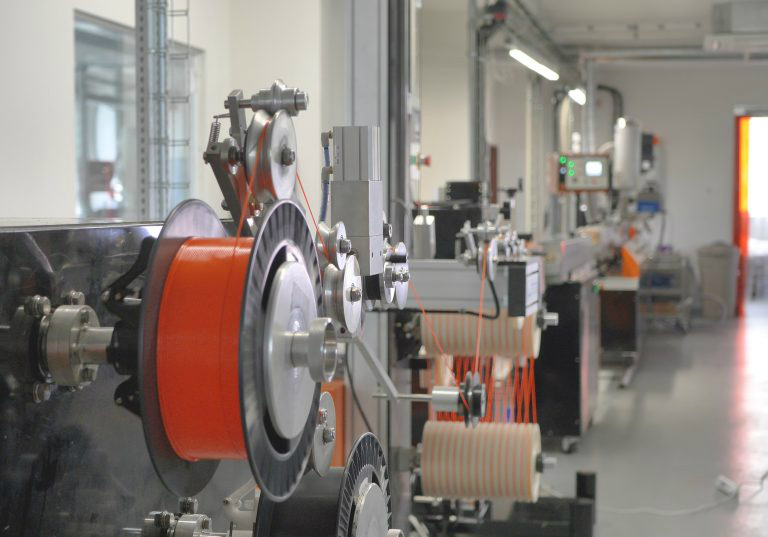
But while the machine itself can be counted on to deliver consistent results, the same can’t always be said for the filament you feed into it. In a recent blog post, [Josef Prusa] explains that his team was surprised to see just how poor the physical consistency was on even premium brands of 3D printer filament. As a company that prides itself with keeping as much of the 3D printing experience under their control as possible, they felt they had an obligation to do better for their customers. That’s why they’ve started making their own filament which they can hold to the same standards as the rest of their printer.

Their new filament, which is aptly called “Prusament”, is held to higher physical standards of not only diameter but ovality. Many manufacturers simply perform spot checks on the filament’s diameter, but this can miss bulges or changes in its cross-sectional shape. On your average 3D printer this might cause some slightly uneven extrusion and a dip in print quality, but likely not a failure. But the Prusa i3 MK3, specifically with the Multi Material upgrade installed, isn’t most printers. During testing even these slight variations were enough to cause jams.

But you won’t have to take their word for it. Every spool of Prusament will have a QR code that points to a page which tells you the exact production date, length, percent ovality, and standard diameter deviation of that particular roll. An interactive graph will even allow you to find the filament’s diameter for a specific position in the spool, as well as determine how much filament is remaining for a given spool weight. It should be very interesting to see what the community will do with this information, and we predict some very interesting OctoPrint plugins coming down the line.

Prusament is currently only available in PLA, but PETG and ASA variants are coming soon. You can order it now directly from Prusa Research in Prague for $24.99 per kilogram, but it will also be available on Amazon within the month for help keep the shipping costs down.

Continue reading “Prusa Unveils Their Own Line Of PLA Filament”

C64 Keyboard Helps Keep The Memory Alive

To say that the Commodore 64 was an important milestone in the history of personal computing is probably a bit of an understatement. For a decent chunk of the 1980s, it was the home computer, with some estimates putting the total number of them sold as high as 17 million. For hackers of a certain age, there’s a fairly good chance that the C64 holds a special spot in their childhood; perhaps even setting them on a trajectory they followed for the rest of their lives.

At the risk of showing his age, [Clicky Steve] writes in to tell us about the important role the C64 played in his childhood. He received it as a gift on his fifth birthday from his parents, and fondly remembers the hours he and his grandfather spent with a mail order book learning how to program it. He credits these memories with getting him interested in technology and electronic music. In an effort to keep himself connected to those early memories, he decided to build a modern keyboard with C64 keycaps.

As you might expect, the process started with [Steve] harvesting the caps from a real Commodore, in fact, the very same computer he received as a child. While the purists might shed a tear that the original machine was sacrificed to build this new keyboard, he does note that his C64 had seen better days.

Of course, you can’t just pull the caps off of C64 and stick them on a modern keyboard. [Steve] found the STLs for a 3D printable C64 to Cherry MX adapter on GitHub, and had 80 of them professionally printed as he doesn’t have access to an SLS printer. He reports the design works well, but that non-destructively removing the adapters from the caps once they are pressed into place probably isn’t going to happen; something to keep in mind for others who might be considering sacrificing their personal C64 for the project.

[Steve] installed the caps on a Preonic mechanical keyboard, which worked out fairly well, though he had to get creative with the layout as the C64 caps didn’t really lend themselves to the keyboard’s ortholinear layout. He does mention that switches a bit heavier than the Cherry MX Whites he selected would probably be ideal, but overall he’s extremely happy with his functional tribute to his grandfather.

If you’re more of a purist, you can always adapt the C64 keyboard directly to USB. Or go in the complete opposite direction and put a Raspberry Pi into a C64 carcass.

Space Garbage Truck Passes Its First Test

Back in April we reported on the successful launch of the SpaceX Falcon 9 rocket to the International Space Station which carried, along with supplies and experiments for the orbiting outpost, the RemoveDEBRIS spacecraft. Developed by the University of Surrey, RemoveDEBRIS was designed as the world’s first practical demonstration of what’s known as Active Debris Removal (ADR) technology. It included not only a number of different technologies for ensnaring nearby objects, it even brought along deployable targets to use them on.

Orbital debris (often referred to simply as “space junk”) is a serious threat to all space-faring nations, and has become even more pressing of a concern as the cost of orbital launches have dropped precipitously over the last few years, accelerating number and frequency of new objects entering orbit. The results of these first of their kind tests have therefore been hotly anticipated, as the technology to actively remove debris from Low Earth orbit (LEO) is seen by many in the industry to be a key element of expanding access to space for commercial purposes.

Six months after its arrival in space we’ve now starting to see the first results of the groundbreaking tests performed by the RemoveDEBRIS spacecraft, and so far it’s very promising.

Continue reading “Space Garbage Truck Passes Its First Test”

Voice Controlled Stereo Balance With ESP8266

A stereo setup assumes that the listener is physically located between the speakers, that’s how it can deliver sound equally from both sides. It’s also why the receiver has a “Balance” adjustment, so the listener can virtually move the center point of the audio by changing the relative volume of the speakers. You should set your speaker balance so that your normal sitting location is centered, but of course you might not always be in that same position every time you listen to music or watch something.

[Vije Miller] writes in with his unique solution to the problem of the roving listener. He’s come up with a system that can adjust the volume of his speakers without having to touch the receiver’s setup, in fact, he doesn’t have to touch anything. By leveraging configurable voice control software running on his computer, his little ESP8266-based devices do all the work.

Each speaker has its own device which consists of a NodeMCU ESP8266 and X9C104 digital potentiometer inside of a 3D printed case. The audio terminal block on the gadget allows him to connect it inline between the speaker and the receiver, giving [Vije] the ability to adjust the volume through software. The source code, which he’s posted on the Hackaday.io project page, uses a very simple REST-style API to change speaker volume based on HTTP requests which hit the ESP8266’s IP address.

The second part of the project is a computer running VoiceAttack, which lets [Vije] assign different actions based on what the software hears. When he says the appropriate command, the software goes through and fires off HTTP requests to the nodes in the system. Everything is currently setup for two speakers, but it shouldn’t be too difficult to expand to more speakers (or even rooms) with some adjustment to the software.

It’s not the first voice controlled speaker we’ve ever seen, but it does solve a very specific problem in a unique way. We’d be interested in seeing the next logical step, which would see this technology integrated into the speaker itself.

Continue reading “Voice Controlled Stereo Balance With ESP8266”

Get Your PCBs Made At The Mall

As we’ve seen with some recent posts on the subject here at Hackaday, there seems to be a growing schism within the community about the production of PCBs. Part of the community embraces (relatively) cheap professional fabrication, where you send your design off and get a stack of PCBs in the mail a couple weeks later. Others prefer at home methods of creating PCBs, such as using a CNC, laser engraver, or even the traditional toner transfer. These DIY PCBs take some skill and dedication to produce, but the advantage is that you can have the board in hand the same day you design it. But there may be a third option that seems to have slipped through the cracks.

[Virgil] writes in with a very interesting method of producing professional looking prototype PCBs that doesn’t involve weeks of waiting for the results, nor does it require any complicated techniques or specialized equipment. In this method, a UV printer is used to deposit your mask directly onto the copper clad board, which you then etch with whatever solution you like. Don’t have a UV printer you say? No worries, there’s probably somebody at the mall that does.

As [Virgil] explains, the little kiosks at the mall which offer to personalize items for customers generally use a UV printer which allows them to shoot ink on nearly any material. Instead of asking them to put a logo on the back of your phone, you’ll just be asking them to put the vector file of your mask, which you can bring along on a USB flash drive, onto the bare copper board. They may tell you they can’t guarantee the ink will stick to the bare copper, but just tell them you’re willing to take the risk. It’s one of those situations in which your money will be glad to speak on your behalf.

After the UV printer does its thing, the mask might be somewhat fragile. [Virgil] likes to wrap the boards in plastic for the ride home to make sure they don’t get damaged. Then it’s a quick dunk in the etching solution followed by a rinse and some isopropyl alcohol to get the remainder of the UV ink off. The results really do speak for themselves: nice sharp lines with exceptionally little manual work.

We’ve covered some relatively easy ways of quickly producing nice PCBs at home, as long as you don’t mind spending a couple hundred US dollars to get the hardware together. This seems to be the best of both worlds, though it does have the downside of requiring you speak with another human. We’d love to hear from any readers who give this particular method a shot.

Continue reading “Get Your PCBs Made At The Mall”

Open Source Paramotor Using Quadcopter Tech

Have you ever dreamed of flying, but lack the funds to buy your own airplane, the time to learn, or the whole hangar and airstrip thing? The answer might be in a class of ultralight aircraft called powered paragliders, which consist of a soft inflatable wing and a motor on your back. As you may have guessed, the motor is known as a paramotor, and it’s probably one of the simplest powered aircraft in existence. Usually little more than big propeller, a handheld throttle, and a gas engine.

But not always. The OpenPPG project aims to create a low-cost paramotor with electronics and motors intended for heavyweight multicopters. It provides thrust comparable to gas paramotors for 20 to 40 minutes of flight time, all while being cheaper and easier to maintain. The whole project is open source, so if you don’t want to buy one of their kits or assembled versions, you’re free to use and remix the design into a personal aircraft of your own creation.

It’s still going to cost for a few thousand USD to get a complete paraglider going, but at least you won’t need to pay hangar fees. Thanks to the design which utilizes carbon fiber plates and some clever hinges, the whole thing folds up into a easier to transport and store shape than traditional paramotors with one large propeller. Plus it doesn’t hurt that it looks a lot cooler.

Not only are the motors and speed controls borrowed from the world of quadcopters, but so is the physical layout. A traditional paramotor suffers from a torque issue, as the big propeller wants to twist the motor (and the human daring enough to strap it to his or her back) in the opposite direction. This effect is compensated for in traditional gas-powered paramotor by doing things like mounting the motor at an angle to produce an offset thrust. But like a quadcopter the OpenPPG uses counter-rotating propellers which counteract each others thrust, removing the torque placed on the pilot and simplifying design of the paraglider as a whole.

If you still insist on the fixed-wing experience, you could always get some foam board and hope for the best.

[Thanks to Luke for the tip.]

Continue reading “Open Source Paramotor Using Quadcopter Tech”

Exploring An Abandoned Toys “R” Us

If someone asked me to make a list of things I didn’t expect to ever hear again, the question “Do you want to go to a Toys “R” Us?” would be pretty near the top spot. After all of their stores (at least in the United States) closed at the end of June 2018, the House of Geoffrey seemed destined to join Radio Shack as being little more than a memory for those past a certain age. A relic from the days when people had to leave their house to purchase goods.

But much to my surprise, a friend of mine recently invited me to join him on a trip to the now defunct toy store. His wife’s company purchased one of the buildings for its ideal location near a main highway, and before the scrappers came through to clean everything out, he thought I might like a chance to see what was left. Apparently his wife reported there was still “Computers and stuff” still in the building, and as I’m the member of our friend group who gets called in when tangles of wires and sufficiently blinking LEDs are involved, he thought I’d want to check it out. He wasn’t wrong.

Readers may recall that Toys “R” Us, like Radio Shack before it, had a massive liquidation sale in the final months of operations. After the inventory was taken care of, there was an auction where the store’s furnishings and equipment were up for grabs. I was told that this location was no different, and yet a good deal of material remained. In some cases there were no bidders, and in others, the people who won the auction never came back to pick the stuff up.

So on a rainy Sunday evening in September, armed with flashlight, camera, and curiosity, I entered a Toys “R” Us for last time in my life. I found not only a stark example of what the changing times have done to retail in general, but a very surprising look at what get’s left behind when the money runs out and the employees simply give up.

Continue reading “Exploring An Abandoned Toys “R” Us”