DIY Rubber Ducky Is As Cheap As Its Namesake

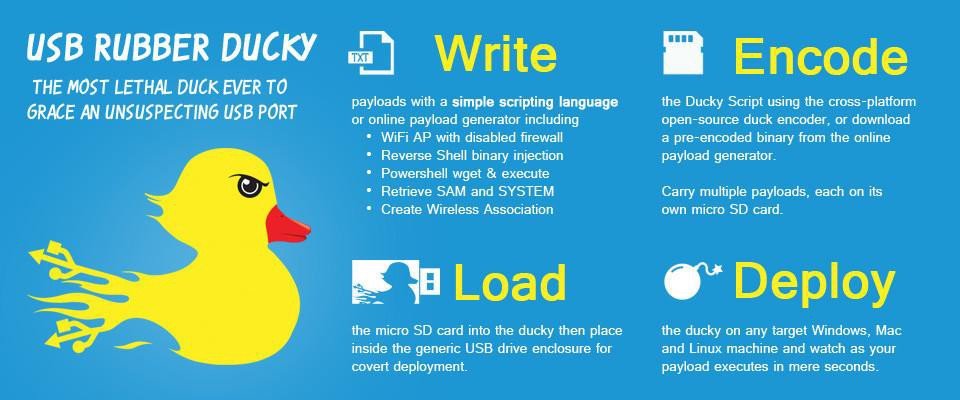
The “Rubber Ducky” by Hak5 is a very powerful tool that lets the user perform rapid keystroke injection attacks, which is basically a fancy way of saying the device can type fast. Capable of entering text at over 1000 WPM, Mavis Beacon’s got nothing on this $45 gadget. Within just a few seconds of plugging it in, a properly programmed script can do all sorts of damage. Just think of all the havoc that can be caused by an attacker typing in commands on the local machine, and now image they are also the Flash.

But unless you’re a professional pentester, $45 might be a bit more than you’re looking to spend. Luckily for the budget conscious hackers out there, [Tomas C] has posted a guide on using open source software to create a DIY version of Hak5’s tool for $3 a pop. At that cost, you don’t even have to bother recovering the things when you deploy them; just hold on tight to your balaclava and make a run for it.

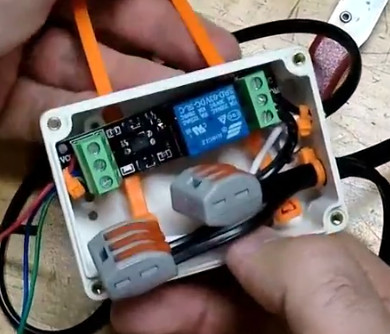
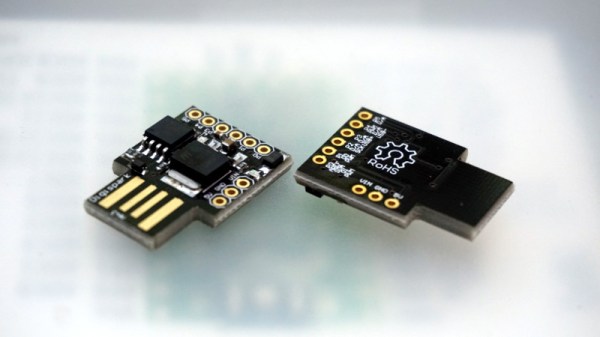
The hardware side of this hack is the Attiny85-based Digispark, clones of which can be had for as low as $1.50 USD depending on how long your willing to wait on the shipping from China. Even the official ones are only $8, though as of the time of this writing are not currently available. Encapsulating the thing in black shrink tubing prevents it from shorting out, and as an added bonus, gives it that legit hacker look. Of course, it wouldn’t be much of a hack if you could just buy one of these little guys and install the Rubber Ducky firmware on it.

In an effort to make it easier to use, the official Rubber Ducky runs scripts written in a BASIC-like scripting language. [Tomas C] used a tool called duck2spark by [Marcus Mengs], which lets you take a Rubber Ducky script (which have been released by Hak5 as open source) and compile it into a binary for flashing to the Digispark.

Not quite as convenient as just copying the script to the original Ducky’s microSD card, but what do you want for less than 1/10th the original’s price? Like we’ve seen in previous DIY builds inspired by Hak5 products, the trade-off is often cost for ease of use.

[Thanks to Javier for the tip.]

Raspberry Pi Projection Mapping Crash Course

Projection mapping might not be a term you’re familiar with, but you’ve certainly seen the effect before. It’s when images are projected onto an object, usually one that has an interesting or unusual shape, to create an augmented reality display. Software is used to map the image or video to the physical shape it’s being projected on, often to surreal effect. Imagine an office building suddenly being “painted” another color for the Holidays, and you’ll get the idea.

This might seem like one of those things that’s difficult to pull off at the hobbyist level, but as it turns out, there’s a number of options to do your own projection mapping with the lowly Raspberry Pi. [Cornelius], an avid VJ with a penchant for projection mapping, has done the legwork and put together a thorough list of different packages available for the Pi in case you want to try your hand at the futuristic art form. Many of them are even open source software, which of course we love around these parts.

[Cornelius] starts by saying he’s had Pis running projection installations for as long as three years, and while he doesn’t promise the reader it’s always the best solution, he says its worth getting started on at least. Why not? If the software’s free and you’ve already got a Raspberry Pi laying around (we know you do), you just need a projector to get into the game.

There’s a lot of detail given in the write-up, including handy pro and con lists for each option, so you should take a close look at the linked page if you’re thinking of trying your hand at it. But the short version is that [Cornelius] found the paid package, miniMAD, to be the easiest to get up and running. The open source options, ofxPiMapper and PocketVJ, have a steeper learning curve but certainly nothing beyond the readers of Hackaday.

To make things easier, [Cornelius] even goes on to give the reader a brief guide on setting up ofxPiMapper, which he says shouldn’t take more than 30 minutes or so using its mouse and keyboard interface. It would be interesting to see somebody combine this with the Raspberry Pi integrated projector we saw a couple years back to make a highly portable mapping setup.

This Xbox 360 Is Powered By Steam

Now that we’re far enough into the next generation of home video game consoles that we can’t really keep calling them that anymore, yard sales are sure to be full of lonely Xbox 360s and PS3s that have been put out to pasture. You’ll probably even find a Wii U or two out there that somebody accidentally purchased. This is great for hackers who like cramming new electronics into outdated consumer gear, and accordingly, we’re starting to see the fruits of that generational shift.

Case in point, this Xbox 360 which has been transformed into a “Steam Box” by [Pedro Mateus]. He figured the Xbox 360 was the proper size to fit a full PC plus PSU, while still looking contemporary enough that it won’t seem out of place in the entertainment center. Running SteamOS on Fedora 28, it even offers a traditional game console experience and user interface, despite the decidedly PC internals.

On the outside, the only thing that really gives away this particular Xbox’s new lease on life (when the purple LEDs are off, anyway) is the laser cut acrylic Steam logo on the top that serves as a grill for the internal CPU cooler. Ironically, [Pedro] did spray the Xbox white instead of just starting with a black one, but otherwise, there wasn’t much external modification necessary. Inside, of course, is a very different story.

It’s packing an AMD Ryzen 5 2400G processor with Radeon RX Vega 11GPU and 8GB of Corsair Vengeance LPX DDR4 3200MHz RAM. Power is provided by a Seasonic SS-300TFX 300W, and a Noctua NH-L9a-AM4 keeps the system cool. Even with all that gear in there, the thing is probably still quieter than the stock Xbox 360.

[Pedro] helpfully provides quite a few benchmarks for those wondering how this hacked-up Xbox fares against a more traditional gaming setup, though peak performance was obviously not the goal here. If you’ve got 45 minutes or so to spare, you should check out the video he’s put together after the break, which goes over the machine’s construction.

We’ve seen it done with the original Xbox, and now the Xbox 360. Who will be the first to send in their build that guts a current-generation Xbox and turns it into a PC for Internet fame?

[Thanks to Mike for the tip.]

Continue reading “This Xbox 360 Is Powered By Steam”

Adding 3D Printer Power And Light Control To OctoPrint

OctoPrint is a great way to monitor your printer, especially with the addition of a webcam. Using a tablet or mobile phone, you can keep an eye on what the printer is doing from anywhere in the house (or world, if you take the proper precautions), saving you from having to sit with the printer as if it’s an infant. But simply watching your printer do its thing is only a small slice of the functionality offered by OctoPrint’s vast plugin community.

As [Jeremy S Cook] demonstrates, it’s fairly easy to add power control for the printer and auxiliary lighting to your OctoPrint setup. Being able to flick the lights on over the print bed is obviously a big help when monitoring it via webcam, and the ability to turn the printer off can provide some peace of mind after the print has completed. If you’re particularly brave it also means you could power on the printer and start a print completely remotely, but good luck if that first layer doesn’t go down perfectly.

In terms of hardware, you only need some 3.3V relays for the Raspberry Pi running OctoPrint to trigger, and an enclosure to put the wiring in. [Jeremy] uses only one relay in this setup to power the printer and lights at once, but with some adjustment to the software, you could get independent control if that’s something you’re after.

On the software side [Jeremy] is using an OctoPrint plugin called “PSU Control”, which is actually intended for controlling an ATX PSU from the Pi’s GPIO pins, but the principle is close enough to throw a relay. Other plugins exist which allow for controlling a wider away of devices and GPIO pins if you want to make a fully remote controlled enclosure. Plus you can always whip up your own OctoPrint plugin if you don’t find anything that quite meets your switching needs.

[Jeremy] previously documented his unique mount to keep his Raspberry Pi and camera pointed at his printer, which is naturally important if you want to create some cool videos with Octolapse.

Continue reading “Adding 3D Printer Power And Light Control To OctoPrint”

One Small Step For A Space Elevator

Space elevators belong to that class of technology that we all want to see become a reality within our lifetimes, but deep-down doubt we’ll ever get to witness firsthand. Like cold fusion, or faster than light travel, we understand the principles that should make these concepts possible, but they’re so far beyond our technical understanding that they might as well be fantasy.

Except, maybe not. When Japan Aerospace Exploration Agency (JAXA) launches their seventh Kounotori H-II Transfer Vehicle towards the International Space Station, riding along with the experiments and supplies for the astronauts, will be a very special pair of CubeSats. They make up the world’s first practical test of space elevator technology, and with any luck, will be one of many small steps that precedes the giant leap which access to space at a fraction of the cost will be.

Of course, they won’t be testing a fully functional space elevator; even the most aggressive of timelines put us a few decades out from that. This will simply be a small scale test of some of the concepts that are central to building a space elevator, as we need to learn to crawl before we can walk. But even if we aren’t around to see the first practical space elevator make it to the top, at least we can say we were there on the ground floor.

Continue reading “One Small Step For A Space Elevator”

France Questions Russian Satellite With “Big Ears”

French Defense Minister Florence Parly took a page out of Little Red Riding Hood when she recently called out a Russian satellite for having “big ears”. While she stopped short of giving any concrete details, it was a rare and not terribly veiled accusation that Russia is using their Luch-Olymp spacecraft to perform orbital espionage.

Luch satellite conceptual drawing from NASA

At a speech in Toulouse, Parly was quoted as saying: “It got close. A bit too close. So close that one really could believe that it was trying to capture our communications.” and “this little Stars Wars didn’t happen a long time ago in a galaxy far away. It happened a year ago, 36,000 kilometers above our heads.”

The target of this potential act of space piracy is the Athena-Fidus satellite, a joint venture between France and Italy to provide secure communication for the military and emergency services of both countries. Launched in 2014, it provides 3 Gbit/s throughput via the Ka-band for mobile receivers on the ground and in drones.

This isn’t the first time Russia’s Luch class of vehicles has been the subject of scrutiny. In 2015 it was reported that one such craft maneuvered to within 10 kilometers of the Intelsat 7 and Intelsat 901 geostationary communications satellites, prompting classified meetings at the United States Defense Department. As geostationary satellites orbit the Earth at 3.07 km/s, a 10 km approach is exceptionally dangerous. Even a slight miscalculation could cause an impact within seconds.

Could Stealth Satellites Be In Our Future?

Much to the chagrin of shadowy spy agencies everywhere, this sort of orbital cat and mouse is easily detectable from the ground. When spy planes became easy to detect using radar, the next step was to evade that detection. Are we on a path to satellites that are transparent to radar?

Gregory Charvat, author of Small and Short-Range Radar Systems and occasional contributor here at Hackaday, tells us that building a stealth satellite is no easy task. “Just like how we had to re-invent the aircraft to make the first stealth aircraft, to make a stealth satellite one would have to fundamentally re-invent the satellite as we know it today.”

Likening it to the immense cost and effort it took to develop stealth aircraft like the Lockheed F-117 Nighthawk, Gregory says developing a satellite which could hide from radar would likely be more trouble than it’s worth for most applications. Space is already hard enough. “Maintaining that special shape that reflects radar away from your aircraft and including all of these essential peripherals is a big challenge” Gregory says, which results in “compromise and high maintenance costs.”

Beyond attempting to eavesdrop on communications, military insiders say that these close passes by Luch satellites could also be “dry-runs” for anti-satellite operations; either by using a directed energy weapon to disable the target spacecraft, or simply running into it. With events like these, and the commitment by the United States to establish a Space Force in the coming years, efforts to militarize space seem to be on the rise.

[via DefenseNews]

Bixel, An Open Source 16×16 Interactive LED Array

The phrase “Go big or go home” is clearly not lost on [Adam Haile] and [Dan Ternes] of Maniacal Labs. For years they’ve been thinking of creating a giant LED matrix where each “pixel” doubled as a physical push button. Now that they’ve built up experience working on other LED projects, they finally decided it was time to take the plunge and create their masterpiece: the Bixel.

Creating the Bixel (a portmanteau of button, and pixel) was no small feat. The epic build is documented in an exceptionally detailed write-up on the team’s site, in addition to the time-lapse video included after the break. [Adam] tells us the Bixel took around 100 hours of assembly, and we don’t doubt it. This is truly one of those labors of love which is unlikely to be duplicated, though all of the source files for both the hardware and software are available if you’re feeling brave enough.

The write-up contains a lot of fascinating detail about the design and construction of the Bixel, but perhaps the least surprising of all of them is that the final product ended up being very different from what they originally envisioned. The plan was to simply use lighted arcade buttons in a 16×16 grid, as they were purpose-built for exactly what the guys had in mind. But when they priced them out, the best they could do was $2 a pop. That’s $500 for just the buttons alone, before they even got into the enclosure or electronics. Like any good hackers, [Adam] and [Dan] decided to ditch the ready-made solution and come up with something of their own.

In the end, they cut the individual LEDs out of RGB strips, and soldered them down to their custom designed 500mmx500mm PCB. To the sides of each section of strip are two tactile switches, and above is a “sandwich” made of laser cut acrylic. The sheet closest to the LEDs has a 25mm hole, the top sheet has a 20mm hole, and between them is a circle of acrylic that acts as the “button”. Once it’s all screwed together, the button can’t fall out of the front or move from side to side, but it can be pushed down to contact the tactile switches.

To wire it all up they took a cue from the DIY keyboard scene and used a Teensy, some 595 shift registers, and 256 1N4148 diodes. A Raspberry Pi running their Python framework does the heavy computational lifting, leaving the Teensy to just handle talking to the hardware. Overall it’s a fantastic design to emulate if you’re looking to create large arrays of buttons on the cheap; such as whenever you get around to building that starship simulator.

Continue reading “Bixel, An Open Source 16×16 Interactive LED Array”