Homemade Test Jig Is Cheaper Than Outsourcing

In the past, [Sjaak] has had his testing and programming jigs made for him in Shenzhen, but realized they weren’t that great of a value. They weren’t terribly expensive in the grand scheme of things, but they didn’t include any wiring, so he was still spending his own time and money. His quest to develop his own in-house jigs not only netted him a considerable cost savings in the end, but also produced a nicely detailed post on his site for anyone else who may be heading down the same path. That’s a win-win in our book.

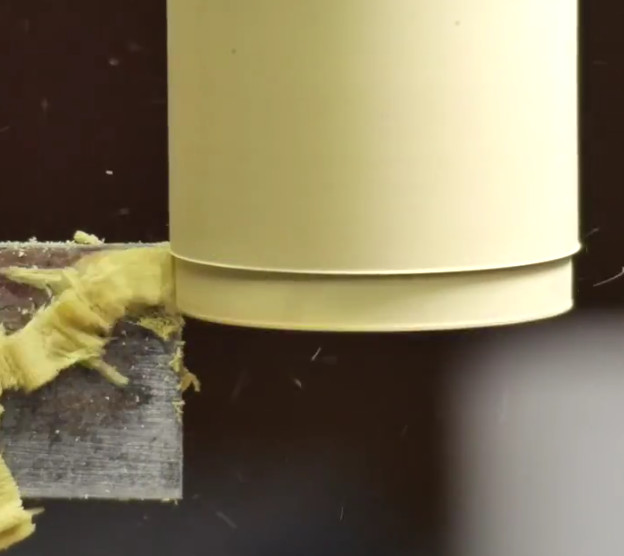
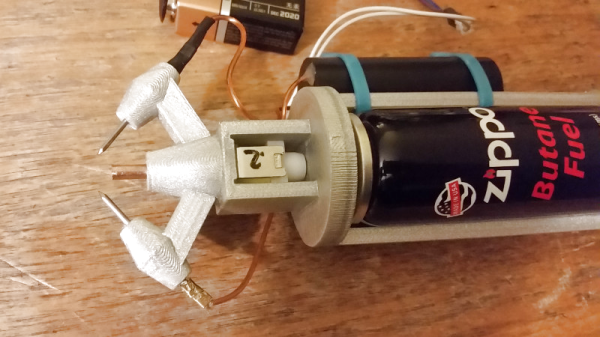
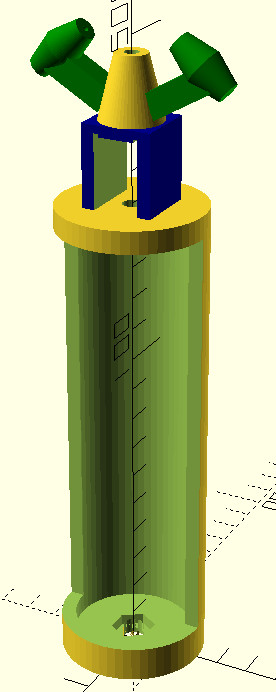
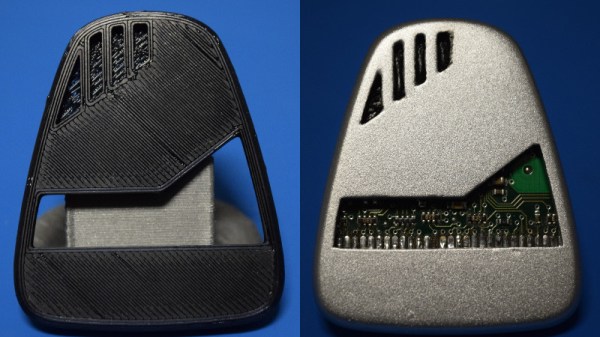
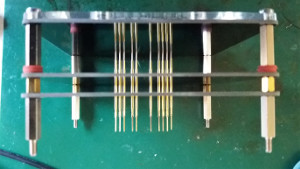
The idea behind a jig is pretty simple: essentially it’s just a mount that holds the PCB, and a set of pins which contact the appropriate points on the board. The jig can then provide power, programming, status LEDs for testing, etc. Basically anything that you can’t or don’t want to include on the final board, but will help in testing or programming them.

To start, [Sjaak] begins with a blank PCB in Eagle and imports his target board. With the two lined up, he can then mark where he wants the pins to go on the jig, and add labels to the silkscreen to make things a little easier during diagnostics. The target board is then removed, the file converted to Gerber, and it’s sent off for manufacturing. With a few more tweaks, the file is then exported to DXF and laser cut out of acrylic. When the PCBs come back, it’s just a matter of sandwiching it all together with some standoffs and adding the pins.

[Sjaak] mentions that he was inspired by an old post on how SparkFun was internally handling their test jigs, though we think with a dash of automation he could make things even easier for himself.

Tips For Basic Machining On A Drill Press

It’s safe to say most Hackaday readers would love to have a mill at home, or a nice lathe, but such equipment isn’t always practical for the hobbyist. The expense and amount of room they take up is a hard sell unless you’re building things on them regularly, so we’re often forced to improvise. In his latest video, [Eric Strebel] gives some practical advice on using a standard drill press to perform tasks you would normally need a mill or lathe for; and while his tips probably won’t come as a surprise to the old-hands out there, they might just help some of the newer players get the most out of what they have access to.

[Eric] explains the concept of the cross slide vice, which is the piece of equipment that makes machining on a drill press possible. Essentially it’s a standard vice, but with screws that allow you to move the clamped piece in the X and Y dimensions under the drill which can already move in the Z dimension. For those counting along at home, that puts us up to the full three dimensions; in other words, you can not only make cuts of varying depths, but move the cut along the surface of the work piece in any direction.

You can even turn down a (small) piece of round stock by placing it in the chuck of the drill press, and putting a good chisel in the cross slide vice. The chisel can then be moved up against the spinning piece to make your cuts. We don’t suggest doing anything too heavy, but if you need to turn down something soft like a piece of plastic or wood to a certain diameter, it can do in a pinch.

[Eric Strebel] is quickly becoming a favorite around these parts. His well-produced videos show viewers the practical side of product design and in-house manufacturing. We recently covered his video on doing small-scale production, and there’s plenty more invaluable info to be had browsing back through his older videos.

The quest to do machining without actually having a machine shop is certainly not new to Hackaday. There have been many different approaches to solving the issue, but picking up a decent drill press and cross slide is a first step down the rabbit hole for most people.

Continue reading “Tips For Basic Machining On A Drill Press”

Cheap Flamethrower Is Predictably Worrying

We’d never criticize somebody for coming up with a creative way to save a few bucks. In truth, pickings would be pretty slim around here if we deleted every project or hack where cost savings was a prime motivator. That being said, there’s still some things you should probably spend a few extra dollars on. You know, the essential things in life that you need to know will be safe and reliable, like your car and…your flamethrower.

While we don’t have any information about what kind of car [Steve Hernandez] is driving, but over on Hackaday.io, he’s posted some info about his 3D printed wrist-mounted flamethrower. The final result does look pretty impressive, but given the subject matter and the lack of any safety gear, we would firmly plant it in the “Don’t try this at home” category.

At the heart of this flamethrower is a solenoid valve recovered from a Glade air freshener. Rather than spraying out the smell of lilacs, this valve has found a new purpose in life by squirting out butane from a pressurized can. The butane is then ignited by a spark gap made up two nails connected to a 300 kV boost coil.

[Steve] designed the frame of this creation in OpenSCAD, and printed it out in a single piece. It holds the butane can and solenoid in position, as well as keeping the nails in the proper orientation for the spark gap to function. Admittedly the head of his printed flamethrower does look very cool, but if there was ever a situation where you should be suspect of the heat tolerance of 3D printed plastic, a flamethrower is probably it.

What’s noticeably lacking of course is any method to keep the flame from potentially traveling back up through the valve and into the butane can. The high-speed flow coming out of the nozzle is probably enough to keep that from happening, but we still wouldn’t feel comfortable strapping his device to our wrist as-is.

You may be surprised to find that wrist-mounted flamethrowers are a relatively popular project here at Hackaday. We’ve covered quite a few over the years, but still aren’t convinced this is something we personally need to add to our collection of gear.

Visual 3D Print Finishing Guide

With 3D printers now dropping to record low prices, more and more people are getting on the additive manufacturing bandwagon. As a long time believer in consumer-level desktop 3D printing, this is a very exciting time for me; the creativity coming out of places like Thingiverse or the 3D printing communities on Reddit is absolutely incredible. But the realist in me knows that despite what slick promotional material from the manufacturers may lead you to believe, these aren’t Star Trek-level replicators. What comes out of these machines is often riddled with imperfections (from small to soul crushing), and can require considerable cleanup work before they start to look like finished pieces.

If all you hope to get out of your 3D printer are some decent toy boats and some low-poly Pokemon, then have no fear. Even the most finicky of cheap printers can pump those out all day. But if you’re looking to build display pieces, cosplay props, or even prototypes that are worth showing to investors, you’ve got some work cut out for you.

With time, patience, and a few commercial products, you can accomplish the ultimate goal: turning a 3D printed object into something that doesn’t look like it was 3D printed. For the purposes of this demonstration I’ll be creating a replica of the mobile emitter used by the “Emergency Medical Hologram” in Star Trek: Voyager. I can neither confirm nor deny I selected this example due to the fact that I’m currently re-watching Voyager on Netflix. Let’s make it look good.

Continue reading “Visual 3D Print Finishing Guide”

Homebrew SNES Mini Aims For Historical Accuracy

While “normies” are out fighting in the aisles of Walmart to snap up one of the official “Classic Mini” consoles that Nintendo lets slip out onto the market every once and awhile, hackers have been perfecting their own miniature versions of these classic gaming systems. The “Classic Mini” line is admittedly a very cool way to capitalize on nostalgic masses who have now found themselves at the age where they have disposable income, but the value proposition is kind of weak. Rather than being stuck with the handful of generation-limited games that Nintendo packed into the official products, these homebrew consoles can play thousands of ROMs from systems that stretch across multiple generations and manufacturers.

But for those old enough to remember playing on one of these systems when they first came out, these modern reincarnations always lack a certain something. It never feels quite right. That vaguely uncomfortable feeling is exactly what [ElBartoME] is aiming to eliminate with his very slick miniature SNES build. His 3D printed case doesn’t just nail the aesthetics of the original (PAL) console, but the system also uses real SNES controllers in addition to NFC “cartridges” to load different ROMs.

The project’s page on Thingiverse has all the wiring diagrams and kernel configuration info to get the internal Raspberry Pi 3 to read an original SNES controller via the GPIO pins. He also gives a full rundown on the hardware and software required to get the NFC-enabled cartridges working with EmulationStation to launch the appropriate game when inserted. Though he does admit this is quite a bit trickier than the controller setup.

[ElBartoME] has put a video up on YouTube that shows him inserting his mock cartridges and navigating the menus with an original SNES controller. If it wasn’t for the fact that the console is the size of a smartphone and the on-screen display is generations beyond what the SNES could pull off, you’d think he was playing on the real thing.

We’ve seen some incredibly impressive emulation boxes based on the Raspberry Pi, and builds which tried to embrace original hardware components, but this particular project may represent the best of both worlds.

Continue reading “Homebrew SNES Mini Aims For Historical Accuracy”

High Speed Chronograph Looks Like Pro Gear

It can be hard enough to take a good photograph of a running kid or pet, and if we’re being honest, sometimes even stationary objects manage to elude our focus. Now imagine trying to take a picture of something moving really fast, like a bullet. Trying to capture the moment a fast moving projectile hits an object is simply not possible with a human behind the shutter button.

Enter the ballistic chronometer: a device that uses a set of sensor gates and a highly accurate timer to determine how fast an object is flying through it. Chronometers that operate up to a couple hundred meters per second are relatively common, but [td0g] had something a little faster in mind. He’s come up with an optical setup that he claims can capture objects moving as fast as Mach 2. With this chronometer tied into a high-speed flash rig, [td0g] is able to capture incredible shots such as the precise instant a bullet shatters a glass of water.

Because he couldn’t find any phototransistors with the sub-microsecond response time necessary to detect a small object moving at 1,000 m/s, [td0g] ended up using LEDs in a photoconductive configuration, where 27 VDC is applied backwards against the diode. Careful monitoring of voltage fluctuations across the diode allows for detection of changes in the received light level. To cut down on interference, [td0g] used IR LEDs as his light sources, reasoning there would be less ambient IR than if he used something in the visual range.

What really impresses with this build is the attention to detail and amount of polish [td0g] put into the design. From the slick angled bracket that holds the Arduino and LCD to the 3D printed covers over the optical gates, the final device looks like a professional piece of equipment with a price tag to rival that of a used car.

For the future, [td0g] plans on upgrading to faster comparators than he LM339’s he has installed currently, and springing for professionally done PCBs instead of protoboard. In its current state this is already a very impressive piece of kit, so we’d love to see what it looks like when it’s “finished”.

If you don’t need something quite this high end but still would like to see how fast something is going, we have covered chronometer builds to fit every budget.

80’s Smartwatch Finally Plays Tetris

While the current generation of smartwatches have only been on the market for a few years, companies have been trying to put a computer on your wrist since as far back as the 80s with varying degrees of success. One such company was Seiko, who in 1984 unveiled the UC-2000: a delightfully antiquated attempt at bridging the gap between wristwatch and personal computer. Featuring a 4-bit CPU, 2 KB of RAM, and 6 KB of ROM, the UC-2000 was closer to a Tamagotchi than its modern day counterparts, but at least it could run BASIC.

Dumping registers

Ever since he saw the UC-2000 mentioned online, [Alexander] wanted to get one and try his hand at developing his own software for it. After securing one on eBay, the first challenge was getting it connected up to a modern computer. (Translated from Russian here.) [Alexander] managed to modernize the UC-2000’s novel induction based data transfer mechanism with help from a ATtiny85, which allowed him to get his own code on the watch, all that was left was figuring out how to write it.

With extremely limited published information, and no toolchain, [Alexander] did an incredible job of figuring out the assembly required to interact with the hardware. Along the way he made a number of discoveries which set his plans back, such as the fact that there is no way to directly control individual pixels on the screen; all graphics would have to be done with the built-in symbols.

The culmination of all this hard work? Playing Tetris, naturally. Though [Alexander] admits that limitations of the device’s hardware meant the game had to be simplified a bit, he’s almost certainly having more fun than any of the UC-2000’s original owners did with this device. He’s setup a GitHub repository for anyone who wishes to join him in this brave new world of vintage wrist computing.

[Alexander] isn’t the only one experimenting with fringe wearable computers. We’ve seen our fair share of interesting smartwatches, featuring everything from novel input methods to complete scratch-builds.

Continue reading “80’s Smartwatch Finally Plays Tetris”