The retrocomputing community are experts at keeping vintage Apple iron running, but if you’re looking for a simpler way to pay homage to the original Mac, check out this Raspberry Pi powered ‘desk accessory’ by [John Calhoun], fittingly called ‘SystemSix’.
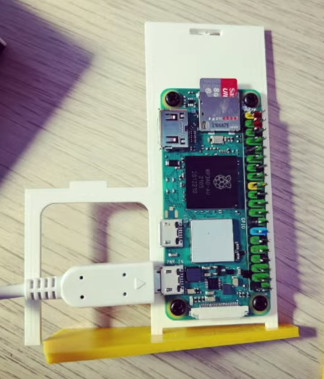
Housed inside a delightfully Mac-shaped piece of laser-cut acrylic, SystemSix is powered by as Raspberry Pi 3, with the graphics displayed on a sizeable 5.83″ e-ink panel. While it resembles a kind of retro-futuristic take on the ‘classic’ Macintosh, SystemSix is the illusion of a fully interactive computer. While non-interactive, the fake desktop is every bit as charming as a real Macintosh display, albeit scaled down. The desktop updates automatically with new information, and presently includes a calendar, dithered lunar phase graphic, and a local weather report.
Clearly calling it a ‘desk accessory’ is a neat play on words. The original Macintosh implemented simple desk accessory programs, such as the calculator and alarm clock, that could run alongside the main application in memory. This was the only way to run more than one application on the Macintosh, before MultiFinder added rudimentary cooperative multitasking in 1987. As such, SystemSix is a functional, stylish and quite literal ‘desk accessory’.
[John] has the full project write-up over on GitHub, and goes into great detail about maintaining the Macintosh aesthetic. For example, the lunar phase graphic uses ‘Atkinson’ dithering. This technique was pioneered by Apple programmer Bill Atkinson, the author of MacPaint and the QuickDraw toolbox on the original Macintosh (and later, Hypercard).
And in case you were wondering – yes, this is the [John Calhoun], who programmed Glider for Macintosh. Now recently retired from Apple, we’re really excited to see what other Macintosh-inspired creations he comes up with. Maybe he will come back around to his Mac-powered MAME cabinets that we covered all the way back in 2005. Or perhaps a sleeper battlestation, like the iMac G4 lampshade that was upgraded with an M1 processor.