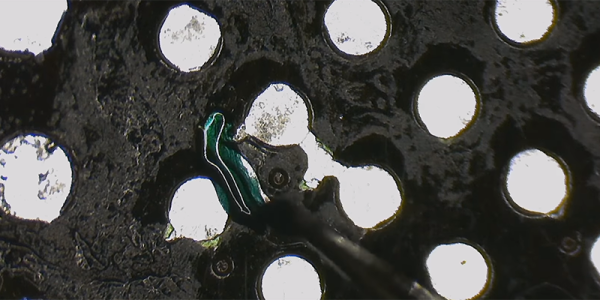
Hot Air Surgery Revives A Cheap Windows Tablet

[Jason Gin] recently wrote in to tell us about his adventures replacing the eMMC storage chip on a cheap Windows tablet, and we have to say, it’s an impressive amount of work for a device which apparently only cost him $15. Surely much better pieces of hardware have been tossed in the trash for less serious failures than what ailed his DigiLand DL801W tablet. We’d love to see the lengths this guy would go to restore something a bit higher up the food chain.

As any good hacker knows, you can’t fix the problem until you understand it. So the first step [Jason] took was to conduct some troubleshooting. The tablet would only boot to the EFI shell, which didn’t do him much good since there was no on-screen keyboard to interact with it. But he had the idea of trying to connect a USB keyboard via an OTG adapter, and sure enough that got him in. Once he was able to enter commands into the EFI shell, he attempted to read from a few different sectors of the eMMC drive, only to get the same nonsense repeating data. So far, not looking good.

But before he fully committed to replacing the eMMC drive, he wanted a second opinion. Using the same USB OTG adapter, he was able to boot the tablet into a Windows 10 environment, and from there got access to some drive diagnostic tools. The software reported that not only was the drive reporting to be half the appropriate size, but that writing to the chip was impossible.

With the fate of the tablet’s Foresee NCEMBS99-16G eMMC chip now confirmed, [Jason] decided it was time to operate. After pulling the tablet apart and masking off the PCB with Kapton tape to protect it from the heat, he slowly went in with his hot air rework station to remove the failed chip. But rather than put another low-end chip in its place, he used this opportunity to replace it with a Samsung KLMBG4GEND-B031. Not only does this chip have twice the capacity of the original, it should be noticeably faster.

With the new Samsung eMMC chip installed, [Jason] put the tablet back together and was able to successfully install Windows 10 onto it. Another piece of tech saved from the big landfill in the sky.

If the casual confidence of this particular repair wasn’t enough of a clue, this isn’t the first time he’s showed some unruly eMMC chips who’s boss.

What’s Inside A Neonode Laser Sensor?

Every once in a while, you get your hands on a cool piece of hardware, and of course, it’s your first instinct to open it up and see how it works, right? Maybe see if it can be coaxed into doing just a little bit more than it says on the box? And so it was last Wednesday, when I was at the Embedded World trade fair, and stumbled on a cool touch display floating apparently in mid-air.

The display itself was a sort of focused Pepper’s Ghost illusion, reflected off of an expensive mirror made by Aska3D. I don’t know much more — I didn’t get to bring home one of the fancy glass plates — but it looked pretty good. But this display was interactive: you could touch the floating 2D projection as if it were actually there, and the software would respond. What was doing the touch response in mid-air? I’m a sucker for sensors, so I started asking questions and left with a small box of prototype Neonode zForce AIR sensor sticks to take apart.

The zForce sensors are essentially an array of IR lasers and photodiodes with some lenses that limit their field of view. The IR light hits your finger and bounces back to the photodiodes on the bar. Because the photodiodes have a limited angle over which they respond, they can be used to triangulate the distance of the finger above the display. Scanning quickly among the IR lasers and noting which photodiodes receive a reflection can locate a few fingertips in a 2D space, which explained the interactive part of the floating display. With one of these sensors, you can add a 2D touch surface to anything. It’s like an invisible laser harp that can also sense distance.

The intended purpose is fingertip detection, and that’s what the firmware is good at, but it must also be the case that it could detect the shape of arbitrary (concave) objects within its range, and that was going to be my hack. I got 90% of the way there in one night, thanks to affordable tools and free software that every hardware hacker should have in their toolbox. So read on for the unfortunate destruction of nice hardware, a tour through some useful command-line hardware-hacking tools, and gratuitous creation of animations from sniffed SPI-like data pulled off of some test points.

Continue reading “What’s Inside A Neonode Laser Sensor?”

Retrotechtacular: A Very British MagLev

When we look back to the 1970s it is often in a light of somehow a time before technology, a time when analogue was still king, motor vehicles had carburettors, and telephones still had rotary dials.

In fact the decade had a keen sense of being on the threshold of an exciting future, one of supersonic air travel, and holidays in space. Some of the ideas that were mainstream in those heady days didn’t make it as far as the 1980s, but wouldn’t look out of place in 2018.

The unlikely setting for todays Retrotechtacular piece is the Bedford Levels, part of the huge area of reclaimed farmland in the east of England known collectively as the Fens. The Old Bedford River and the New Bedford River are two straight parallel artificial waterways that bisect the lower half of the Fens for over 20 miles, and carry the flood waters of the River Ouse towards the sea. They are several hundred years old, but next to the Old Bedford River at their southern end are a few concrete remains of a much newer structure from 1970. They are all that is left of a bold experiment to create Britain’s first full-sized magnetic levitating train, an experiment which succeeded in its aim and demonstrated its train at 170 miles per hour, but was eventually canceled as part of Government budget cuts.

A track consisting of several miles of concrete beams was constructed during 1970 alongside the Old Bedford River, and on it was placed a single prototype train. There was a hangar with a crane and gantry for removing the vehicle from the track, and a selection of support and maintenance vehicles. There was an electrical pick-up alongside the track from which the train could draw its power, and the track had a low level for the hangar before rising to a higher level for most of its length.

After cancellation the track was fairly swiftly demolished, but the train itself survived. It was first moved to Cranfield University as a technology exhibit, before in more recent years being moved to the Railworld exhibit at Peterborough where it can be viewed by the general public. The dream of a British MagLev wasn’t over, but the 1980s Birmingham Airport shuttle was hardly in the same class even if it does hold the honour of being the world’s first commercial MagLev.

We have two videos for you below the break, the first is a Cambridge Archaeology documentary on the system while the second is a contemporary account of its design and construction from Imperial College. We don’t take high-speed MagLevs on our travels in 2018, but they provide a fascinating glimpse of one possible future in which we might have.

It does make one wonder: will the test tracks for Hyperloop transportation break the mold and find mainstream use or will we find ourselves 50 years from now running a Retrotechtacular on abandoned, vacuum tubes?

Continue reading “Retrotechtacular: A Very British MagLev”

One Man’s Quest For A Desktop Spherical Display

[Nirav Patel] is a man on a mission. Since 2011 he has been obsessed with owning a spherical display, the kind of thing you see in museums and science centers, but on a desktop scale. Unfortunately for him, there hasn’t been much commercial interest in this sort of thing as of yet. Up to this point, he’s been forced to hack up his own versions of his dream display.

That is until he heard about the Gakken Worldeye from Japan. This device promised to be exactly what he’s been looking for all these years, and he quickly snapped up two of them: one to use, and one to tear apart. We like this guy’s style. But as is often the case with cheap overseas imports, the device didn’t quite live up to his expectations. Undaunted by the out of the box performance of the Worldeye, [Nirav] has started documenting his attempts to improve on the product.

These displays work by projecting an image on the inside of a frosted glass or plastic sphere, and [Nirav] notes that the projection sphere on the Worldeye is actually pretty decent. The problem is the electronics, namely the anemic VGA resolution projector that’s further cropped down to a 480 pixel circle by the optics. Combined with the low-quality downsampling that squashes down the HDMI input, the final image on the Worldeye is underwhelming to say the least.

[Nirav] decided to rip the original projector out of the Worldeye and replace it with a Sony MP-CL1 model capable of a much more respectable 1280×720. He came up with a 3D printed bracket to hold the MP-CL1 in place, and has put the files up on Thingiverse for anyone who might want to play along at home. The results are better, but unfortunately still not great. [Nirav] thinks the sphere is physically too small to support the higher resolution of the MP-CL1, plus the optics aren’t exactly of the highest quality to begin with. But he’s just glad he didn’t have to build this one from scratch.

Going back to our first coverage of his DIY spherical display in 2012, we have to say his earliest attempts are still very impressive. It looks like this is a case of the commercial market struggling to keep up with the work of independent hackers.

Controlling OctoPrint On The Go

Not too long ago I took the plunge into the world of OctoPrint by shoehorning a Raspberry Pi Zero into a PrintrBot Play, and I have to say, the results were quite impressive. OctoPrint allows you to run your 3D printer untethered from your computer, but without all the downsides of printing off of an SD card. Generally running off of a Raspberry Pi, OctoPrint serves up a very capable web interface that gives you full control over slicing and printing from essentially any device with a modern browser.

That’s all well and good if you’ve got your laptop with you, or you’re sitting at your desktop. But what if you’re out of the house? Or maybe out in the garage where you don’t have a computer setup? OctoPrint is still happily serving up status information and a control interface, you just don’t have a computer to access it. Luckily, there are options for just that scenario.

In this post we’re going to take a look at a couple of options for controlling and monitoring OctoPrint from your mobile device, which can help truly realize its potential. Personally I have an incredible amount of anxiety when leaving a 3D printer running a long job, and in the past I’ve found myself checking every 10 minutes or so to see if it was done. Now that I can just glance at my phone and see an ETA along with status information about the machine, it’s given me the confidence to run increasingly longer and complex prints. Continue reading “Controlling OctoPrint On The Go”

Badgelife: From 1 To 100

Blame it on the falling costs of printed circuit boards, the increased accessibility of hardware design tools, the fact that GCC works on microcontrollers now, whatever the ‘maker movement’ is, or any one of a number of other factors. There’s a hardware demoscene now. Instead of poking bits, writing code, and dividing by zero to create impressive multimedia demonstrations on a computer, there is a small contingent of very creative people who are building their own physical hardware, just for the hell of it. They’re pushing boundaries of what can be done with hardware design, demonstrating manufacturing know-how, and turning a (small) profit while doing it. This is badgelife, the tiny subculture dedicated to creating custom electronic conference badges.

At Hackaday, we’ve been doing a deep dive into the rigors of this demoscene of hardware, and last week we had the pleasure of hosting a meetup with some of the big players of the badgelife community as guests of honor. There were, of course, talks discussing the trials and tribulations of designing, manufacturing, and shipping hundreds of pieces of hardware on a limited budget with not enough time. If you want to know how hard electronic design and manufacturing can be, you want to check out these talks below. Continue reading “Badgelife: From 1 To 100”

FPGA Makes ASCII Video

Human beings like pictures which is probably why there’s the old adage “A picture’s worth a thousand words.” We take computer graphic output for granted now, but even in the earliest days for Teletypes and line printers, there was artwork made from characters ranging from Snoopy to Spock. [Wenting Z] continues the tradition by creating an FPGA that converts VGA video to ASCII art and outputs it via DVI.

The device uses a Xilinx Virtex device and uses about 500 LUT (look up tables) which is not much at all. You can see a video (that includes an overlay of the source video) of the device in action below.

In fact, we think of art like this as a computer phenomenon, but [Flora Stacey] created a butterfly on a typewriter in 1898 and ham radio operators were doing art using paper tape for the last half of the twentieth century. Even before that, In 1865, Alice in Wonderland had a certain passage that was typeset to suggest a mouse’s tail. Perhaps the pinnacle is the famous ASCII version of Star Wars.

This is decidedly less mechanical than some of the other ASCII art projects we’ve seen. If you have a taste for more text art, have a look at some other examples, including a very old advertisement that uses character art.

Continue reading “FPGA Makes ASCII Video”