In today’s episode of “AI Is Why We Can’t Have Nice Things,” we feature the Hertz Corporation and its new AI-powered rental car damage scanners. Gone are the days when an overworked human in a snappy windbreaker would give your rental return a once-over with the old Mark Ones to make sure you hadn’t messed the car up too badly. Instead, Hertz is fielding up to 100 of these “MRI scanners for cars.” The “damage discovery tool” uses cameras to capture images of the car and compares them to a model that’s apparently been trained on nothing but showroom cars. Redditors who’ve had the displeasure of being subjected to this thing report being charged egregiously high damage fees for non-existent damage. To add insult to injury, if renters want to appeal those charges, they have to argue with a chatbot first, one that offers no path to speaking with a human. While this is likely to be quite a tidy profit center for Hertz, their customers still have a vote here, and backlash will likely lead the company to adjust the model to be a bit more lenient, if not outright scrapping the system.
aluminum118 Articles
Reconductoring: Building Tomorrow’s Grid Today
What happens when you build the largest machine in the world, but it’s still not big enough? That’s the situation the North American transmission system, the grid that connects power plants to substations and the distribution system, and which by some measures is the largest machine ever constructed, finds itself in right now. After more than a century of build-out, the towers and wires that stitch together a continent-sized grid aren’t up to the task they were designed for, and that’s a huge problem for a society with a seemingly insatiable need for more electricity.
There are plenty of reasons for this burgeoning demand, including the rapid growth of data centers to support AI and other cloud services and the move to wind and solar energy as the push to decarbonize the grid proceeds. The former introduces massive new loads to the grid with millions of hungry little GPUs, while the latter increases the supply side, as wind and solar plants are often located out of reach of existing transmission lines. Add in the anticipated expansion of the manufacturing base as industry seeks to re-home factories, and the scale of the potential problem only grows.
The bottom line to all this is that the grid needs to grow to support all this growth, and while there is often no other solution than building new transmission lines, that’s not always feasible. Even when it is, the process can take decades. What’s needed is a quick win, a way to increase the capacity of the existing infrastructure without having to build new lines from the ground up. That’s exactly what reconductoring promises, and the way it gets there presents some interesting engineering challenges and opportunities.
Continue reading “Reconductoring: Building Tomorrow’s Grid Today”
An IPhone Case Study
Way back in 2008, Apple unveiled the first unibody Macbook with a chassis milled out of a single block of aluminum. Before that, essentially all laptops, including those from Apple, were flimsy plastic screwed together haphazardly on various frames. The unibody construction, on the other hand, finally showed that it was possible to make laptops that were both lightweight and sturdy. Apple eventually began producing iPhones with this same design style, and with the right tools and a very accurate set of calipers it’s possible to not only piece together the required hardware to build an iPhone from the ground up but also build a custom chassis for it entirely out of metal as well.
The first part of the project that [Scotty] from [Strange Parts] needed to tackle was actually getting measurements of the internals. Calipers were not getting the entire job done so he used a flatbed scanner to take an image of the case, then milled off a layer and repeated the scan. From there he could start testing out his design. After an uncountable number of prototypes, going back to the CAD model and then back to the mill, he eventually settles into a design but not before breaking an iPhone’s worth of bits along the way. Particularly difficult are the recessed areas inside the phone, but eventually he’s able to get those hollowed out, all the screw holes tapped, and then all the parts needed to get a working iPhone set up inside this case.
[Scotty] has garnered some fame not just for his incredible skills at the precision mill, but by demonstrating in incredible detail how smartphones can be user-serviceable or even built from scratch. They certainly require more finesse than assembling an ATX desktop and can require some more specialized tools, but in the end they’re computers like any other. For the most part.
Hackaday Links: November 17, 2024
A couple of weeks back, we covered an interesting method for prototyping PCBs using a modified CNC mill to 3D print solder onto a blank FR4 substrate. The video showing this process generated a lot of interest and no fewer than 20 tips to the Hackaday tips line, which continued to come in dribs and drabs this week. In a world where low-cost, fast-turn PCB fabs exist, the amount of effort that went into this method makes little sense, and readers certainly made that known in the comments section. Given that the blokes who pulled this off are gearheads with no hobby electronics background, it kind of made their approach a little more understandable, but it still left a ton of practical questions about how they pulled it off. And now a new video from the aptly named Bad Obsession Motorsports attempts to explain what went on behind the scenes.
Copper Bling Keeps Camera Chill
Every action camera these days seems prone to overheating and sudden shutdowns after mere minutes of continuous operation. It can be a real pain, especially when the only heat problem a photographer might face back in the day was fogged film from storing a camera in a hot car. Then again, the things a digital camera can do while it’s not overheated are pretty amazing compared to analog cameras. Win some, lose some, right?
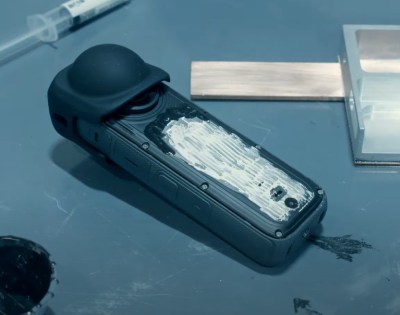
Maybe not. [Zachary Tong], having recently acquired an Insta360 digital camera, went to extremes to solve its overheating problem with this slick external heat sink project. The camera sports two image sensor assemblies back-to-back with fisheye lenses, allowing it to capture 360° images, but at the cost of rapidly overheating. [Zach]’s teardown revealed a pretty sophisticated thermal design that at least attempts to deal with the excess heat, including an aluminum heat spreader built into the case, which would be the target of the mod.
 He attached a custom copper heatsink to a section of the heat spreader, which had been carefully milled flat to provide the best thermal contact. [Zach] used a fancy boron nitride heat transfer paste and attached the heat sink to the spreader with epoxy. A separate aluminum enclosure was bonded to the copper heat sink, giving [Zach] a place to mount his audio sync and timecode recorder and providing extra thermal mass.
Does it help? It sure seems to; where [Zach] was previously getting about twenty minutes before thermal shutdown with both cameras running, the heatsink-adorned rig was able to run about six times longer, with the battery giving out first. True, the heatsink takes away from the original sleek lines of the camera and might make it tough to use while snowboarding or surfing, but it’s still more portable than some external camera heatsinks we’ve seen. And besides, the copper is pretty gorgeous. Continue reading “Copper Bling Keeps Camera Chill”
The Strangest Way To Stick PLA To Glass? With A Laser And A Bit Of Foil
Ever needed a strong yet adhesive-free way to really stick PLA to glass? Neither have we, but nevertheless there’s a way to use aluminum foil and an IR fiber laser to get a solid bond with a little laser welding between the dissimilar materials.

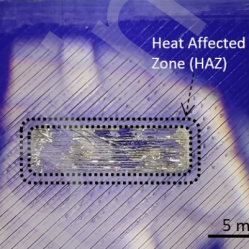
It turns out that aluminum can be joined to glass by using a pulsed laser process, and PLA can be joined to aluminum with a continuous wave laser process. Researchers put them together, and managed to reliably do both at once with a single industrial laser.
By putting a sacrificial sheet of thin aluminum foil between 3D printed PLA and glass, then sending the laser through the glass into the aluminum, researchers were able to bond it all together in an adhesive-free manner with precise control, and very little heat to dissipate. No surface treatment of any kind required. The bond is at least as strong as any adhesive-based solution, so there’s no compromising on strength.
When it comes to fabrication, having to apply and manage adhesives is one of the least-preferable options for sticking two things together, so there’s value in the idea of something like this.
Still, it’s certainly a niche application and we’ll likely stick to good old superglue, but we honestly didn’t know laser welding could bond aluminum to glass or to PLA, let along both at once like this.
Lost Print Vacuum Casting In A Microwave
Hacks are rough around the edges by their nature, so we love it when we get updates from makers about how they’ve improved their process. [Denny] from Shake the Future has just provided an update on his microwave casting process.
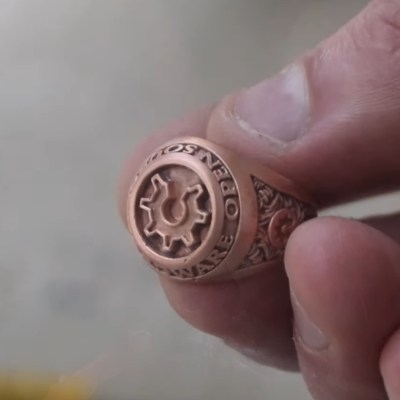
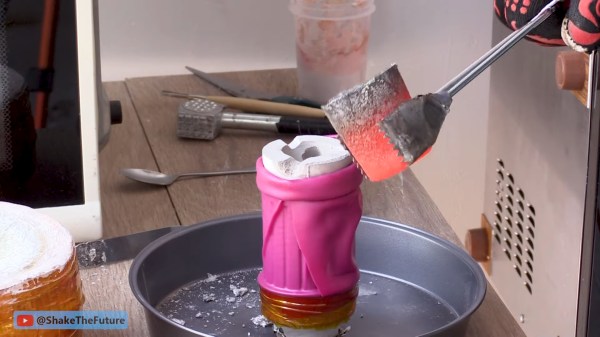
Sticking metal in a microwave certainly seems like it would be a bad idea at first, but with the right equipment it can work quite nicely to develop a compact foundry. [Denny] walks us through the process start to finish in this video, including how to build the kilns, what materials to use, and how he made several different investment castings using the process. The video might be worth watching just for all the 3D printed tools he’s built to aid in the process — it’s a great example of useful 3D prints to accompany your fleet of little plastic boats.
A lot of the magic happens with a one minute on and six minutes off cycle set by a simple plug timer. This allows a more gradual ramp to burn out the PLA or resin than running the microwave at full blast which can cause some issues with the kiln, although nothing catastrophic as demonstrated. Vacuum is applied to the mold with a silicone sleeve cut from a swimming cap while pouring the molten metal into the mold to draw the metal into the cavities and reduce imperfections.
We appreciate the shout out to respirators while casting or cutting the ceramic fiber mat. Given boric acid’s effects, [PDF] you might want to use safety equipment when handling it as well or just use water as that seems like a valid option.
If you want to see where he started check out this earlier version of the microwave kiln and how he used it to make an aluminum pencil.


