The Ifs Make Learning To Code Child’s Play

Anyone who has done the slightest bit of programming knows about the “Hello, World!” program. It’s the archetypal program that one enters to get a feel for a new language or a new architecture; if you can get a machine to print “Hello, World!” back to you, the rest is just details. But what about teaching kids to program? How does one get toddlers thinking in logical, procedural ways? More particularly, what’s a “Hello, World!” program look like for the pre-literate set?

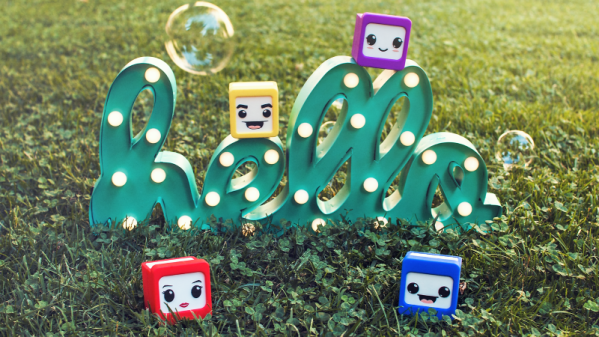
Those are the sort of questions that led to The Ifs by [Makeroni Labs]. The Ifs are educational toys for teaching kids as young as three the basics of coding. Each If is a colorful plastic cube with a cartoon face and a “personality” that reflects what the block does – some blocks have actuators, some have sensors. The blocks are programmed by placing magnetic tabs on the top representing conditions and actions. A kid might choose to program a block to detect when it’s being shaken, or when the lights come on, and then respond by playing a sound or vibrating. The blocks can communicate with each other too, so that when the condition for one block is satisfied, something happens on another block.

The Ifs look like a lot of fun, and they’re a great jumpstart on the logical thinking skills needed for coders and non-coders alike. We’re not alone in thinking this is a pretty keen project – the judges for this year’s Hackaday Prize selected The Ifs as one of the twenty finalists. Will it win? We’ll find out next week at the 2019 Hackaday Superconference. If you won’t be in Pasadena with us, make sure you tune in to the livestream to watch the announcement.


Spin Me Right Round, Baby: Generator Building Experiments For Mere Mortals

How many of you plan to build a wind-powered generator in the next year? Okay, both of you can put your hands down. Even if you don’t want to wind your coils manually, learning about the principles in an electric generator might spark your interest. There is a lot of math to engineering a commercial model, but if we approach a simple version by looking at the components one at a time, it’s much easier to understand.

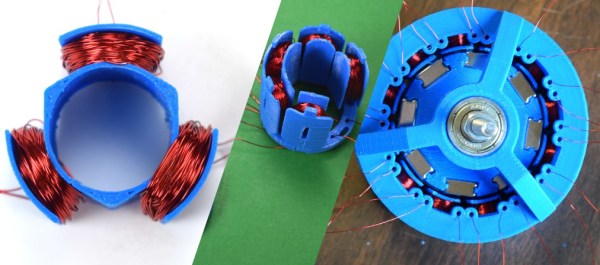
For this adventure, [K&J Magnetics] start by dissect a commercial generator. They picked a simple version that might serve a campsite well, so there is no transmission or blade angle apparatus to complicate things. It’s the parts you’d expect, a rotor and a stator, one with permanent magnets and the other with coils of wire.

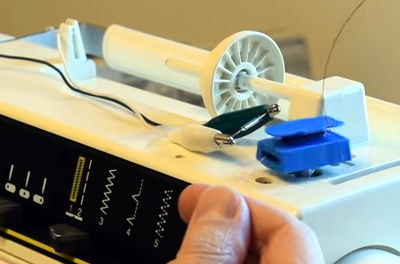
The fun of this project is copying the components found in the commercial hardware and varying the windings and coil count to see how it affects performance. If you have ever wound magnet wire around a nail to make an electromagnet, you know it is tedious work so check out their 3D printed coil holder with an embedded magnet to trigger a winding count and a socket to fit on a sewing machine bobbin winder. If you are going to make a bunch of coils, this is going to save headaches and wrist tendons.
They use an iterative process to demonstrate the effect of multiple coils on a generator. The first test run uses just three coils but doesn’t generate much power at all, even when spun by an electric drill. Six windings do better, but a dozen finally does the trick, even when turning the generator by hand. We don’t know about their use of cheap silicone diodes though, that seems like unintentional hobbling, but we digress.

Making turbine blades doesn’t have to be a sore chore either, and PVC may be the ticket there, you may also consider the vertical axis wind turbine which is safer at patio level. Now, you folks building generators, remember to tip us off!

Continue reading “Spin Me Right Round, Baby: Generator Building Experiments For Mere Mortals”

School’s In Session With Arduboy Curriculum

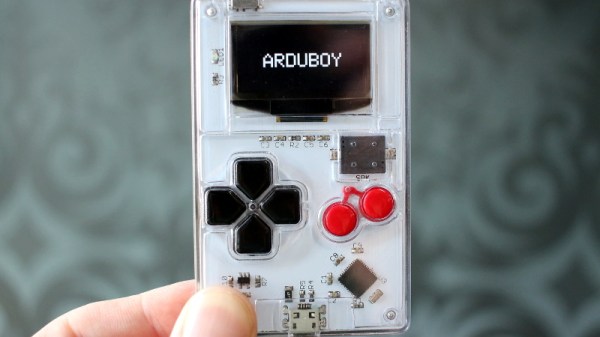
It’s hard not to be impressed by the Arduboy. In just a few short years, [Kevin Bates] went from proof of concept to a successful commercial product without compromising on his original open source goals. Today, anyone can develop a game for the Arduboy and have it distributed to owners all over the world for free. If you’ve ever dreamt of being a game developer, the Arduboy community is for you.

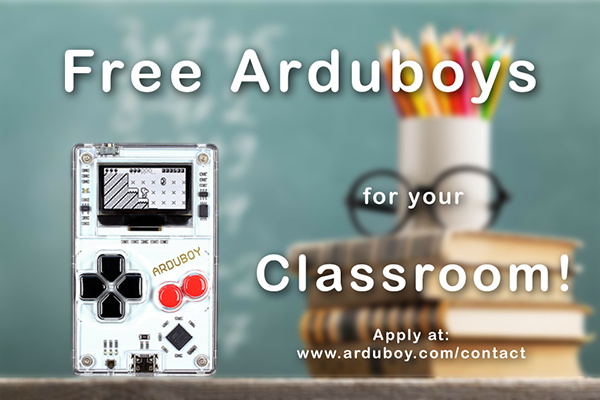
Realizing the low-cost hardware and open source software of the Arduboy makes it an excellent way to learn programming, [Kevin] is now trying to turn his creation into a legitimate teaching tool. He’s kicking off this new chapter in the Arduboy’s life with a generous offer: giving out free hardware to educators all over the world. Anyone who wants to be considered for the program just needs to write-up a few paragraphs on how they’d utilize the handheld game system in their class.

[Kevin] already knows the Arduboy has been used to teach programming, but those have all been one-off endeavours. They relied on a teacher that was passionate enough about the Arduboy to put in their own time and effort to create a lesson plan around it. So one of the main goals right now is getting an official curriculum put together so educators won’t have to start from scratch. The community has already developed 16 free lessons, but they’re looking for help in creating more and translating them into other languages.

While the details are still up in the air, [Kevin] also plans to travel to schools personally and help them get their Arduboy classes off the ground. He’s especially interested in developing countries and other areas that are disadvantaged educationally. Believing that the Arduboy is as much a way to teach effective leadership and teambuilding as it is programming, he thinks this program can truly make a difference.

Since [Kevin] first Rickrolled us with his prototype in 2014, we’ve seen the Arduboy project spread like wildfire through the hacker community. From figuring out how to play its games on other gadgets to developing an expansion cartridge for the real thing, the Arduboy has already done its fair share of inspiring. Here’s hoping it has just as much of an impact on the next generation of hackers once they get their hands on it.

Watch The Low-Cost Mechatronics Lab Dispense Candy, Sort Cups

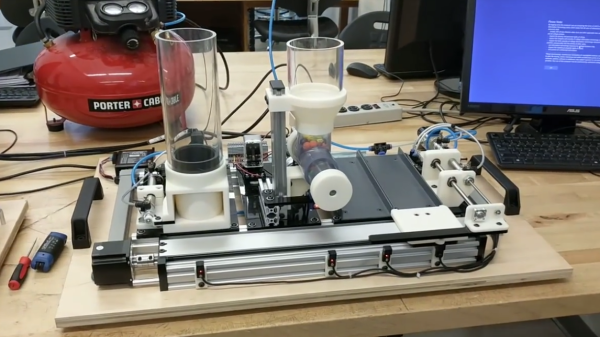
A lot can be done with simple motors and linear motion when they are mated to the right mechanical design and control systems. Teaching these principles is the goal behind the LCMT (Low Cost Mechatronics Trainer) which is intended primarily as an educational tool. The LCMT takes a “learn by doing” approach to teach a variety of principles by creating a system that takes a cup from a hopper, fills it with candy from a dispenser, then sorts the cups based on color, all done by using the proper combinations of relatively simple systems.

The Low Cost Mechatronics Trainer can be built for under $1,000 and is the wonderful work of a team from the Anne Arundel Community College in Maryland, USA. The LCMT is clearly no one-off project; there are complete CAD files and build documentation on the site, as well as a complete lab guide for educators.

A demo video of the assembled system is embedded below, with a walkthrough done by [Tim Callinan]. It’s worth a watch to see how cleanly designed the system is, and the visual learners among you may learn a thing or two just by watching the system go through its motions.

Continue reading “Watch The Low-Cost Mechatronics Lab Dispense Candy, Sort Cups”

Laser Cut Cardboard Robot Construction Kit Eases Learning And Play

It has never been easier to put a microcontroller and other electronics into a simple project, and that has tremendous learning potential. But when it comes to mechanical build elements like enclosures, frames, and connectors, things haven’t quite kept the same pace. It’s easier to source economical servos, motors, and microcontroller boards than it is to arrange for other robot parts that allow for cheap and accessible customization and experimentation.

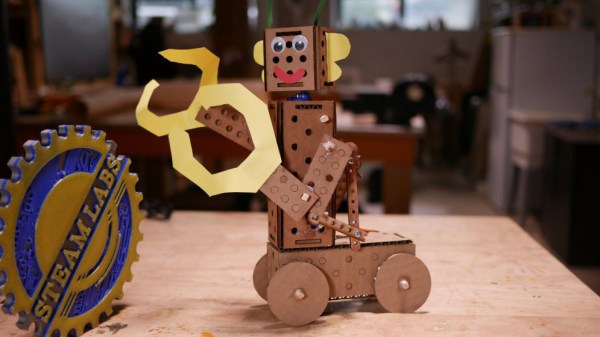
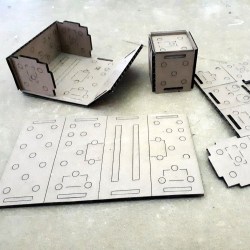
That’s where [Andy Forest] comes in with the Laser Cut Cardboard Robot Construction Kit, which started at STEAMLabs, a non-profit community makerspace in Toronto. The design makes modular frames, enclosures, and basic hardware out of laser-cut corrugated cardboard. It’s an economical and effective method of creating the mechanical elements needed for creating robots and animatronics while still allowing easy customizing. The sheets have punch-out sections for plastic straws, chopstick axles, SG90 servo motors, and of course, anything that’s missing can be easily added with hot glue or cut out with a knife. In addition to the designs being open sourced, there is also an activity guide for educators that gives visual examples of different ways to use everything.

Cardboard makes a great prototyping material, but what makes the whole project sing is the way the designs allow for easy modification and play while being easy to source and produce.

Strike A Chord With This LED Ukulele

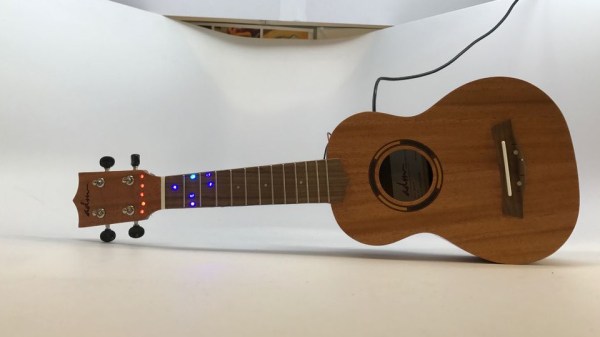
You may laugh off the ukulele as a toy or joke instrument, and admittedly, their starting price tag and the quality that usually comes with such a price tag doesn’t help much to get a different opinion on that. But it also makes it the perfect instrument for your next project. After all, they’re easy to handle, portable, and cheap enough to use a drill and other tools on them without too much regret. Plus, a little knowledge to play can get you far, and [Elaine] can teach you the essential, “all the pop songs use it”, four chords with her Arduino powered LED Ukulele.

As first step, [Elaine] drilled holes in her ukulele’s fingerboard to place some LEDs at all the positions required to play the four chords C, G, Am, and F. Connected to an Arduino attached to the ukulele’s back, each chord will light up its associated LEDs to indicate the finger positions required to play the chord itself. Taking the teaching part a step further, her next step is to extend each LED with a second, light sensing one, and read back if the fingers are placed at the correct position.

[Elaine] has already plans to turn the ukulele into an interactive game next. And if four chords are eventually not enough for you anymore, have a look at another LED based project teaching to play any major, minor and major seventh chord on the ukulele.

Kniwwelino Is An ESP8266 Micro:Bit

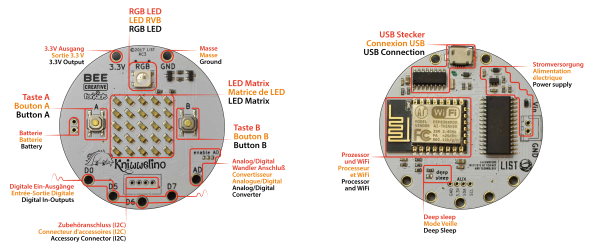
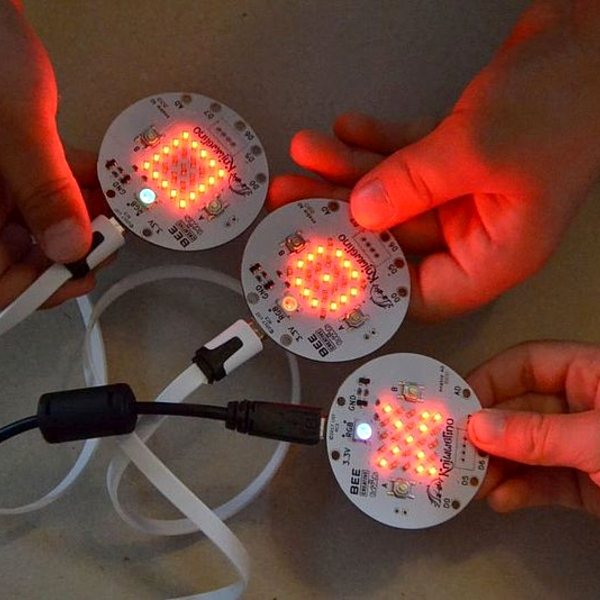
Kniwwelino is the latest in a line of micro:bit-inspired projects that we’ve seen, but this one comes with a twist: it uses an ESP8266 and WiFi at the core instead of the nR51 ARM/BTLE chip. That means that students can connect via laptop, cellphone, or anything else that can get onto a network.

That’s not the only tradeoff, though. In order to get the price down, the Kniwwelino drops the accelerometer/magnetometer of the micro:bit for a programmable RGB LED. With fewer pins to break out, the Kniwwelino is able to ditch the love-it-or-hate-it card-edge connector of the micro:bit as well. In fact, with all these changes, it’s hard to call this a micro:bit clone at all — it’s more like a super-blinky ESP8266 development kit.

So what have they got left in common? The iconic 5×5 LED matrix in the center, and a Blockly visual programming dialect dedicated to the device. Based on the ESP8266, the Kniwwelino naturally also has an Arduino dialect that students can “graduate” to when they’re tired of moving around colored blobs, and of course you could flash the chip with anything else that runs on an ESP8266.

We don’t have one in our hands, but we like the idea. An RGB LED is a lot of fun on Day One, and the fact that the Kniwwelino fits so neatly into existing bodies of code makes the transition from novice to intermediate programmer a lot easier. These things are personal preference, but WiFi beats Bluetooth LE in our book, for sheer ubiquity and interoperability. Finally, the Kniwwelino comes in at about half the manufacturing cost of a micro:bit, which makes it viable in schools without large manufacturer subsidies. They’re estimating $5 per unit. (Retail is higher.) On the other hand, the Kniwwelino is going to use more juice than its ARM-based competitor, and doesn’t have an accelerometer.

Kniwwelino is apparently derived from a luxembourgish word “kniwweln” that apparently means to craft something. The German Calliope Mini is named after Zeus’ daughter, the programmer’s muse. We’re stoked to see so many cute dev boards getting into the hands of students, no matter what you call them.