When you move from one-off builds to production scale, perhaps to meet that Kickstarter commitment or to keep your Tindie store stocked, you’re going to need to tool up. Jobs like building wiring harnesses can be tedious and time-consuming, so outsourcing them to this robot wire cutter might be a good idea.
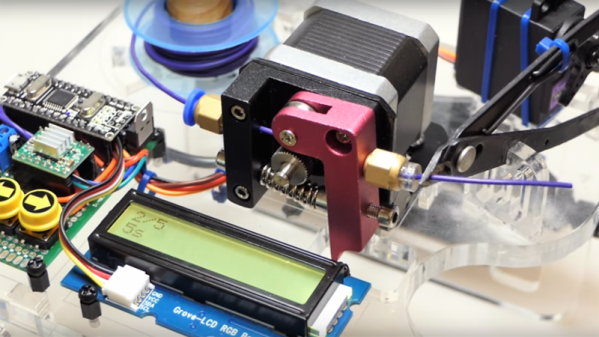
The video below tells the whole tale of this build, which despite the fact that [Maclsk] seems to have put it together quickly from scrap bin parts still looks pretty professional. The business end of the machine is a 3D printer extruder, minus the hot end, of course. A Nano controls the extruder’s stepper to shoot out the right length of wire, as well as the servo that squeezes the snippers. An LCD display and some pushbuttons provide the UI that rounds out the build. Tell it how long and how many, and you’ll be ready to build. We can see how this might be upgraded to strip the wires as well, although getting both ends stripped might be tricky.
Might this component tape-cutting robot from a few weeks back have inspired [Maclsk]’s build? Perhaps, but in any case, both are fun to watch.
Continue reading “Automate Wire Prep With A Robot Wire Cutter”
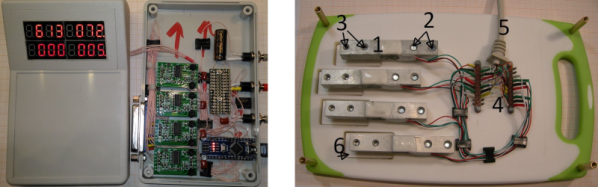
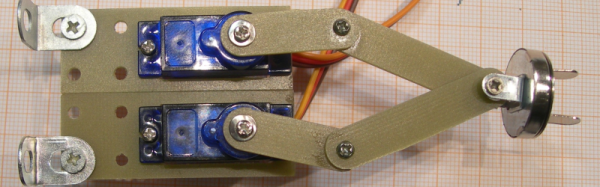
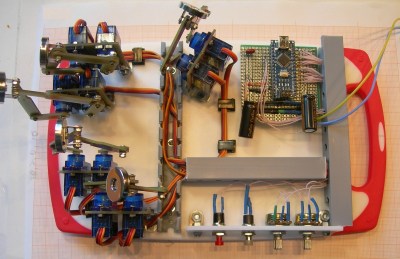 He’s using ten hobby micro servos connected to an Arduino Nano, all mounted on a kitchen chopping board, with a few other bits thrown in to round out the build. There’s one pair of servos for each finger. A five bar linkage converts the servo rotations to two-dimensional motion. The end of the linkage has a swiveling metallic disk. Patient fingers are attached to these discs via magnetic metal pads that are attached to the end of the fingers using adhesive plaster tape. Two push buttons cycle through a large number of exercise modes and two potentiometer’s help adjust the speed and smoothness (the number of points calculated for the desired motion). Two 7-segment LED display modules connected to the Arduino provides a visual interface showing program modes, speed, number of cycles and other relevant information. Replicating the project ought to be very straightforward since the device uses off-the-shelf parts which are easy to put together using the detailed build instructions, photos and code posted on [Sergei]’s project page. Check out the videos below to see the rehab helper in action.