Unlike biological systems, which can use muscles, robots that try to imitate them don’t have particularly fast, powerful, compact linear actuators available. This puts walking robots at a particular disadvantage, since they can’t spread their actuators along a limb and have to place them right at the joint. [Food for Robots] took on the challenge of building such a joint-mounted actuator, and shared the results in a recent video.
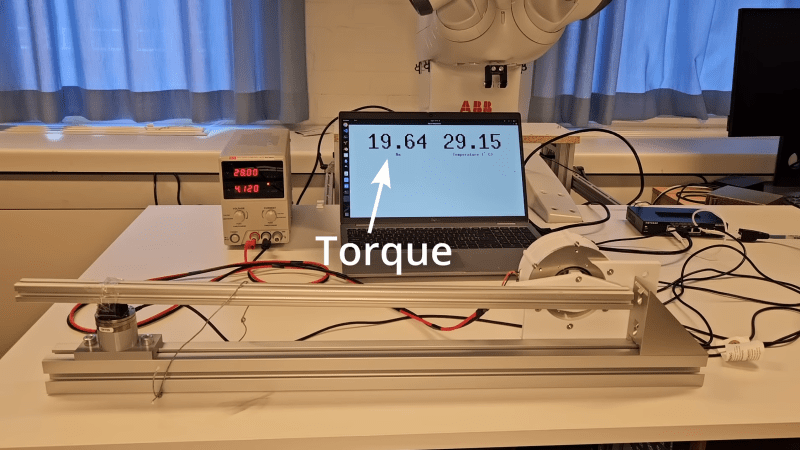
[Food for Robots] is building a walking robot, so he needed a compact, lightweight, and backdrivable actuator capable of producing 20 Newton-meters of torque. He’d previously built a largely 3D-printed actuator, but when he tried to exceed 10 Nm of torque with it, various parts kept breaking. He therefore machined the second iteration out of aluminum; since it didn’t need to be 3D printed, he switched from a Capstan drive to a planetary gearbox. The gearbox sits in the center of the actuator, inside the stator, and uses several stacked layers of gears to increase strength within the limits of a small CNC.
Gears are usually the biggest contributors to backlash in a mechanical system, but they’re far from the only culprits. Ball bearings are a less obvious source of imprecision, since any gaps between the balls and the races can lead to axial wobble. Precision mechanisms can eliminate this by pairing two ball bearings, holding the outer races fixed, and applying a preload force to the inner traces. [Chronova Engineering], however, has a different solution, for which he split a ball bearing in half.
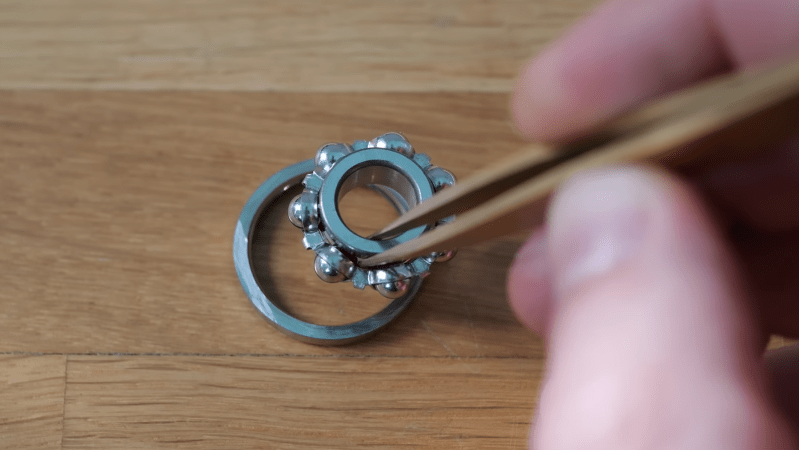
Besides taking up more room, thermal expansion also means that it’s difficult to apply a consistent preload force between two ball bearings. Instead, to make a self-contained preloaded bearing, [Chronova Engineering] first disassembled a single ball bearing. The most difficult part of this is taking apart the ball cage; the two parts of this are normally riveted together, but he managed to find a crimped cage and pry it apart. After taking the bearing completely apart, he cut the outer trace in half along the circumference, then reassembled the bearing. The split outer trace makes it possible to press the two halves together, preloading it and removing slop.
To see how well this worked, [Chronova Engineering] replaced the the ball bearing supporting one end of the feed screw for a milling machine with this new bearing. Before the replacement, it had a backlash of 0.1 to 0.2 millimeters; after the modification, it dropped to 30 to 40 microns. This kind of bearing is already known in the machining world – four-point-contact bearings use a very similar principle – but they don’t seem to be well known.
For more about these common yet remarkable rotary mechanisms, check out our article on bearings. If, on the other hard, precision isn’t a priority, you can always 3D print ball bearings.
Lightning, despite being a common and readily-detected phenomenon, is nevertheless difficult to study. One reason is the difficulty of predicting when and where lightning will strike; tall structures do attract more lightning strikes, but it’s hard to move them into a storm’s path. Instead, researchers often use small rockets carrying a fine wire to trigger strikes, an approach [Electron Impressions] recently replicated (more details).
The science of this is less than straightforward: even in calm weather, there’s a surprisingly strong atmospheric electric field, about 100 volts per meter off the ground. During a thunderstorm, though, this can build up to kilovolts per meter, and may reverse polarity. When an updraft carries supercooled water, ice crystals, and graupel (ice particles formed by supercooled water freezing on a snowflake) upwards, the heavier graupel falls relative to the other components. As it collides with ice crystals, it builds up a negative charge and the crystals accumulate a positive charge; across a storm, this leads to positive charge building up near the top of clouds and negative charge near the bottom. Lightning equalizes this imbalance. In the relatively few cloud-to-ground strikes, a dielectric breakdown begins from both sides of the stroke, with leaders rising from the ground and descending from the cloud. The wire trailed by a rocket creates an artificial leader, ideally triggering a controlled strike.
To consistently get a strike, the rocket needs to be launched under a strongly-negatively-charged region of the cloud. An electric field mill measures the local field strength; these are usually quite expensive, but [Electron Impressions] managed to build his own. The rocket itself was 3D printed and designed to fly well under stormy conditions. It carried a strand of thin copper wire wound onto a plastic spool meant to minimize friction and prevent broken wires. The rocket’s igniter was waterproofed for storm conditions and remotely triggered using a walkie-talkie for safety.
After many attempts, [Electron Impressions] finally managed to trigger a strike and video the results. The first stroke created a plasma channel, along which several more strokes followed. This indicated that the cloud had probably been negatively charged, which was in agreement with the field mill’s measurements. The wind blew the plasma channel slightly to the side, where it caused a second rocket to explode on the ground. Both ignition systems were destroyed, and the remains of the rocket were never found. Sadly, the strike doesn’t seem to have formed a fulgurite, but it did fracture the ground as water flash-boiled.
For a more reusable solution, some researchers have also experimented with using drones to trigger lightning. There’s good reason for more study; the theory of lightning formation still has some major open questions.
[Jan] of [Roetz 4.0] has a unique approach to multi-material 3D printing: he’s designed an extruder which takes two different materials and extrudes one as a shell around the other. This opens up some interesting possibilities, such as a conductive filament surrounded by an insulating shell; [Jan], however, didn’t have an immediate use for the process, so he moved on to a related technique: extruding plastic tubes with a compressed-air core.
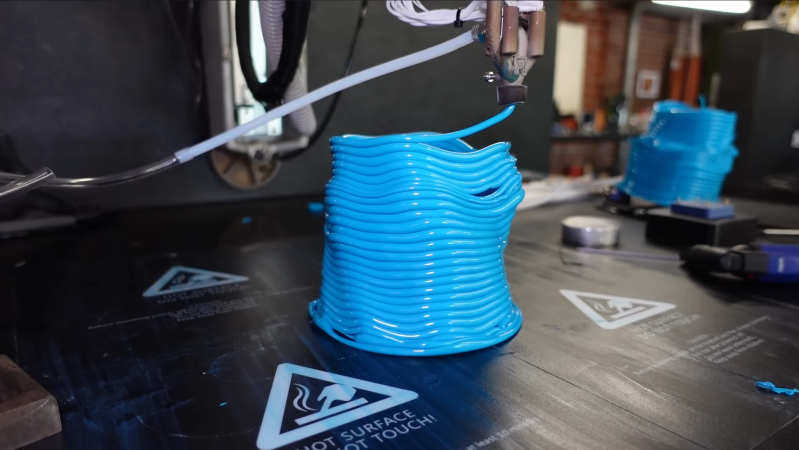
The extruder he used for this was a variation on the dual-material extruder; it takes in two strands of filament, melts them, and extrudes them as a shell around the outlet of a compressed-air line, which was controlled by a high-precision pressure regulator. During testing with PLA, it seemed capable of extruding airtight tubes of filament, though it had a tendency to blow bubbles and form tubes with inconsistent diameters. The low thermal conductivity of the stainless steel extruder also proved problematic; coupled with the cooling effect of the compressed air, filament sometimes solidified inside the extruder.
[Jan] found it almost impossible to get consistent results using only pressure-based control; as the layer of molten plastic around the air gets thinner, it provides less resistance to further ballooning, leading to continuous expansion until the bubble bursts. Controlling the volume of air extruded provided much more consistent results, and in a second video, he built a peristaltic pump to do just that. He also switched to using TPU filament, which greatly improved layer adhesion. When inflated with compressed air, the finished TPU structures expanded slightly, though there were still air leaks. The results look promising, and TU Darmstadt has already carried out some research in this area.
If you’ve ever thought about the nomenclature of electrical components, potentiometer stands out as a strange name, etymologically suggesting something like a voltmeter. In fact, the component took its name from a voltage-measuring instrument also named the potentiometer. [Alnwlsn] recently took a look at one such device, which was integrated into a thermometer, and the Weston cell used to calibrate it.
The potentiometer (instrument) has a galvanometer at its heart. One side of the galvanometer is connected to the center lead of a potentiometer (component) which spans a voltage source; the other side is connected to a reference voltage. The potentiometer can be adjusted until no current flows through the galvanometer, at which point both sides match the reference voltage. The reference voltage source can then be replaced with some other source, which can then be measured relative to the reference by adjusting the potentiometer until both the voltages match. The reference voltage source is a Weston cell, which uses two mercury electrodes, one amalgamated with cadmium, to produce a stable 1.018 volt reference; despite being 74 years old, this particular cell still measured at 1.017 volts.
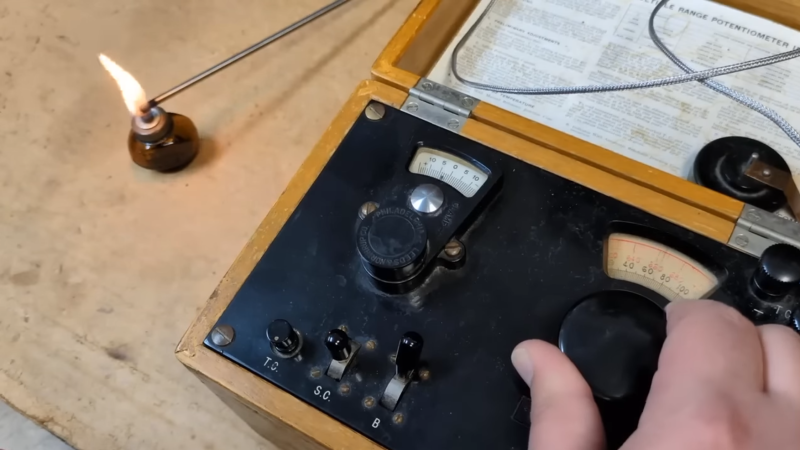
In this case, the potentiometer was made to measure the voltage produced by a thermocouple. After calibrating the potentiometer and connecting an iron-constantan thermocouple, [Alnwlsn] tested it with ice and boiling water, and in each case it proved accurate. In a more extreme test, it captured the temperature difference between the base and the tip of an alcohol flame.
As strong and light as carbon fiber-epoxy composites are, the same can’t always be said of carbon-fiber reinforced 3D printer filaments. Of those that do improve over stock filament, the best performance comes from long, continuous strands, but the printers that can embed these are quite expensive. [MagicLAG], looking for a cheaper method, made something even stronger: prints reinforced with subsurface carbon-fiber cloth.
They tried a few other methods first, including pausing the print and manually embedding carbon fiber strands, ironing strands into the finished part, and ironing carbon fiber cloth into the bottom layer. For the main method, though, he printed the test part in three pieces: a core part, and two outer shell layers. Between the core and the shell is a small gap, into which carbon-fiber cloth can be epoxied. Under good conditions (not using quick-setting epoxy), this mostly preserves the outer surface and dimensional accuracy.
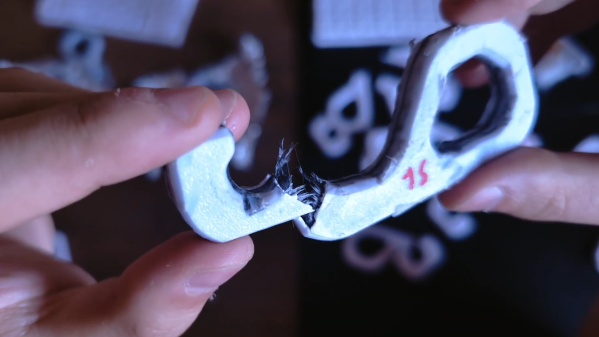
To test the various strengthening methods, [MagicLAG] printed hooks and tensioned them on a load cell until failure. None of the methods using single-stranded fiber showed any improvement; the fiber simply bent and let the surrounding plastic break. As a control for the epidermal cloth parts, they printed shells and cores and epoxied them together. These controls performed better than the standard parts, but not nearly as well as the carbon-fiber cloth composites. With only a few layers of cloth, these more than tripled the yield strength of the basic hook.
If you’d rather use a carbon-fiber filament, the type of plastic matters; carbon fiber makes PLA, at least, weaker. Regardless of form, some caution is called for whenever handling carbon fiber, since it seems to show some asbestos-like effects.
Optical cavities – two mirrors arranged to reflect light multiple times between them – form the basis of lasers and certain optical filters. Since any angle between the two mirrors results in light being scattered away, parallel alignment is essential, yet difficult to maintain. Nevertheless, [Timothy Giles] managed to 3D-print and align such an optical cavity, and used it to detect minute shifts in space and wavelength.
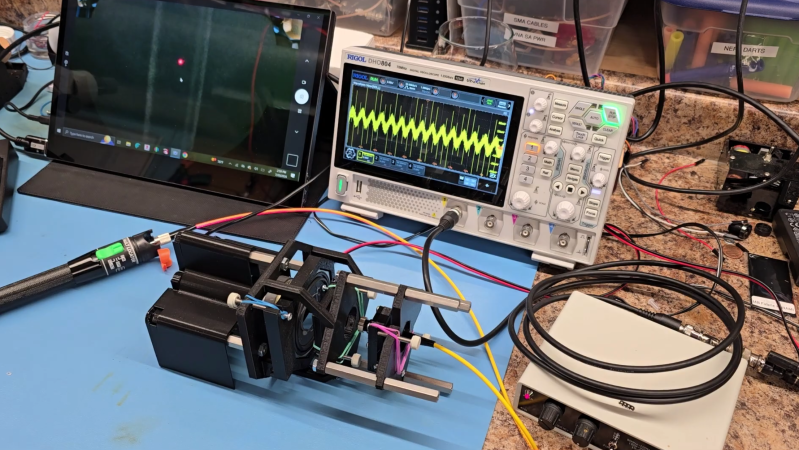
The cavity has two semi-transparent mirrors facing towards each other. One mirror is held in a 3D-printed mount, and the other is attached to the diaphragm of a speaker with a hole drilled through the center. The hole avoids the speaker coil, and allows light exiting the optical cavity through the semi-transparent mirror to appear on a paper target, which is monitored by a webcam. On the other side of the optical cavity, a laser diode coupled to a single-mode fiber shines in through the other mirror. Alignment is challenging, but the webcam makes it easier; as the mirrors tilt relative to each other, the pattern seen on the paper target changes, providing feedback for more precise adjustment.
Light reflected within the cavity can interfere constructively or destructively with incoming light, changing the brightness of the emitted beam. [Tim] used the speaker as a linear actuator to vary the cavity’s length, which, by counting the peaks in brightness, allowed him to measure the diaphragm’s displacement. This also demonstrated a laser diode’s wavelength instability: when the cavity was set to a constant length and the laser started up, the output brightness would cycle a few times. As the diode was warming up, its output wavelength was shifting, creating the same changing interference pattern.
To get a Gaussian beam distribution, [Tim] used a fiber-coupled laser; if you’d like to build one, we’ve seen a coupling mechanism built before. Most lasers are built around an internal optical cavity, but some instead use an external cavity.